
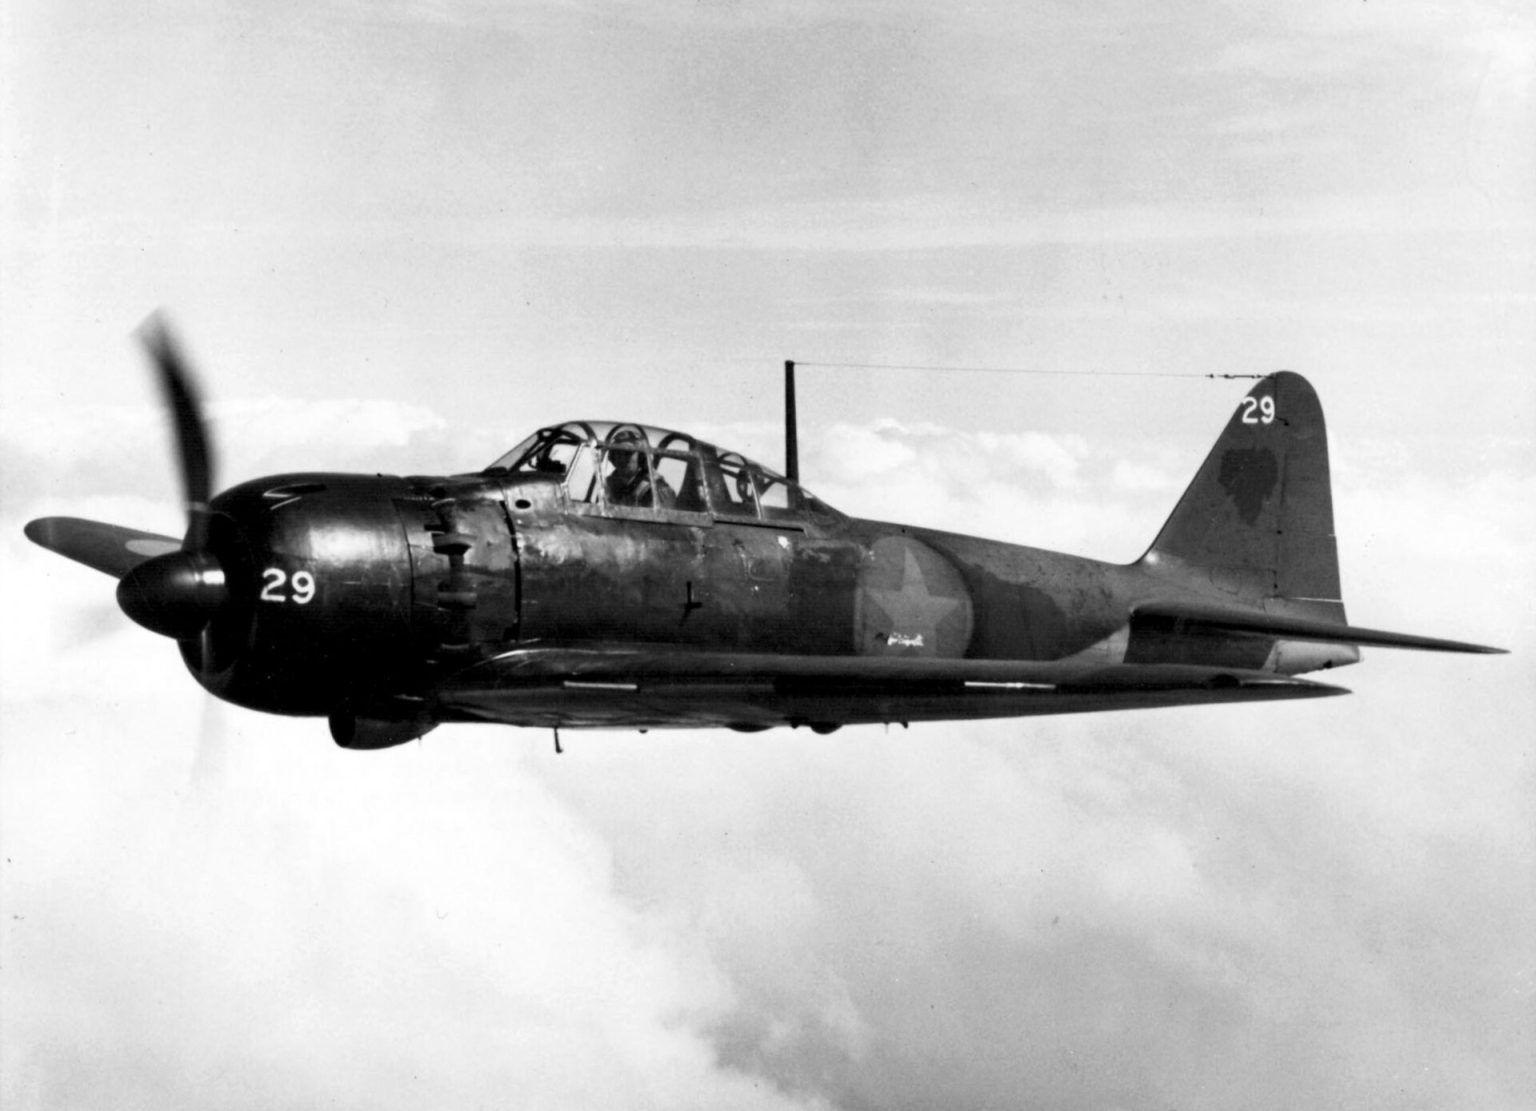
Mitsubishi A6M
“Zero”
The Imperial Japanese Navy’s carrier fighter — light, long-ranged and astonishingly agile. It dominated the skies over the Pacific in 1941–42, before Allied tactics and newer fighters exposed the price of its featherweight design.
The fighter that ruled the early Pacific
In 1937 the Imperial Japanese Navy issued a demanding specification — the 12-shi requirement — for a new carrier fighter that had to combine long range, heavy armament, high speed and exceptional manoeuvrability all at once. At Mitsubishi, designer Jiro Horikoshi concluded the only way to meet such contradictory demands was to make the aircraft as light as humanly possible. The result, first flown on 1 April 1939 and adopted in 1940 as the Type 0 Carrier Fighter, became known to the world as the Zero.
When it appeared over China and then swept across the Pacific in December 1941, the Zero stunned its opponents. Its range let it escort strikes far beyond what Allied planners believed possible; its low wing loading gave it a turning circle few fighters could match. In the opening months of the Pacific war — over Pearl Harbor, the Philippines and the Dutch East Indies — it out-ranged and out-turned nearly everything sent against it, and Allied pilots were soon warned never to dogfight a Zero.
That dominance rested on a gamble. To save weight the Zero carried no armour plate and no self-sealing fuel tanks, so it burned readily when hit, and its controls grew heavy and unresponsive at high speed. Once the Allies understood these weaknesses — helped by a nearly intact example, the Akutan Zero, recovered in 1942 — and fielded faster, sturdier fighters such as the F6F Hellcat and F4U Corsair, the Zero’s edge collapsed. By 1944 it was outclassed, and late in the war many were expended in kamikaze attacks. Around 10,939 were built, more than any other Japanese aircraft.
01The Zero’s featherweight gamble: range and agility bought by sacrificing protection
Jiro Horikoshi’s design met the Navy’s contradictory demands through relentless weight-saving. The Zero used a new lightweight aluminium alloy (Sumitomo’s extra-super-duralumin), a slender structure and the smallest practical engine — and it deleted the armour and self-sealing fuel tanks that Western fighters increasingly carried. The pay-off was extraordinary range and a turning performance that dazzled opponents in 1941–42.
The price was survivability. Without armour behind the pilot or protected tanks, a Zero that took hits could burn or break up where a Wildcat, Hellcat or Corsair would absorb the damage and fly home. As the war turned, that trade — agility and reach in exchange for protection — increasingly favoured the Allies, whose pilots learned to fight on their own terms rather than the Zero’s.
What makes it special
A fighter built around lightness
Every part of the Zero was shaped by the drive to save weight. It used a new lightweight aluminium alloy, a thin monocoque structure, and — most controversially — no armour and no self-sealing fuel tanks. The result was a very low wing loading that gave the Zero a tight turn and a light, responsive feel at combat speeds, at the cost of durability under fire.
Range that redrew the map
Powered by a compact, fuel-efficient Nakajima Sakae radial and carrying a droppable belly tank, the Zero could reach roughly 3,000 km — a figure that let it escort bombers on missions Allied intelligence had assumed were impossible. That reach was as important to Japan’s early victories as the fighter’s agility.
Superb at low speed, stiff at high speed
The Zero’s low wing loading made it a peerless turner at moderate speeds, but the same light structure meant its ailerons stiffened sharply as speed rose, and it could not follow heavier fighters in a high-speed dive. Allied pilots learned to exploit exactly this — using speed, altitude and team tactics rather than turning with it.
02The Akutan Zero: how a crash-landed fighter in the Aleutians handed the Allies its secrets
On 4 June 1942, during the Aleutians campaign, a Zero flown by petty officer Tadayoshi Koga was hit by ground fire and force-landed on Akutan Island. The boggy ground flipped the aircraft and killed the pilot, but left the airframe largely intact. Recovered weeks later by a US Navy party, it was shipped to San Diego, repaired and test-flown — the first flyable Zero the Allies had studied in detail.
The evaluation confirmed what combat had begun to show: the Zero was a superb low-speed turner but stiffened badly at high speed, could not dive with heavier fighters, and had no protection for pilot or fuel. Those findings helped validate the dive-and-zoom and team tactics — such as the Thach Weave — that Allied pilots used to blunt the Zero’s advantages in the following years.
03The Zero’s armament: two cannon, two machine guns, and a magazine problem
The A6M2 carried a mixed battery: two 20 mm Type 99 cannon in the wings and two 7.7 mm Type 97 machine guns in the cowling. The cannon hit hard, but early versions had a low muzzle velocity and only about 60 rounds per gun, which made them difficult to aim at range and quick to run dry. The rifle-calibre cowl guns rarely had the punch to bring down sturdier Allied aircraft on their own. Later variants improved the cannon’s velocity and ammunition supply.
Full specifications
Figures are for the A6M2 Model 21, the main early-war variant; later marks such as the A6M5 differed in engine, speed and armament.
Baseline: A6M2 Model 21 — the folding-wingtip carrier fighter that equipped the Pearl Harbor strike force in December 1941 and the Japanese carrier air groups through Coral Sea and Midway. Figures for the A6M3 Model 32 and the most-produced A6M5 Model 52 are given in grey where they differ. Japanese wartime figures were recorded in metric and varied between factories, test centres and captured-aircraft reports; where sources disagree the commonly cited Mitsubishi/Koku Hombu value is used.
Dimensions & weights
- Crew
- 1 pilot — single-seat carrier fighter
- Length
- 9.06 m (29 ft 9 in) — A6M2 Model 21; 9.12 m (29 ft 11 in) on the A6M5
- Wingspan
- 12.00 m (39 ft 4 in) — folding tips reduced it to 11.00 m (36 ft 1 in) for carrier lifts; A6M3 Model 32 clipped to 11.00 m (36 ft 1 in)
- Height
- 3.05 m (10 ft 0 in) — tail down, propeller vertical
- Wing area
- 22.44 m² (241.5 sq ft) — A6M3 Model 32 21.53 m² (231.8 sq ft)
- Empty weight
- 1,680 kg (3,704 lb) — A6M5 about 1,876 kg (4,136 lb)
- Loaded weight
- 2,410 kg (5,313 lb) — normal loaded, full internal fuel and guns
- Max takeoff weight
- 2,796 kg (6,164 lb) — overload with drop tank and bombs
- Internal fuel
- ~518 l (~137 US gal / 114 imp gal) — fuselage and wing tanks, none self-sealing
Performance
- Max speed
- 533 km/h (331 mph / 288 kn) at 4,550 m (14,930 ft) — A6M5 565 km/h (351 mph) at 6,000 m (19,700 ft)
- Cruise speed
- 333 km/h (207 mph / 180 kn) — economical cruise; long-range cruise was flown far slower, at very lean mixture
- Rate of climb
- 15.7 m/s (3,090 ft/min) — 6,000 m (19,700 ft) in 7 min 27 s
- Service ceiling
- 10,000 m (32,810 ft) — A6M5 about 11,740 m (38,520 ft)
- Range
- ~1,870 km (~1,160 mi / ~1,010 nmi) on internal fuel — the Zero's defining strategic quality. Land-based Zeros escorted bombers from Taiwan to Luzon and from Rabaul to Guadalcanal, distances Allied planners had assumed no single-engined fighter could cover, which repeatedly put fighter cover where it was thought impossible.
- Ferry range with drop tank
- ~3,350 km (~2,080 mi / ~1,810 nmi) with the 330 l (87 US gal) centreline tank, at long-range lean cruise — combat radius in practice was far shorter, roughly ~900 km (~560 mi) with a modest allowance for combat
- Takeoff run
- 150 m (490 ft) — normal loaded, no wind; shorter still into a carrier's wind over deck
- Landing run
- 300 m (985 ft) — typical land figure, no wind and no arrestor gear
- Wing loading
- 107 kg/m² (22.0 lb/sq ft) at normal loaded weight — exceptionally low for a 1940 fighter, against roughly 150–190 kg/m² for contemporary Allied types. This, more than any other single number, explains the Zero's turn radius and low-speed handling.
Propulsion & systems
- Engine
- 1 × Nakajima NK1C Sakae 12 14-cylinder twin-row air-cooled radial, single-stage two-speed supercharger — A6M3 and A6M5 used the Sakae 21; the A6M8 was to use the Mitsubishi Kinsei 62
- Power
- 709 kW (950 hp) takeoff rating of the Sakae 12; 700 kW (940 hp) at 4,200 m (13,780 ft). Sakae 21 in the A6M5: 843 kW (1,130 hp). Engine development lagged badly — Allied fighters roughly doubled installed power over the same period.
- Propeller
- 3-blade Sumitomo constant-speed (Hamilton Standard licence), 2.90 m (9 ft 6 in) diameter
- Armament
- 2 × 20 mm Type 99 cannon + 2 × 7.7 mm Type 97 cannon in the wings with ~60 rounds per gun on early marks, machine guns in the cowling with 500 rounds per gun; up to 2 × 60 kg (132 lb) bombs
- Structure & protection
- All-metal, extra super duralumin main spar; no armour plate, no self-sealing tanks This is the central trade of the design. Jiro Horikoshi's team met an impossible specification — range, manoeuvrability, speed and armament together — by removing weight everywhere, including the pilot's back armour, the armoured windscreen and any tank protection. The result flew beautifully and burned readily: a short burst of 0.50 in fire into a wing tank could end the aircraft and the pilot. Japan could not replace trained naval aviators at the rate this cost them, and by 1943 that, not the airframe, was the decisive shortage.
- First flight
- 1 April 1939 A6M1 prototype, Mitsubishi, flown by Katsuzo Shima
- Service entry
- 1940 A6M2 Model 11 in combat over China from summer 1940; Model 21 aboard the carriers from 1941
- Built
- ~10,900 all marks Mitsubishi ~3,900 and Nakajima ~6,600 under licence, plus 327 A6M2-N floatplanes and about 500 two-seat trainers depending on how variants are counted — the most-produced Japanese aircraft of the war
- Unit cost
- ~60,000–70,000 yen (1941) Hedged: Japanese wartime unit costs are inconsistently reported, were quoted in a controlled war economy, and do not convert meaningfully into modern currency. Treat the figure as indicative only.
- Cost per flight hour
- ~USD 8,000–12,000 Modern warbird estimate, not a wartime figure: fuel, insurance, hangarage, and reserves against a scheduled radial overhaul. Only a handful of Zeros are airworthy anywhere in the world, and most flying examples are powered by an American Pratt & Whitney R-1830 rather than an original Nakajima Sakae, since serviceable Sakae engines and spares effectively no longer exist. Airframes with an original Sakae command a substantial premium and fly less.
04The Zero’s cost: why no meaningful price exists
The A6M was a wartime product of the Imperial Japanese state, built by Mitsubishi and Nakajima under military direction and never sold on an open market. As a result there is no reliable flyaway unit price or cost-per-flight-hour figure for the type in the public record, and comparisons in modern dollars are not meaningful. What is well documented is the scale: with about 10,939 aircraft completed, the Zero was produced in greater numbers than any other Japanese aircraft of the war.
Armament & payload
A6M Zero: two cannon, sixty rounds, and no armour behind the pilot
The Zero's armament was heavier than most 1940 fighters could claim and its reach was longer than any of them, but both were bought with the same currency: weight left out of the aeroplane. Cannon ammunition was scarce, the guns themselves were slow-firing and low-velocity, and behind the pilot there was nothing at all.
Cannon
- 2 × 20 mm Type 99 Mark 1, one in each wing outboard of the undercarriage, a licence development of the Oerlikon FF.
- Roughly 60 rounds per gun in a drum magazine on the A6M2 — about seven seconds of fire, and a real tactical constraint rather than a footnote. Pilots were trained to open with the machine guns and save the cannon for a killing burst.
- Low muzzle velocity (around 600 m/s) and a modest rate of fire meant a pronounced shell drop and a trajectory that did not match the 7.7 mm guns, so the two weapons converged properly only at one range.
- Later marks improved this: belt feed on the Type 99 Mark 2 raised capacity to 100 and then 125 rounds per gun, with higher velocity, on A6M3 and A6M5 subtypes.
Machine guns
- 2 × 7.7 mm Type 97 in the upper cowling, synchronised through the propeller, 500 rounds per gun.
- Derived from the Vickers gun; accurate, reliable and effectively unlimited in ammunition compared with the cannon, but far too light to bring down an armoured Allied fighter or a four-engined bomber.
- Aimed through a Type 98 reflector sight; a few early aircraft retained a telescopic sight, disliked by most pilots.
- The A6M5c and later fits substituted or added 13.2 mm Type 3 guns as the 7.7 mm was recognised as obsolete.
Bombs
- 2 × 60 kg (132 lb) bombs on underwing racks — the standard offensive load, useful against soft targets and shipping upperworks, marginal against anything armoured.
- A single 250 kg (551 lb) bomb could be carried on the centreline in later fighter-bomber fits, at the cost of the drop tank and therefore of range.
- Small anti-bomber aerial bombs were also trialled against formations of heavy bombers, with negligible results.
- The Zero was never a serious strike aircraft; bombs were an expedient once its fighter role had been overtaken.
Drop tanks & range
- One 330 l (87 US gal) jettisonable centreline tank, carried as standard on escort work.
- With it, and with the extraordinarily lean cruise technique taught by Saburo Sakai and others — very low rpm, high manifold pressure, weak mixture — Zeros routinely flew missions of five to eight hours.
- This is what let 1st Air Fleet Zeros escort bombers from Taiwan to targets in the Philippines, and Tainan Air Group Zeros fly the ~1,000 km round trip from Rabaul to Guadalcanal, arriving with only minutes of combat fuel.
- The cost was pilot fatigue and a margin so thin that damaged aircraft, or a fight that ran long, simply did not come home.
Protection (or the lack of it)
- No armour plate behind or beneath the pilot, no armoured windscreen, and no self-sealing fuel tanks on the A6M2 — nor any fire suppression in the wing tanks.
- The omissions were deliberate, not an oversight: they were how the design met a specification that otherwise could not be met on 950 hp.
- The practical consequence was that hits which an F4F Wildcat or P-40 absorbed were frequently fatal to a Zero, and Allied pilots learned that a fleeting deflection burst was often enough.
- Late in the war partial fixes appeared — a pilot's armour plate and a CO2 fire-extinguishing system in the tanks on the A6M5b and A6M5c, and some self-sealing — but they were incomplete, added weight to an already underpowered airframe, and came far too late.
Late-war fits
- A6M5 Model 52: wing skinning thickened (roughly 0.7 mm to 1.2 mm) to raise the permitted dive speed to about 740 km/h, addressing a genuine weakness — the Zero had previously been outdived by everything it fought.
- Individual ejector exhaust stacks replaced the collector ring, recovering a useful amount of thrust and a few km/h.
- Heavier guns (13.2 mm, belt-fed cannon), rocket rails and partial protection followed on the A6M5b/c and A6M7, but each addition cost speed and climb the Sakae could no longer pay for.
- From October 1944 the Zero was pressed into the kamikaze role, most of the Special Attack sorties flying A6M airframes with a 250 kg bomb. It should be stated plainly: the type ended the war being used to kill its own pilots deliberately, because it could no longer win a fight any other way. It was effective enough at that to worry Allied commanders, and it consumed the last of Japan's aircrew.
Three typical Zero fits
- Fleet interception
- Combat air patrol over the carriers, A6M2 Model 21: full internal fuel, no drop tank, 2 × 20 mm with ~60 rounds per gun and 2 × 7.7 mm with 500 rounds per gun, no bombs. Lightest and best-climbing configuration; endurance limited to roughly two to three hours on station.
- Long-range escort with drop tank
- The mission that made the Zero's reputation, A6M2/A6M3: 330 l centreline drop tank, full guns, no bombs, flown at lean long-range cruise. Radius of roughly ~900 km with a short combat allowance; the tank was jettisoned on contact, after which the fight had to be brief and the navigation home exact.
- Late-war fighter-bomber
- A6M5/A6M7 from 1944: one 250 kg bomb on the centreline in place of the tank, or 2 × 60 kg underwing, with 13.2 mm guns and partial armour on later subtypes. Slower, heavier and no longer competitive as a fighter; this was also the standard Special Attack configuration.
All of the above is mark-dependent. Ammunition capacity, gun calibre, protection and permitted dive speed all changed substantially between the A6M2 of 1941 and the A6M5c of 1944, and individual units modified aircraft in the field. Figures quoted here follow the A6M2 Model 21 unless a later mark is named.
Variants
From the Model 11 to the A6M8 that never flew in anger
Eleven marks and roughly 10,900 airframes over six years, built by two companies — and, tellingly, no successor. The Zero was still Japan's standard carrier fighter in 1945 because its intended replacements never arrived in numbers.
- A6M1 prototype
- Two aircraft, Mitsubishi Zuisei 13 engine and two-blade propeller. First flight 1 April 1939; underpowered and quickly re-engined with the Nakajima Sakae.
- A6M2 Model 11
- First production version, Sakae 12, fixed wingtips, no carrier equipment. About 64 built; blooded over China from summer 1940, where it destroyed Chinese fighter opposition almost at will.
- A6M2 Model 21
- The classic Zero: folding 500 mm wingtips for carrier lifts, arrestor gear, 12.00 m span. Roughly 3,500 built by Mitsubishi and Nakajima. This is the aircraft of Pearl Harbor, Darwin, Coral Sea and Midway.
- A6M2-N floatplane ("Rufe")
- Nakajima conversion with a large central float and stabilising floats, 327 built. Intended for island operations without airfields; about 60 km/h slower and outclassed, but genuinely useful in the Aleutians and Solomons.
- A6M3 Model 32 (clipped wing)
- Sakae 21 with a two-speed supercharger and square-cut 11.00 m wings for roll rate and speed. About 343 built. The redesign cost fuel volume and range at exactly the moment the Solomons campaign demanded more of both; the Model 22 restored the round folding tips and the fuel.
- A6M5 (Model 52)
- Most-produced mark, roughly 6,000 airframes from 1943. Thicker wing skinning for a higher dive limit, individual exhaust stacks, later 13.2 mm guns, belt-fed cannon, some armour and tank protection on the 5b and 5c. Better in every respect and still not enough against the F6F and F4U.
- A6M7
- Model 62/63 fighter-bomber, structurally strengthened for a 250 kg centreline bomb and a dive delivery. Built from 1945 in modest numbers, and the mark most closely associated with Special Attack units.
- A6M8 (never in service)
- Mitsubishi Kinsei 62 of 1,164 kW (1,560 hp) at last giving the airframe the power it had always wanted. Two prototypes in 1945; mass production was ordered and never happened, and no A6M8 saw operational service.
- Nakajima licence production
- Nakajima built roughly 6,600 Zeros — more than Mitsubishi, the designer — from 1941 onward, alongside the A6M2-N. Two-seat A6M2-K and A6M5-K trainers added several hundred more.
The Zero's dominance in 1941–42 was real, and it is worth being precise about why. In the first six months of the Pacific war it outclassed the Brewster Buffalo, the P-39 and P-40, and the early Wildcat in the fight those aircraft were foolish enough to accept: a low-speed turning contest. It also arrived where it was not expected, which multiplied its effect. But that ascendancy rested at least as much on the calibre of pre-war Japanese naval aviators — among the most thoroughly trained pilots in the world, many with years of combat over China — and on Allied unfamiliarity with the aircraft, as on the airframe itself.
Both supports failed. The Allies stopped dogfighting it: Jimmy Thach's weave gave a pair of Wildcats a mutual defence a lone turning Zero could not solve, and the standing instruction became to fight in the vertical, dive away, and never follow a Zero into a turn. Energy tactics turned the Zero's low wing loading from an advantage into an irrelevance. Then the equipment changed — the F6F Hellcat and F4U Corsair brought roughly twice the power, heavy armament, armour and self-sealing tanks, and simply flew away from a Zero whenever the fight went badly. Against that, the Sakae's stalled development and the absence of protection were decisive, and Japan's irreplaceable pre-war aircrew were consumed in aircraft that did not protect them.
The Akutan Zero belongs in this account, carefully. An almost intact A6M2 flown by Petty Officer Tadayoshi Koga overturned on soft ground on Akutan Island in the Aleutians on 4 June 1942, killing the pilot; it was recovered in July, repaired, and test-flown in the United States from September 1942. The evaluation confirmed and quantified what combat reports had already suggested — poor performance in high-speed rolls to the right, a float-carburettor engine that cut under negative g, an inability to follow in a dive — and fed directly into Allied tactical instruction. It was genuinely valuable intelligence. It was not, however, the cause of the Zero's decline: the Thach Weave was devised before the aircraft was recovered, and the Hellcat was already designed. The Zero was overtaken by industrial capacity, engine development and pilot training, and the captured airframe only made the process faster and better informed.
Survivors: only a handful of Zeros are airworthy anywhere in the world, and most flying examples are powered by an American Pratt & Whitney R-1830 radial rather than an original Nakajima Sakae, because serviceable Sakae engines and spares no longer realistically exist. Beyond those, a small number of static restorations, composite airframes and unrestored wrecks survive in museums in Japan, the United States, Australia and the Pacific islands, several recovered from jungle or lagoon sites.
From carrier fighter to last-ditch weapon
The requirement
The Imperial Japanese Navy issues the demanding 12-shi specification for a long-range, agile carrier fighter.
First flight
Jiro Horikoshi’s prototype flies on 1 April, its performance made possible by radical weight-saving.
Combat debut
Adopted as the Type 0 Carrier Fighter, the Zero enters service and sees its first combat over China.
The Pacific onslaught
Zeros escort the attack on Pearl Harbor and sweep across the Philippines and the Dutch East Indies.
The Akutan Zero
A nearly intact A6M2 is recovered in the Aleutians in June and later test-flown, exposing the fighter’s weak points.
The Allies respond
Faster, sturdier fighters — the F6F Hellcat and F4U Corsair — and new tactics begin to erode the Zero’s dominance.
Outclassed
By the Marianas campaign the Zero is outmatched; late in the year it is increasingly used in kamikaze attacks.
War’s end
Production ends with the Japanese surrender; around 10,939 Zeros had been built, more than any other Japanese aircraft.
Twelve Zero stories
The impossible specification
The Navy’s 12-shi requirement demanded range, speed, firepower and agility all at once.
Read the full story
The man who saved every gram
Jiro Horikoshi’s obsession with weight defined the whole aircraft.
Read the full story
The range that shocked the Allies
The Zero could escort strikes far beyond what its opponents believed possible.
Read the full story
“Never dogfight a Zero”
Early Allied pilots learned the hard way not to turn with it.
Read the full story
The prize in the Aleutians
A crash-landed Zero on Akutan Island gave the Allies their first flyable example.
Read the full story
Fighting on your own terms
Allied pilots learned to use speed and teamwork instead of turning.
Read the full story
The cost of no armour
The same lightness that made the Zero deadly also made it fragile.
Read the full story
Two cannon and a short magazine
The Zero’s hard-hitting cannon ran dry quickly.
Read the full story
Overtaken by the Hellcat
New American fighters reversed the balance of the Pacific air war.
Read the full story
The Zero over Darwin
Even the Spitfire found the Zero a difficult opponent.
Read the full story
From fighter to kamikaze
Late in the war, outclassed Zeros were turned into guided weapons.
Read the full story
The survivors that still fly
A handful of restored Zeros keep the type in the air today.
Read the full story
The Zero in pictures
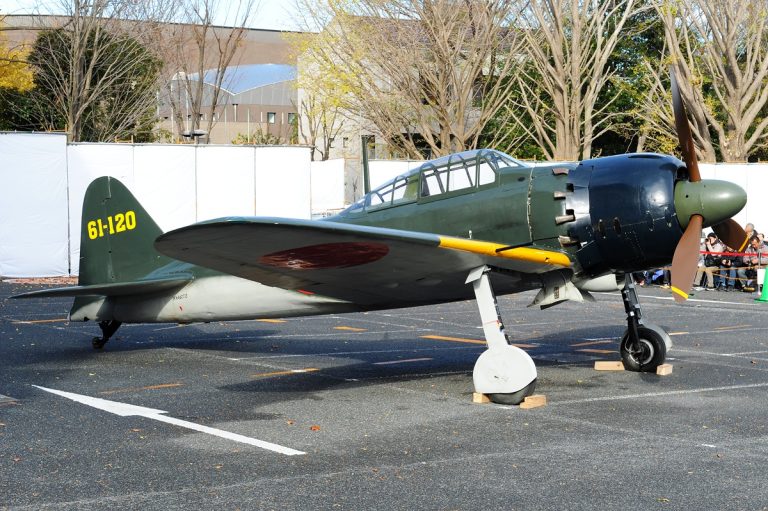
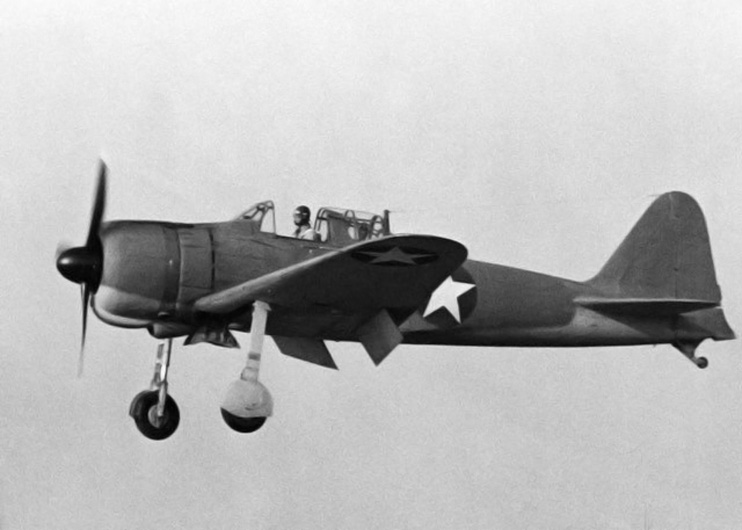
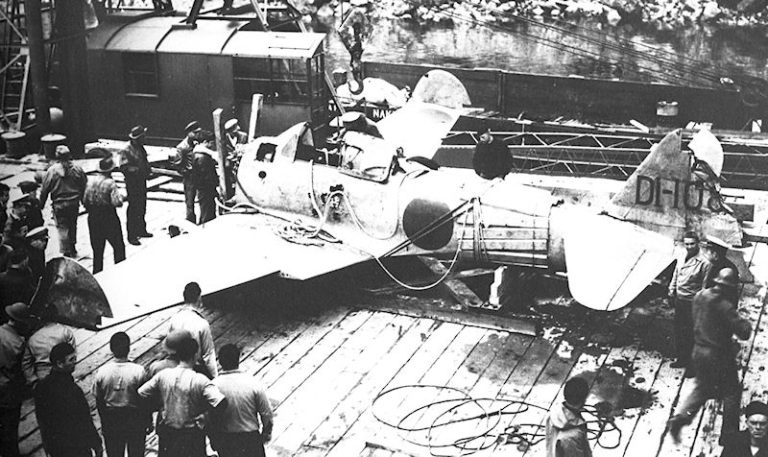
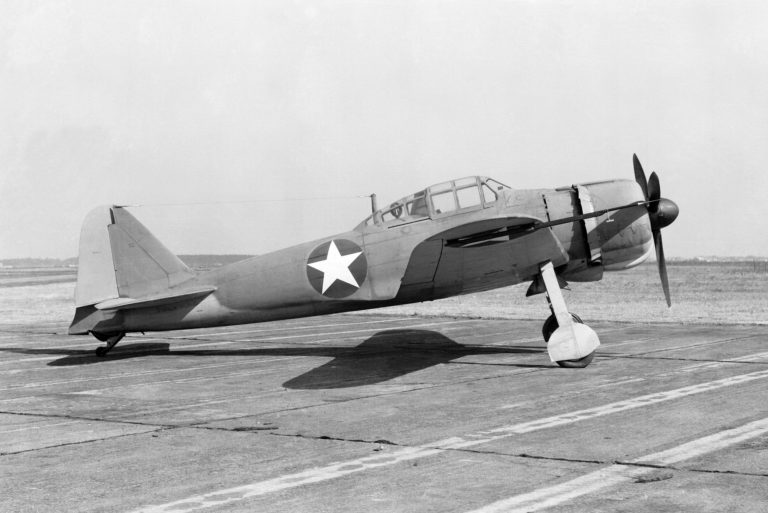
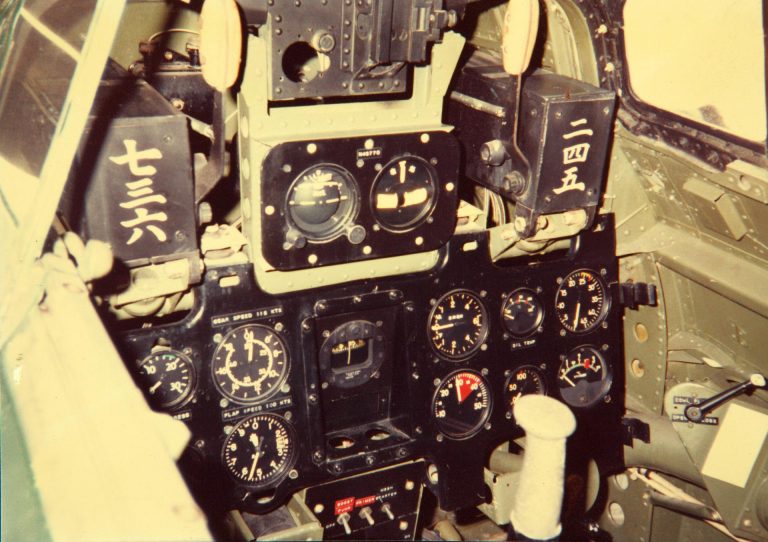
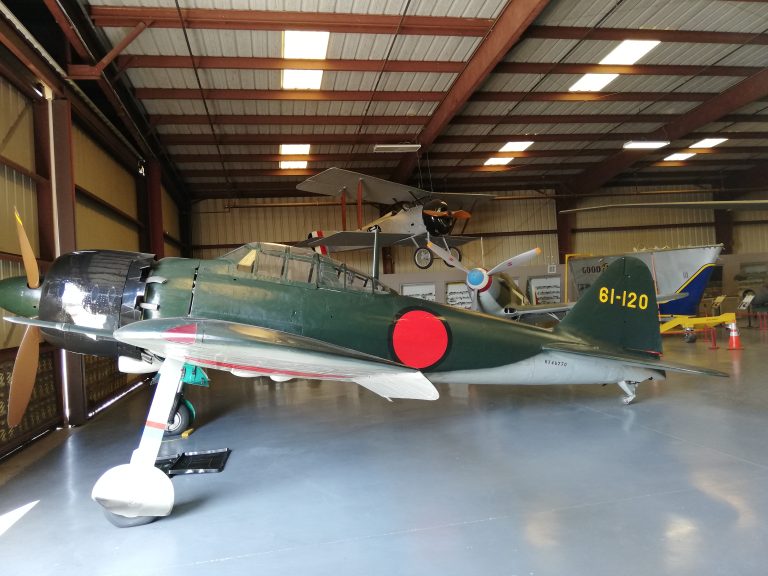
The Zero in motion
A curated video feature for the Mitsubishi A6M Zero is coming soon. In the meantime, explore the photo gallery above and the operator map below.
Where the Zero flew
The record that defines it
The Zero’s record is inseparable from the early Pacific war. In 1941–42 it out-ranged and out-turned nearly everything the Allies could field, escorting the attacks on Pearl Harbor, the Philippines and the Dutch East Indies and giving Japan air superiority across a vast theatre. But it was built without armour or self-sealing tanks, and once the Allies understood its weaknesses — helped by the captured Akutan Zero — and fielded the Hellcat and Corsair, its dominance collapsed. Late in the war, many Zeros were expended in kamikaze attacks.
Compare the combat record of every military aircraft. Figures as of July 2026.
Everything people ask about the A6M Zero
Can I fly in an A6M Zero?
Why was the Zero so feared early in the war?
Why did the Zero become obsolete?
What was the Akutan Zero?
How many Zeros were built?
Are any Zeros still flying?
What does “Zero” mean?
You can’t fly the Zero.
These, you can.
Some legends only live in museums — others are fuelled and waiting. MiGFlug has put civilians in real military jet cockpits since 2004.
 Fly the L-39 AlbatrosThe world’s most-flown jet trainer — aerobatics included
 Fly the F-104 Starfighter“The missile with a man in it”
 Fly the MiG-21The Cold War’s most-produced jet
 Fly the T-33 Shooting StarAmerica’s first jet trainer
 Fly the DH VampireA piece of early jet history
 Fly the S.211Agile Italian jet trainer
 Fly the MB-326The classic Aermacchi jet
 Fly the MiG-15The Soviet legend of the Korean War
Continue the tour
Every fact, checked
- Smithsonian National Air and Space Museum — Mitsubishi A6M ZeroReference collection entry, design background and preserved airframe.
- Military Factory — Mitsubishi A6M ZeroSpecification baseline, variants and production figures.
- The National WWII MuseumPacific air-war context and the Zero’s early dominance.
- The Aviation Geek ClubThe Akutan Zero recovery and the tactics that followed.
- Imperial War MuseumsReference for wartime service and the Zero’s design trade-offs.
- Naval History and Heritage CommandUS Navy accounts of Pacific combat and the captured Zero.
- Planes of Fame Air MuseumAn airworthy A6M restored with an original Sakae engine.
- Encyclopædia Britannica — ZeroOverview of the designation, designer and service history.