
Aichi D3A
“Val”
The Imperial Japanese Navy’s carrier dive bomber — fixed-wheeled and old-fashioned to look at, yet in 1941–42 the most accurate and destructive dive bomber in the Pacific.
Old-fashioned, and deadly accurate
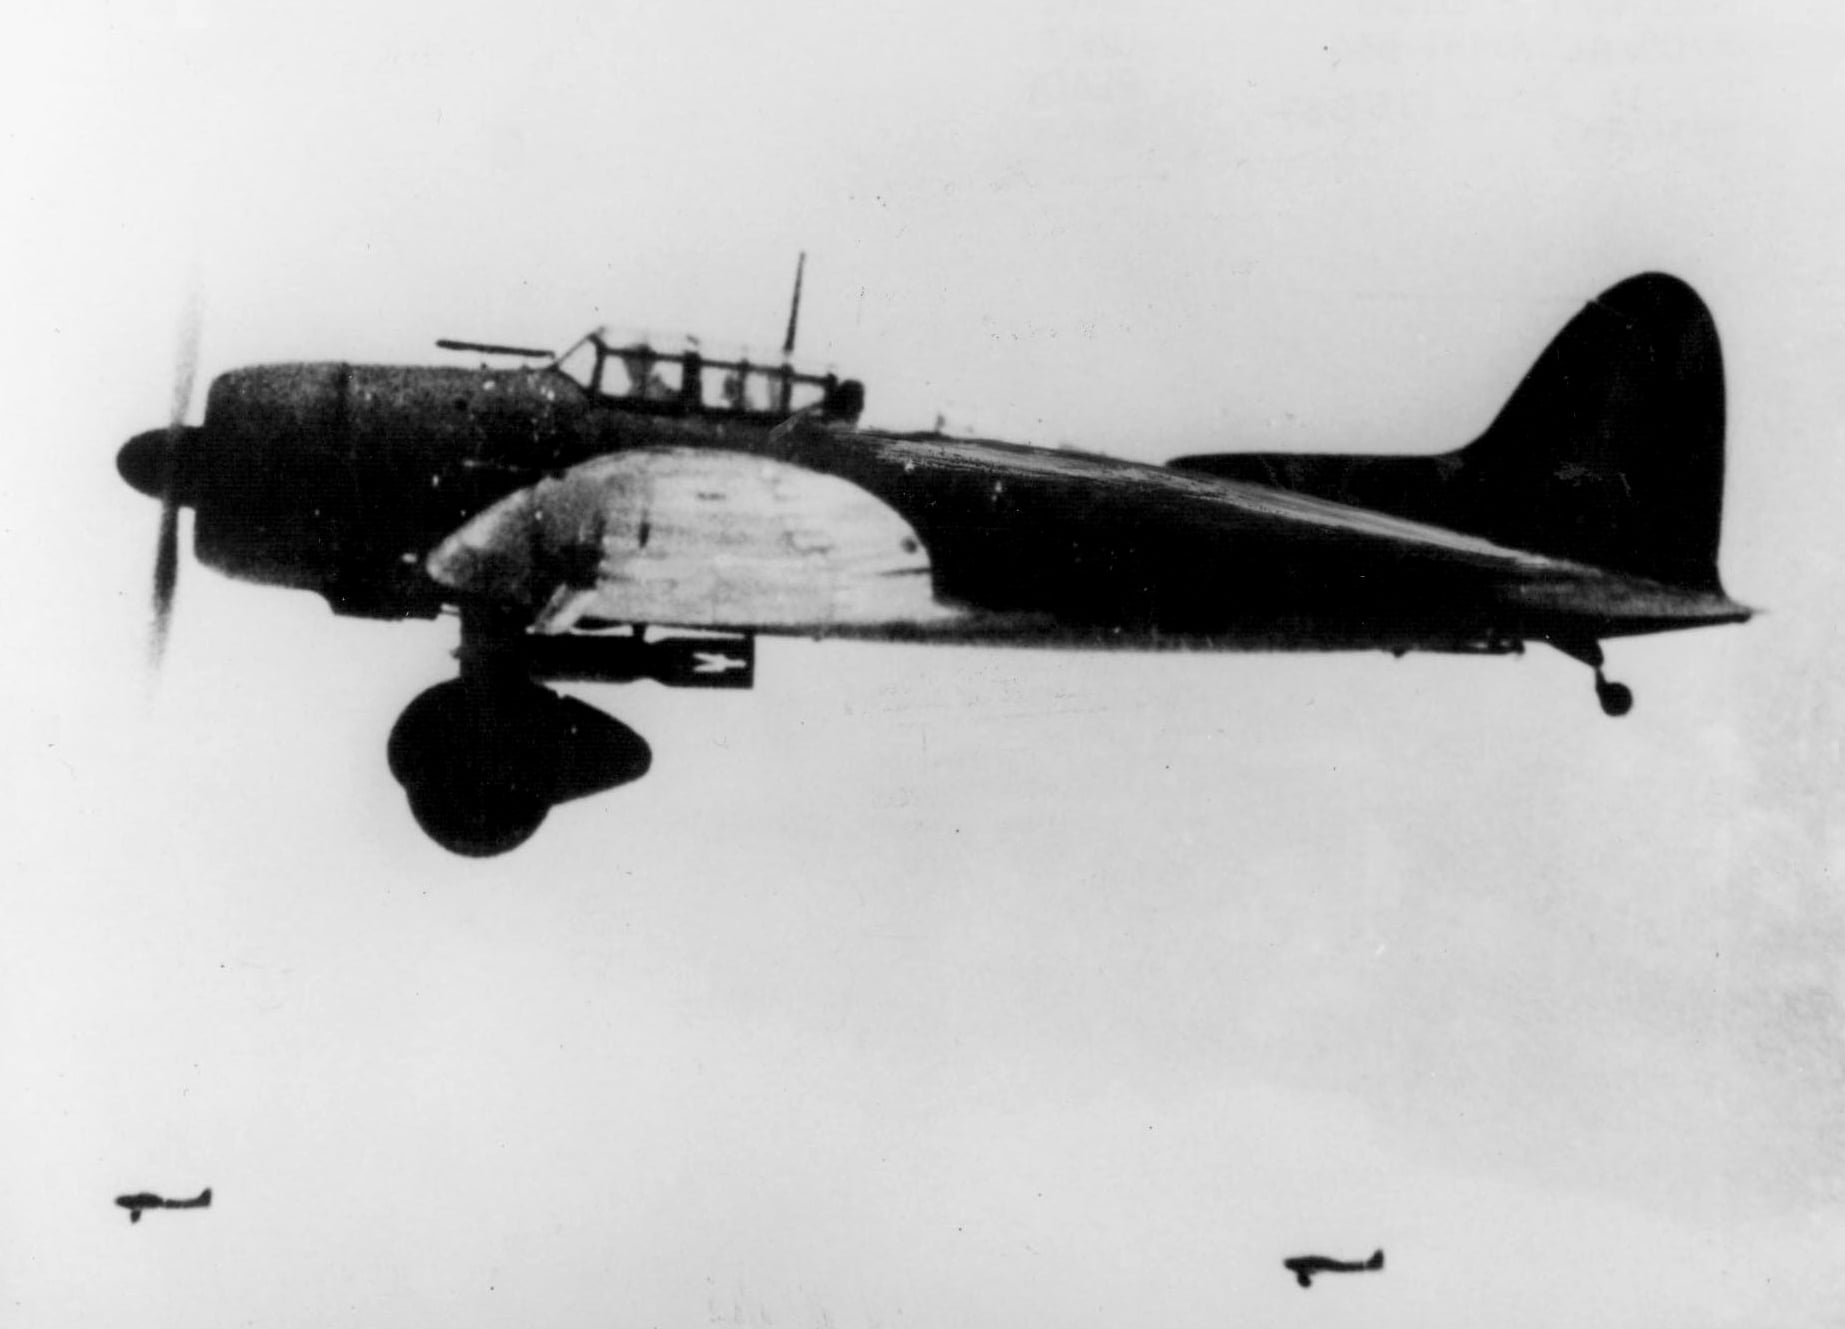
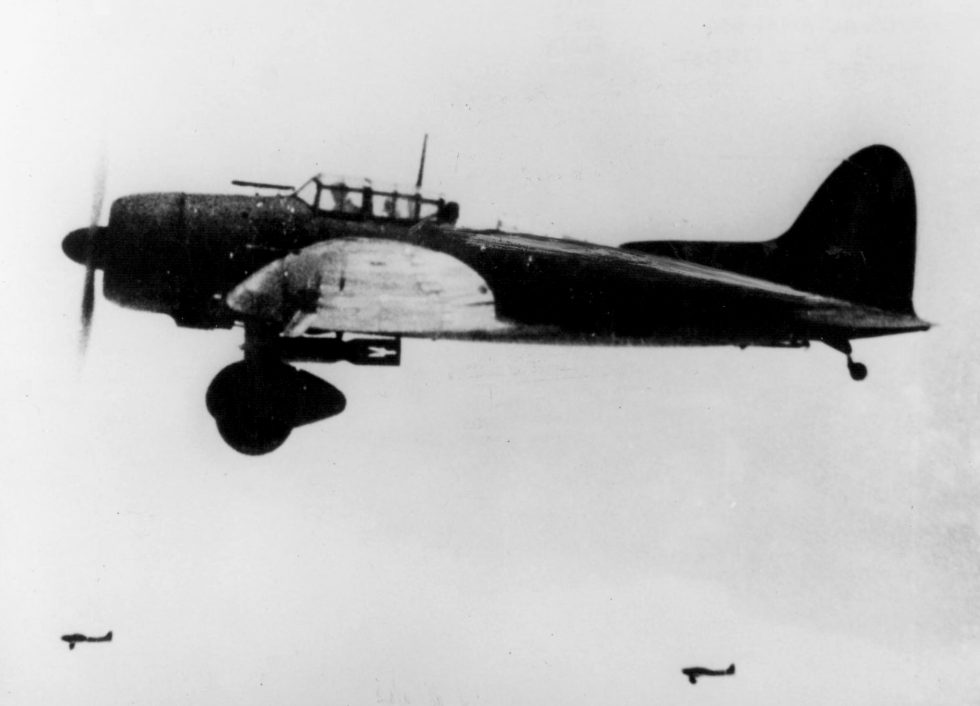
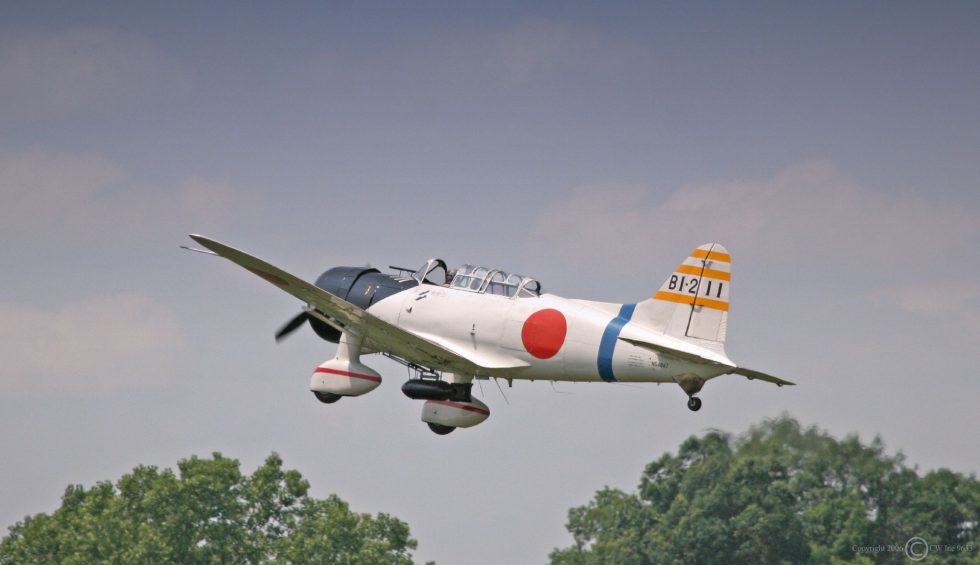
By the late 1930s the Imperial Japanese Navy wanted a modern carrier dive bomber to replace its biplanes. Aichi’s answer, first flown in January 1938, looked oddly conservative even when new: a low-wing monoplane with a smoothly tapered, near-elliptical wing and, most strikingly, fixed landing gear in streamlined trouser fairings. The design owed an acknowledged debt to German practice — Aichi had close ties to Heinkel, and the wing planform echoed the elegant Heinkel He 70. Retractable gear would have added weight and complexity for little gain in a machine built to dive; the fixed, spatted undercarriage was simple, strong and stable in the dive. Allied intelligence later gave it the reporting name “Val.”
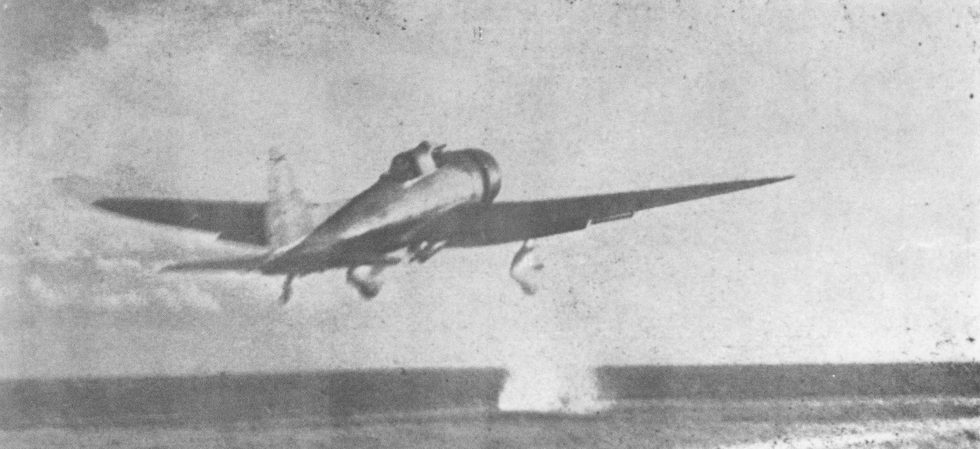
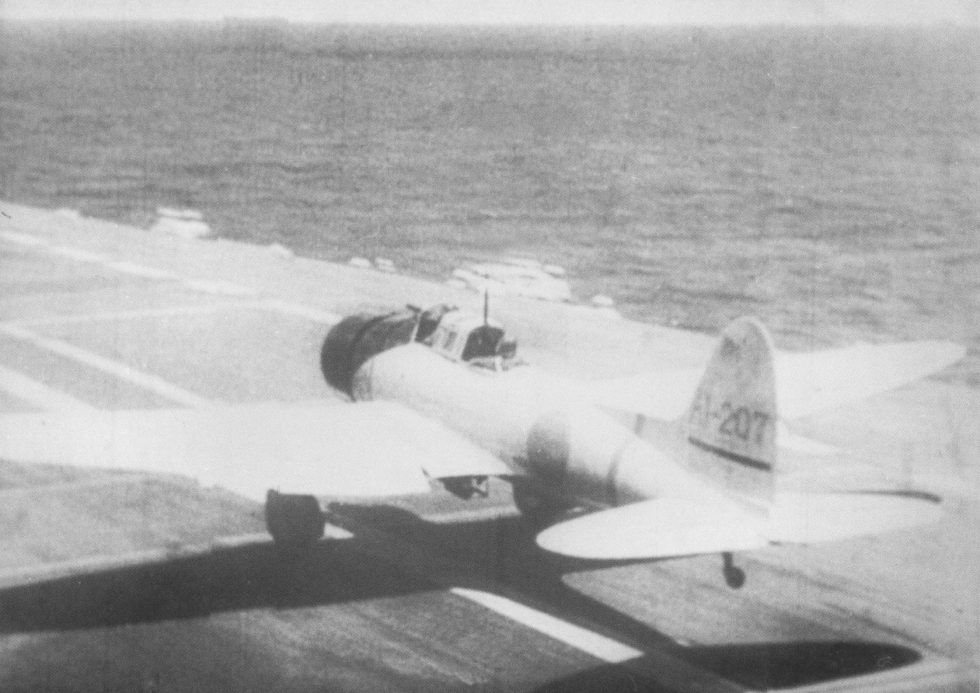
In service from 1940, the D3A became the main Japanese dive bomber at the outbreak of the Pacific war. Its crews were superbly trained, and the aircraft was steady and precise in a dive. D3As were among the aircraft that struck Pearl Harbor on 7 December 1941, and over the following months they ranged across the Pacific and Indian Oceans with remarkable results. In the Indian Ocean raid of April 1942, D3As sank the British aircraft carrier HMS Hermes and the heavy cruisers HMS Cornwall and HMS Dorsetshire — reportedly scoring a very high proportion of hits, often cited at around 80 per cent, though such figures should be treated with caution.
By some accounts the D3A went on to sink more Allied warships than any other Axis aircraft of the war — a striking claim that is widely repeated but hard to verify precisely. What is certain is that the type’s dominance was brief. Heavy losses at Midway in June 1942 gutted the veteran aircrews, and the fixed-gear D3A was soon outclassed by faster Allied fighters and superseded by the sleek, retractable-gear Yokosuka D4Y Suisei. Relegated to land bases and training, surviving D3As ended the war flown in kamikaze attacks. Around 1,495 were built; the type served only with the Imperial Japanese Navy, and no complete example flies today.
01The Aichi D3A Val’s fixed landing gear: why Japan’s best dive bomber kept its wheels down
To modern eyes the D3A’s fixed, trousered undercarriage looks like a step backwards — by 1941 most front-line aircraft retracted their gear. But for a dedicated dive bomber the trade was deliberate. Retracting gear meant extra weight, hydraulics and structure, all for a modest speed gain the Navy was willing to forgo. Fixed gear was light, robust and could double as a rough dive reference, and the aircraft was never intended to outrun fighters.
Combined with large dive brakes and a very steady handling character, the fixed-gear layout helped make the D3A an exceptionally precise dive-bombing platform in the hands of well-trained crews. The same conservatism that made it look dated also made it simple to build and maintain, and forgiving to fly — qualities that mattered in the intense carrier operations of 1941–42. The penalty came later, when the type’s low speed left it desperately vulnerable to the improving Allied fighters of 1943 onward.
What makes it special
Fixed gear, built for the dive
Unusually for 1941, the D3A kept fixed, spatted landing gear. For a dive bomber the choice was sound: lighter and simpler than retractable gear, strong enough for carrier work, and paired with large dive brakes that let a steady pilot hold a precise near-vertical dive. In the hands of veteran crews the result was exceptional bombing accuracy in 1941–42.
An elliptical wing with Heinkel heritage
The D3A’s smoothly tapered, near-elliptical low wing reflected Aichi’s close links to Germany’s Heinkel firm and echoed the graceful Heinkel He 70. It gave good lift and gentle handling, helping the aircraft stay controllable and stable through the stresses of a dive — an old-looking shape that hid a genuinely capable design.
The carrier striker that opened the war
Flown by a crew of two behind a single Mitsubishi Kinsei radial, the D3A carried one 250 kg bomb under the fuselage and two 60 kg bombs under the wings. As the IJN’s principal dive bomber it struck at Pearl Harbor and sank Allied warships from the Java Sea to the Indian Ocean in the opening months of the Pacific war.
02The Aichi D3A Val’s engine and armament: the Kinsei radial and a modest gun fit
Early D3A1s used a Mitsubishi Kinsei radial of around 1,000 hp; the later D3A2 fitted the more powerful Kinsei 54 of roughly 1,300 hp, lifting top speed to about 430 km/h and extending range. Offensive load stayed modest by later standards — a single 250 kg bomb on a swing-out crutch that cleared the propeller in the dive, plus two 60 kg bombs on wing racks. Defence rested on two fixed forward-firing 7.7 mm machine guns and a single flexible 7.7 mm gun for the observer. It was never heavily armed; the D3A relied on accuracy, escort fighters and the skill of its crews rather than on firepower or protection.
03The Aichi D3A Val at the Indian Ocean raid: the accuracy claim, examined
The most cited demonstration of the D3A’s accuracy came in early April 1942, when carrier air groups struck British forces around Ceylon. On 5 April D3As overwhelmed the heavy cruisers HMS Cornwall and HMS Dorsetshire, sinking both within minutes; on 9 April they sank the carrier HMS Hermes and her escort. Accounts of the raid frequently quote an extraordinary hit rate — commonly given as around 80 per cent or higher against the cruisers — and the episode is often used to argue that the D3A sank more Allied warships than any other Axis aircraft. Both the precise percentage and the “most warships” claim are repeated widely but rest on wartime estimates and should be read as impressive-but-approximate rather than exact. What is not in doubt is that, against ships without air cover, the D3A and its trained crews were devastatingly effective in the spring of 1942.
Full specifications
Baseline note: the figures below describe the D3A1 Model 11, the Kinsei-44 aeroplane that flew at Pearl Harbor, off Ceylon, at the Coral Sea and at Midway, and which did all the damage on which the type’s reputation rests. Deltas for the more powerful D3A2 Model 22 of 1943, for the prototypes and for the D3A2-K trainer are given in grey. Two sets of numbers circulate and they do not agree: the Japanese factory table reprinted in Famous Airplanes of the World No. 130, and the Western column derived from Rene Francillon’s Japanese Aircraft of the Pacific War. They differ on height, on empty weight and on the altitude at which peak speed occurs, so both are named rather than averaged.
Dimensions & weights
- Crew
- 2 — pilot forward, observer behind him who navigated, worked the radio and fired the rear gun (the aircraft was commanded by whichever man held the senior rank, and in the carrier groups that was often the observer rather than the pilot — the reverse of United States Navy practice, and a habit that made the observers the irreplaceable half of the crew)
- Length
- 10.185 m (33 ft 5 in); Model 22 10.231 m (33 ft 7 in). Francillon gives 10.195 m (33 ft 5 in) for both marks and makes no distinction
- Wingspan
- 14.360 m (47 ft 1 in), unchanged from the second prototype to the last aircraft built; Western tables round it to 14.365 m
- Height
- 3.348 m (11 ft 0 in) in the Japanese table — but Francillon, and every compilation derived from him, prints 3.847 m (12 ft 7 in). Half a metre apart on a well-photographed aeroplane, and the discrepancy has never been resolved in print
- Wing area
- 34.97 m² (376 sq ft), identical on both marks
- Wing planform
- elliptical, low-set, all-metal stressed skin, with washout worked into the outer leading edges after the first prototype snap-rolled out of tight turns — the shape came from the Heinkel He 70, one of which the Navy imported for study, and the resemblance is real. But the He 70’s elliptical wing was a two-spar timber structure skinned in plywood, and Aichi’s was metal. What was borrowed was the planform, not the engineering
- Undercarriage
- fixed, cantilever, faired in trousered spats; tailwheel and arrester hook — the last Japanese carrier aeroplane designed with fixed gear. The reasoning was sound at the time: at the modest speeds the 11-Shi specification asked for, retraction bought only a few knots while costing weight, hydraulic complexity and maintenance hours that a crowded hangar deck could ill afford. It was the right answer in 1936 and an embarrassment by 1943
- Empty weight
- 2,390 kg (5,269 lb); Francillon 2,408 kg (5,309 lb). Model 22 2,750 kg (6,063 lb) in the Japanese table, 2,570 kg (5,666 lb) in the Western one — a 180 kg gap that no source explains
- Loaded weight
- 3,650 kg (8,047 lb); Model 22 3,800 kg (8,378 lb). Both sets of authorities agree here, which is itself informative about where the disagreements come from
- Maximum overload weight
- 4,122 kg (9,088 lb) is the figure usually quoted for the Model 22; no comparable published Japanese figure exists for the Model 11
- Wing loading
- 104 kg/m² (21.4 lb/sq ft) at loaded weight; Model 22 108.9 kg/m² (22.3 lb/sq ft) — remarkably low for a 1940 strike aircraft, and the single number that explains most of what the type did well: it could be held in a steep dive, pulled out hard, and turned with fighters afterwards
- Power loading
- 3.41 kg/hp (7.5 lb/hp); Model 22 2.92 kg/hp (6.4 lb/hp)
Performance
- Maximum speed, Model 11
- 381.5 km/h (237 mph, 206 kn) at 2,300 m (7,550 ft) in the Japanese table; Francillon gives 386 km/h (240 mph) at 3,000 m (9,845 ft)
- Maximum speed, Model 22
- 427.8 km/h (266 mph, 231 kn) at 5,650 m (18,540 ft); Francillon 430 km/h (267 mph) at 6,200 m (20,340 ft). About 46 km/h (29 mph) better than the Model 11, and still some 180 km/h slower than the Grumman F6F Hellcat that was hunting it by the time the mark was common
- Cruising speed
- 296 km/h (184 mph, 160 kn) at 3,000 m (9,845 ft)
- Climb to 3,000 m
- 5 min 48 s (9,845 ft) for the Model 22; the Model 11, on 230 fewer horsepower, took appreciably longer, and no clean Japanese figure for it is in wide circulation
- Service ceiling
- 8,070 m (26,480 ft) in the Japanese table; Francillon gives 9,300 m (30,510 ft) for the Model 11. Model 22 10,500 m (34,450 ft) on both accounts — the clearest single gain the Kinsei 54 bought
- Range, normal
- 1,472 km (915 miles) with the 250 kg bomb aboard
- Range, maximum
- ~1,820 km (1,131 miles) in clean overload trim. The Model 22 gave range back to the thirstier Kinsei 54: the Japanese table credits it with only 1,050 km (652 miles), Francillon with 1,352 km (840 miles), and the extra tankage described opposite was fitted specifically to claw the deficit back for the Solomons
- Combat radius
- ~500 km (~310 miles) with a 250 kg bomb and enough margin to find the carrier or the strip again. Land-based operations from Buin and Buka against Guadalcanal sat right on that limit, and the arithmetic killed crews who never met an enemy
- Limiting speed in the dive
- 240 kn (444 km/h, 276 mph) indicated — the figure the Navy demanded after the first prototype’s brakes shook badly at their 200 kn (370 km/h) design speed. Strengthened brakes on the second prototype met it
- Handling
- excellent once a long dorsal fin strake, running forward from the tail to the middle of the fuselage, cured the directional instability that had dogged both prototypes — light, agile, and on more than one occasion flown deliberately as a stopgap fighter. It could out-turn most of what chased it. It could out-run none of it
- Recorded bombing accuracy
- 82 per cent on target during the Indian Ocean raid of April 1942 — Francillon’s figure for the operation as a whole, and the best-attested claim of its kind made by any air arm in the war. The best-documented single day is 9 April: 45 Vals against HMS Hermes for 37 hits, and 16 against HMAS Vampire for 16 out of 16. Nagumo signalled a 77.6 per cent success rate for the day. Set against that, the Japanese assessed only 47.7 per cent of the 78 bombs dropped on ships at Pearl Harbor as certain hits, and American damage reports credit fewer again — so the Ceylon numbers describe a peak, not a norm
Propulsion & systems
- Engine
- 1 × Mitsubishi Kinsei 44, 14-cylinder twin-row air-cooled radial, 1,070 hp (798 kW) for take-off. A proportion of early Model 11s had the 1,000 hp (746 kW) Kinsei 43 instead; the Navy’s December 1939 adoption document names the Kinsei 44 specifically
- Model 22 engine
- Mitsubishi Kinsei 54, 1,300 hp (969 kW) for take-off, 1,200 hp (895 kW) at 3,000 m and 1,100 hp (820 kW) at 6,200 m — installed with a reshaped cowling and a propeller spinner, which is the quickest way to tell a Model 22 from a Model 11 in a photograph
- Prototype engines
- Nakajima Hikari 1 of 709 hp (529 kW) on the first prototype, which was simply too weak; the second had the 839 hp (626 kW) Mitsubishi Kinsei 3 in a new cowling, and it was that aeroplane which beat Nakajima’s rival D3N1 in the fly-off
- Engine size and supercharging
- 32.34 litres (1,973 cu in), single-stage supercharger. The Kinsei was the most dependable large radial Mitsubishi built and one of very few Japanese engines that never became a programme risk — part of why the D3A stayed serviceable in the field long after it stopped being survivable
- Propeller
- three-blade metal constant-speed unit — flown without a spinner for most of the Model 11’s life, with one on late Model 11s and on every Model 22
- Fuel
- ~900 litres (198 imp gal, 238 US gal) total in the Model 22 after additional tanks were added to restore the endurance the Kinsei 54 had eaten. No tank on any mark was self-sealing
- Dive brakes
- one hydraulically extended perforated brake beneath each wing, outboard of the fuselage and inboard of the wing bomb racks — they vibrated heavily on the first prototype at their 200 kn design speed and had to be rebuilt to hold 240 kn. Getting this right is most of what made the type accurate
- Bomb displacement gear
- a trapeze under the fuselage that swung the main bomb clear of the propeller arc before release — standard practice for a single-engined dive bomber, and the fitting that allowed a genuinely steep dive angle rather than the shallow glide a fixed rack would have forced
- Sights
- Type 95 telescopic sight for the pilot, superseded by the Type 99 on later aircraft, used for aiming the bomb in the dive; the observer had a Type 97 Mk 1 drift sight in a long vertical tube at his left knee and a drift meter on the floor to his right
- Radio and navigation
- Type 96 Mk 2 radio set mounted between the seats with a Type 3 reflecting compass on top of it — a properly equipped second crewman is why the type could be trusted to find a moving carrier after a 900 km round trip. It is also why the loss of trained observers hurt far more than the loss of airframes
- Protection
- none — no armour for either man, no self-sealing tanks, no fire suppression, no radar and no provision for night work. Every kilogramme went into range and agility, and the bill came due over the Solomons in the second half of 1942
04The Aichi D3A Val’s cost: why no reliable price exists
The D3A was a wartime Japanese state product, built by Aichi for the Imperial Japanese Navy and never sold on an open market. No dependable flyaway unit price or cost-per-flight-hour figure survives in the public record, and wartime Japanese industrial accounting was disrupted by the collapse of 1945. What is well documented is the scale of production — roughly 1,495 airframes across the D3A1 and D3A2 variants. Any precise monetary figure attached to a D3A today should be read as an estimate, not a sourced fact.
Armament & payload
The Type 99 carried one bomb, and for eighteen months it put that bomb exactly where it was aimed
Everything about the D3A’s armament was ordinary except the accuracy. One 250 kg bomb on a fuselage trapeze, two 60 kg bombs under the wings, two rifle-calibre guns in the nose and one on a ring in the back — a fit settled in 1937 and never seriously revised. What made it lethal was the combination behind it: a very low wing loading, a perforated dive brake that actually worked at 240 kn, a telescopic sight, and crews who had been rehearsing the same dive over China since 1939. Off Ceylon in April 1942 that combination produced hit rates against manoeuvring warships that no air arm anywhere matched at any point in the war.
The other half of the ledger was dire. Two 7.7 mm guns forward were a strafing armament, not a fighting one, and the single 7.7 mm on the observer’s ring was worse; the D3A never received the 13 mm rear gun that eventually reached the D4Y, and no armour or self-sealing tank was ever fitted to any mark. The aeroplane that sank more Allied warships than any other Axis type could be shot down by a single well-aimed burst, and repeatedly was. Fits varied by unit far more than by mark: land-based groups in New Guinea bolted 20 mm cannon to some aircraft for ground strafing, training units stripped equipment out, and by 1944 special-attack aircraft flew with guns still installed and no intention of firing them.
Gun
- Two Type 97 7.7 mm fixed machine guns in the upper forward fuselage decking, synchronised to fire through the propeller arc — flak suppression and strafing, never air combat
- One Type 92 7.7 mm flexible gun on a ring in the rear cockpit, worked by the observer: the same rifle-calibre weapon the Navy had been fitting since the early 1930s, and effectively decorative against an F4F, let alone an F6F
- No heavier defensive gun was ever standardised. The Type 2 13 mm that transformed the D4Y Suisei’s rear cockpit in 1944 never reached the D3A on any production line
- Land-based aircraft of the 2nd Air Group, later renumbered the 582nd, carried 20 mm cannon on some sorties against Milne Bay and Port Moresby in 1943 — a ground-attack fit, not a defensive one
- Both fixed guns were normally left in place on kamikaze aircraft, because removing them was more work than leaving them
Air-to-air
- No guided air-to-air weapon existed in Japanese service and none was ever fitted to this type
- The card is not empty, though, because D3A crews were repeatedly ordered to fly as fighters. The low wing loading and light airframe let them turn inside Wildcats, and Val crews were credited with kills over the Solomons and at Santa Cruz
- Those claims are genuine but modest. A dive bomber with two rifle-calibre guns and no armour was not an interceptor; it was a target that could occasionally bite back
- The practice stopped after the Battle of the Philippine Sea in June 1944, for the simple reason that there were no longer carrier decks to fly the aircraft from
Air-to-surface guided
- None. The Imperial Japanese Navy fitted no guided weapon of any kind to the D3A at any point in its career
- The card is kept because the type finished the war as the guidance system. From the second Kamikaze Special Attack unit of 27 October 1944 onwards, D3A2s were expended in special attacks in the Philippines and then off Okinawa
- 122 D3As are recorded as having gone in and not returned as kamikaze — the third-highest total of any Navy type, behind the A6M Zero and the D4Y Suisei
- Effectiveness was poor, because by 1945 a special-attack aircraft could be almost anything except slow. USS Abner Read, sunk on 1 November 1944, and USS William D. Porter, sunk on 10 June 1945, are among the very few destroyers the type accounted for in the role
Bombs
- One 250 kg bomb under the fuselage on the displacement trapeze: the Type 99 No. 25 semi-armour-piercing against ships, or the Type 98 No. 25 land bomb of roughly 242 kg against airfields and installations
- Two 60 kg bombs on wing racks outboard of the dive brakes — Type 99 No. 6 semi-AP or Type 2 No. 6 land bomb. Maximum load was therefore 370 kg, which is very little, and against a County-class cruiser it proved entirely sufficient
- Doctrine before April 1942 was semi-AP for every aircraft in an anti-ship strike. On 5 April 1942 the wave sent against Cornwall and Dorsetshire was still carrying land bombs meant for a second raid on Colombo — 37 aircraft with semi-AP, 16 with land bombs — and the land bombs turned out to be devastating at beating down the cruisers’ anti-aircraft fire
- The lesson was written into doctrine within four days. The leading aircraft of a strike would carry land bombs to suppress the guns, the rest semi-AP to sink the ship. That was the fit used against HMS Hermes on 9 April, and it was used from then on
- Release was normally made low, from a steep dive held on the telescopic sight, with the trapeze swinging the bomb clear of the airscrew. It is a crude description of a skill that took years to build and about six months of Solomons attrition to destroy
Rockets
- None. No rocket armament, no air-to-air rocket and no rocket-assisted take-off gear was ever carried operationally by a D3A
- This is worth stating plainly, because both the type’s successor and its own wooden derivative did get rocket installations: the D4Y4 Model 43 was designed around jettisonable boosters, and the D3Y2-K special-attack version was drawn up with them
- Nothing of the kind reached a Type 99 squadron. The aeroplane left the war carrying exactly the stores it had entered it with, which is unusual for a type built over six years
Pods & other stores
- Nothing hung on a D3A that was not a bomb. No drop tanks, no gun pods, no camera pods, and no torpedo — torpedo work belonged to the B5N and later the B6N, a wholly separate class in Japanese carrier practice
- The aiming system was the fixed installation: Type 95 and later Type 99 telescopic sight for the pilot, Type 97 Mk 1 drift sight and floor-mounted drift meter for the observer
- Carrier equipment amounted to an arrester hook and the Type 96 Mk 2 radio with a Type 3 reflecting compass above it, for the navigation problem of finding a ship that had moved since launch
- Conspicuously absent throughout: armour, self-sealing tanks, radar and any night-flying provision. The Type 99 was a daylight, fair-weather, visual weapon for its entire career, and never pretended otherwise
Three typical loadouts
- Carrier anti-ship strike, Indian Ocean, April 1942
- One Type 99 No. 25 semi-armour-piercing 250 kg bomb on the fuselage trapeze, two 60 kg bombs on the wing racks, full internal fuel. The load that sank Cornwall, Dorsetshire, Hermes and Vampire inside five days.
- Airfield suppression, Pearl Harbor first wave, 7 December 1941
- One Type 98 No. 25 land bomb of about 242 kg, wing racks empty. Fifty-one aircraft were launched against Hickam, Wheeler and Ford Island so that the torpedo aircraft behind them would meet no fighters; 78 more in the second wave went after the ships.
- Special attack, Philippines and Okinawa, 1944–45
- One 250 kg bomb, fuel for the outbound leg, guns and radio frequently left installed and unused. Often flown by pupils drawn straight from dive-bomber training units with a few dozen hours each.
Japanese ordnance nomenclature is a trap for the unwary: "No. 25" denotes a nominal 250 kg class, and the true weights of the Type 99 semi-AP and the Type 98 land bomb differ both from each other and from 250 kg. Weapon fits above follow Osamu Tagaya and Francillon; unit-level modifications such as the 20 mm cannon installations in New Guinea are attested in Japanese unit histories but appear in no official specification. Note also that the widely reproduced list crediting the D3A with sinking USS Arizona is wrong: Arizona was destroyed by an 800 kg armour-piercing bomb dropped by a B5N level bomber, not by a dive bomber.
Variants
Aichi built one airframe twice, and the second time round the aeroplane was already obsolete
The Type 99 has a very short variant list for an aircraft built in four figures, and that is the point. The 11-Shi specification of summer 1936 asked for a conservative, buildable, reliable dive bomber and got exactly one; from the adoption on 16 December 1939 to the last Showa-built machine, the outline never changed. The only substantive development in six years of production was more engine.
Japanese mark numbers encode airframe and engine as two digits, which explains a designation muddle most English books reproduce without comment. Model 11 is first airframe, first engine. When the 1,300 hp Kinsei 54 was tested in a Model 11 fuselage in August 1942 the aircraft was provisionally the Model 12 — first airframe, second engine — and by the time the new cowling, spinner, lengthened canopy, revised bomb swing-arm and altered tailplane had been worked in and the aeroplane was formally adopted on 7 January 1943, it had become the Model 22. That is why Western sources write "Model 12/22" and never say why there are two numbers.
What ended the type was not the airframe but the arithmetic of the men flying it. In 1942 D3As helped sink Lexington at the Coral Sea, put three bombs into Yorktown at Midway and five into Hornet at Santa Cruz, and damaged Enterprise twice. The price rose every time: 18 launched from Hiryu against Yorktown on 4 June 1942 and 13 lost; 27 launched at the Eastern Solomons on 24 August and 23 lost; roughly 40 lost at Santa Cruz in October. Parshall and Tully have shown that the 110 aircrew killed at Midway were just under a quarter of those embarked and not in themselves crippling — the popular story that Midway destroyed Japan’s naval aviators in a day does not survive the casualty lists. It was the Solomons, battle after battle through the autumn of 1942, that emptied the carrier bomber squadrons of men who could hit a moving ship.
By mid-1943 the Model 22 was obsolete and the Navy knew it. It went to land bases in the Solomons and New Guinea, to the light carriers too small to handle the fast-landing Suisei, and increasingly to training units. Thirty-eight were still embarked at the Philippine Sea in June 1944, filling out a squadron that should have had Suiseis and had received nine; 27 flew the second strike on 19 June, met about 30 Hellcats over Guam, and nine did not come back. That was the last carrier operation the type ever flew. In the Philippines that autumn the survivors were slaughtered, and what was left went to the special-attack units.
- 11-Shi Carrier Bomber prototypes (1937–38, 2 aircraft)
- First machine completed December 1937 and flown in January 1938 behind a 709 hp Nakajima Hikari 1: underpowered, unstable in yaw in wide turns, prone to snap-rolling out of tight ones, with dive brakes that shook at 200 kn. The second had the Kinsei 3, a larger fin, slightly greater span, tip washout and stronger brakes.
- D3A1 Model 11 (1939–42, 476–479 built)
- Adopted 16 December 1939 as the Navy Type 99 Carrier Bomber and redesignated Model 11 on 7 April 1942. Kinsei 43 or 44, marginally reduced wing, and the long dorsal fin strake that finally cured the directional instability. This is the Pearl Harbor, Darwin, Ceylon, Coral Sea and Midway aeroplane.
- D3A1 late production (1942)
- Not a separate mark but a recognisable batch: a propeller spinner appeared on the last Model 11s off the line before becoming standard on the following mark.
- D3A2 provisional Model 12 (trials, August 1942)
- Kinsei 54 installed in an otherwise Model 11 airframe. Faster and better in the climb, and appreciably shorter-legged, which is precisely what forced the airframe changes that produced the Model 22.
- D3A2 Model 22 (1943–44, 1,016 built)
- Adopted 7 January 1943. New cowling and spinner, lengthened rear canopy, revised bomb swing-arm and tailplane, and tankage raised to about 900 litres to restore range. Reached front-line units early in 1943 and pushed most Model 11s into training squadrons.
- D3A2 Model 22, Showa production (1944–45)
- Showa Hikoki Kogyo built late Model 22s under licence, distinguished by individual thrust-augmenting exhaust stacks in place of the collector ring. The only second-source production the type ever had: it was never exported, and never licence-built outside Japan.
- D3A2-K, Navy Type 99 Bomber Trainer Model 12 (1943–45, conversions)
- Model 22s given a second set of controls in the rear cockpit. Conversions rather than new-build, and by 1945 the majority of surviving airframes of both marks were on training strength rather than operational.
- Yokosuka D3Y1-K Myojo (1944–45, 2 prototypes and 3 production)
- A near-wholly wooden trainer derived from the D3A to save aluminium, with straight-tapered wings and tail so that unskilled labour could build it. It came out heavier than calculated and far too late to matter.
- D3Y2-K, also designated D5Y1 Myojo Kai (1945, none completed)
- Single-seat special-attack version of the wooden trainer with jettisonable undercarriage. Still under construction at the surrender.
Production totals differ between authorities. Francillon gives 1,495 aircraft, of which 479 Model 11s and 1,016 Model 22s; the Japanese literature also arrives at 1,495 built between December 1939 and August 1945; several Western compilations give 476 Model 11s. The figure of 1,486 that circulates online has no good source behind it. Some 135 aircraft survived in Japan at the surrender, and all were scrapped. No complete original D3A exists anywhere in the world. What does exist is this. The unrestored fuselage of Model 22 c/n 3105, abandoned bomb-damaged at Gasmata in New Britain in 1943 and salvaged in 1973, is displayed at the National Museum of the Pacific War at Fredericksburg, Texas, where the separately recovered tail of c/n 3357 — tail code 582-248, completed by Aichi on 15 August 1943 — stands in the same museum’s Guadalcanal gallery. C/n 3178 was cut up on Ballale in the Solomons by Robert Diemert in 1968, shipped to Manitoba, rebuilt at Carman around a Wright R-2600 rather than its original Kinsei and flown on 22 November 1969, the only Type 99 to have flown since the war; it was at the Canadian national collection in Ottawa from 1970 to 1991 and has been partially restored and in store at Planes of Fame, Chino, ever since. A tail and an engine are held by the Pacific War Museum on Guam. C/n 3179 still lies near Arawe in New Britain where it came down around December 1943, one wing complete and the aeroplane standing on its undercarriage. The Pearl Harbor Aviation Museum began acquiring D3A remains from Papua New Guinea in 2022. Everything that flies today in Type 99 markings is a converted Vultee BT-13 Valiant, built for Tora! Tora! Tora! in 1968–69 under Lynn Garrison with engineering coordinated by Jack Canary, and reused in Midway, in Pearl Harbor and on the American airshow circuit ever since. They are convincing at two hundred yards and share not one component with an Aichi.
From carrier striker to kamikaze
The requirement
The Imperial Japanese Navy issues a specification for a modern monoplane carrier dive bomber to replace its biplanes; Aichi’s design draws on its Heinkel links.
First flight
The prototype flies in January, its near-elliptical wing and fixed, spatted landing gear marking a deliberately simple, dive-optimised design.
Enters service
The D3A joins carrier air groups as the Navy’s principal dive bomber and sees early action over China.
Pearl Harbor
D3As are among the aircraft that strike the U.S. Pacific Fleet at Pearl Harbor on 7 December, opening the Pacific war.
Indian Ocean raid
D3As sink the carrier HMS Hermes and the cruisers HMS Cornwall and HMS Dorsetshire, reportedly with an exceptionally high hit rate.
Midway
Heavy losses of aircraft and veteran aircrew at Midway blunt the D3A’s edge as Allied fighters improve.
Outclassed
The slow, fixed-gear D3A is increasingly outmatched and begins to be superseded by the faster Yokosuka D4Y Suisei.
Land bases and kamikaze
Relegated to shore bases and training, surviving D3As end the war in kamikaze attacks. Production totals roughly 1,495 aircraft.
From the war: twelve Val stories
The dive bomber Japan built next
A 1936 Navy requirement for a modern monoplane dive bomber gave Aichi its opening.
Read the full story
Wheels down on purpose
The fixed, trousered undercarriage looked dated but suited a dedicated dive bomber.
Read the full story
A wing borrowed from Heinkel
The Val’s elegant elliptical wing echoed the German Heinkel He 70.
Read the full story
Over Pearl Harbor
D3As were among the aircraft that opened the Pacific war at Pearl Harbor.
Read the full story
Cornwall and Dorsetshire
Two British heavy cruisers were overwhelmed and sunk in minutes.
Read the full story
The sinking of HMS Hermes
The world’s first purpose-built carrier fell to D3A dive bombers.
Read the full story
More ships than any Axis aircraft?
A striking, much-repeated claim — and one worth hedging.
Read the full story
Why the Val hit so hard
Training, steady handling and dive brakes combined into precision.
Read the full story
The reckoning at Midway
Midway cost Japan carriers, aircraft and the irreplaceable veteran crews.
Read the full story
Outrun by the war
A fixed-gear dive bomber could not survive against 1943’s fighters.
Read the full story
The last sorties
Relegated and obsolete, surviving Vals ended the war in kamikaze attacks.
Read the full story
The Val that no longer flies
Of some 1,495 built, no complete example survives airworthy.
Read the full story
The Val in pictures
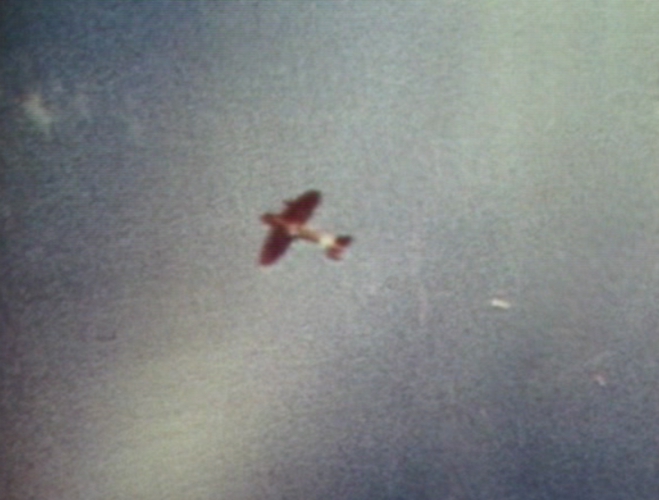
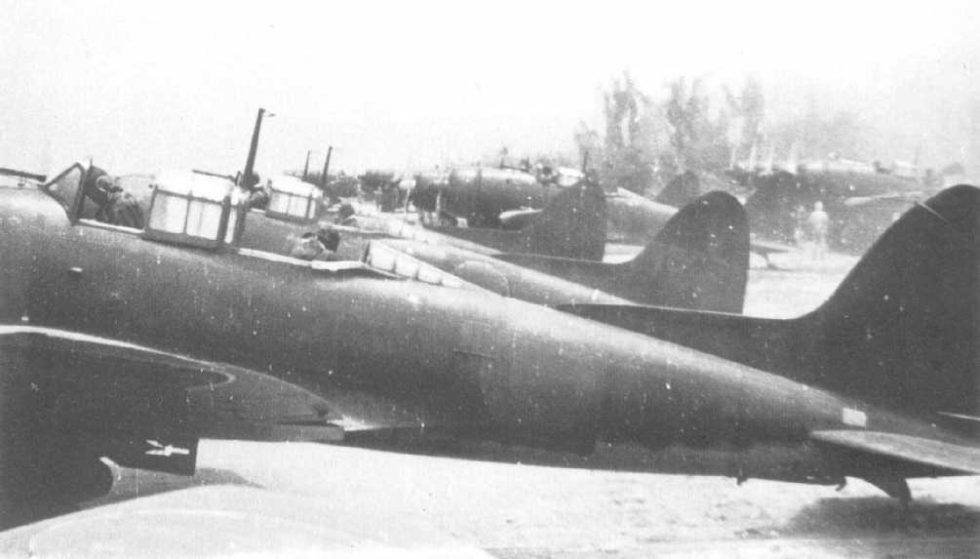
The Val in motion
Video coming soon — we are sourcing a high-authority archival film of the Aichi D3A “Val” for this exhibit.
Where the Val flew
The score that defines it
The D3A’s combat record is concentrated in a brief, brilliant window. In the opening months of the Pacific war it was the most effective dive bomber in the theatre, sinking Allied warships with a precision that has become legendary — though the exact figures are hard to verify. It served only with the Imperial Japanese Navy, and after Midway its edge faded as it was outrun by better fighters.
Compare the combat record of every military aircraft. Figures as of July 2026.
Everything people ask about the D3A Val
Can I fly in a D3A Val?
Why did the D3A have fixed landing gear?
Was the Val influenced by a German design?
Did the D3A really sink HMS Hermes?
How accurate was the Val at the Indian Ocean raid?
Did the D3A sink more warships than any other Axis aircraft?
How many D3As were built, and do any survive?
You can’t fly the Val.
These, you can.
Some legends only live in museums — others are fuelled and waiting. MiGFlug has put civilians in real military jet cockpits since 2004.
 Fly the L-39 AlbatrosThe world’s most-flown jet trainer — aerobatics included
 Fly the F-104 Starfighter“The missile with a man in it”
 Fly the MiG-21The Cold War’s most-produced jet
 Fly the T-33 Shooting StarAmerica’s first jet trainer
 Fly the DH VampireA piece of early jet history
 Fly the S.211Agile Italian jet trainer
 Fly the MB-326The classic Aermacchi jet
 Fly the MiG-15The Soviet legend of the Korean War
Continue the tour
Every fact, checked
- Naval Encyclopedia — Aichi D3A “Val”Design, Heinkel He 70 influence, elliptical wing and D3A2 specifications.
- 19FortyFive — Meet the Aichi D3A ValPearl Harbor role, the Indian Ocean hit-rate claim and production totals.
- The Pacific War Online EncyclopediaDetailed service history and technical data for the D3A.
- World War II DatabaseVariant data, dimensions and operational summary.
- History of WarDevelopment from the 1936 requirement and combat career.
- Pacific WrecksSurviving and recovered D3A airframes and their fates.
- National Museum of the Pacific WarReference for preserved D3A airframes held in the United States.
- Naval History and Heritage CommandContext for the April 1942 Indian Ocean raid and the loss of HMS Hermes.