
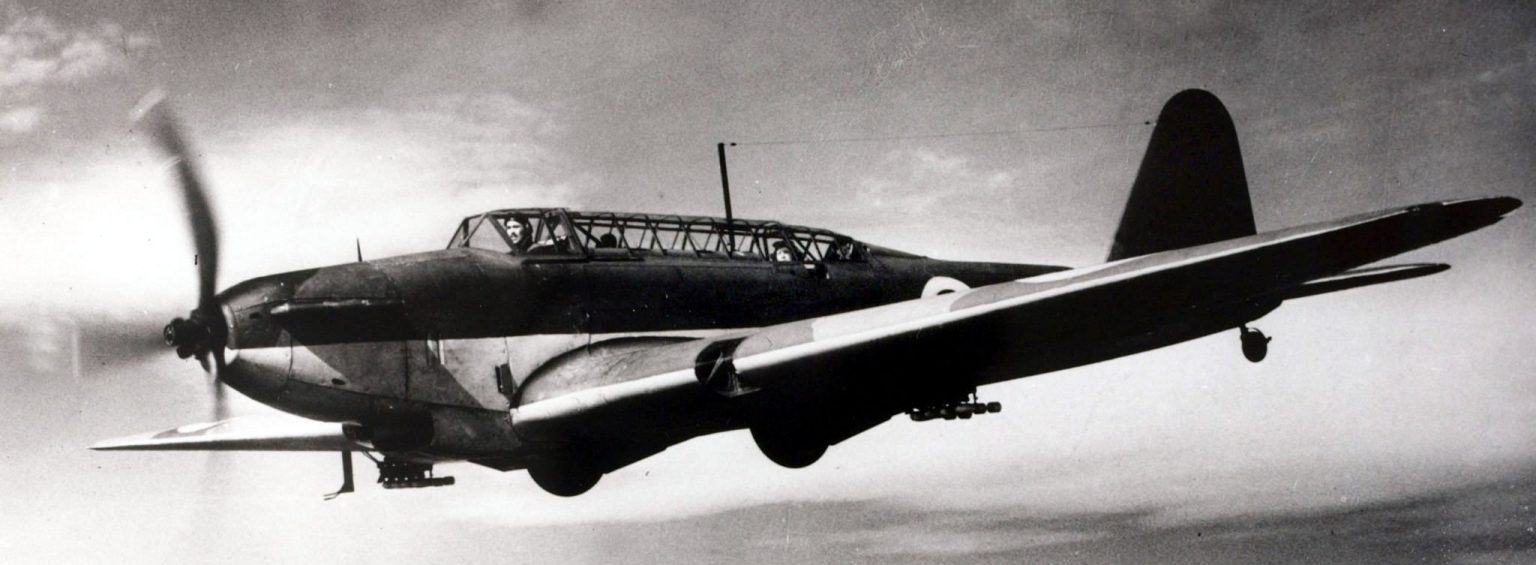
Fairey Battle
Britain’s sleek Merlin-powered light bomber — a leap beyond the biplanes it replaced, then sent to a brutal reckoning over France in 1940.
At a Glance
Fairey Battle: key facts
The Story
The Fairey Battle: the bomber that was modern too soon
When the Fairey Battle first flew in March 1936 it looked like the future. Where the Royal Air Force still filled its bomber squadrons with fabric-covered biplanes, the Battle was a clean, all-metal, stressed-skin monoplane with a retractable undercarriage and an enclosed cockpit — and, crucially, one of the first aircraft anywhere to be built around the new Rolls-Royce Merlin. It could carry a 1,000 lb bomb load a thousand miles at speeds no RAF biplane bomber could approach.
It had been designed to Air Ministry Specification P.27/32, a 1932 requirement for a single-engine day bomber to replace the Hawker Hart and Hind. Fairey’s chief designer Marcel Lobelle produced an elegant answer, and orders followed on a large scale — the Battle became a mainstay of the RAF’s pre-war expansion, with production spread between Fairey’s own factories and a giant Austin Motors “shadow factory” at Longbridge. By early 1939 more than four hundred equipped a dozen home squadrons.
The problem was that aircraft development in the late 1930s moved at a ferocious pace. A design that was advanced in 1936 was obsolescent by 1939. Loaded with three crew, fuel, bombs and the weight of a single engine, the Battle was slow — barely 240–260 mph — and it was defended by just one fixed forward machine gun and a single hand-held gun in the rear cockpit. Against modern monoplane fighters and dense anti-aircraft fire, that was almost no defence at all.
None of that stopped it being sent to war. In September 1939 ten Battle squadrons crossed to France as the Advanced Air Striking Force, the RAF’s forward striking arm. The first months were quiet. Then, on 10 May 1940, the German offensive in the West began, and the Battle squadrons were thrown against advancing columns and river crossings at low level, in daylight, without fighter escort.
What followed was one of the most costly episodes in the RAF’s history. Attacking bridges over the Albert Canal and the Meuse, and the pontoon crossings at Sedan, Battle crews pressed home their attacks into a wall of flak and fighters. Losses were catastrophic — on some raids the majority of the aircraft dispatched did not return. Over the five days from 10 to 14 May 1940, Battles flew 118 sorties and 60 of them ended in destruction: a loss rate of about 51 per cent.
It was over the Albert Canal, on 12 May 1940, that the aircraft earned its place in RAF legend. Five Battles of No. 12 Squadron volunteered to attack the heavily defended bridges near Maastricht. Only one returned. For pressing home the attack in the face of “exceptionally intense” fire, the pilot, Flying Officer Donald Garland, and his observer, Sergeant Thomas Gray, were posthumously awarded the Victoria Cross — the RAF’s first air VCs of the Second World War.
By June 1940 the Battle squadrons of the AASF had been effectively destroyed as a bombing force, and the survivors were withdrawn to Britain. The aircraft was quietly retired from front-line operations. But it did not disappear — instead it began a vast and largely forgotten second career.
Away from the fighting, the Battle turned out to be a superb training machine: docile, roomy, and powered by the same Merlin the new fighters used. Thousands were shipped to Canada and Australia under the British Commonwealth Air Training Plan, where they taught bombing, gunnery and navigation, towed targets, and served as flying test-beds for a whole generation of experimental engines. More Battles ended their days over the Canadian prairies than were ever lost over France.
There is a temptation to blame the aircraft, but the deeper failure was one of ideas. The RAF of the 1930s had convinced itself that a fast modern bomber could fight its way to a target in daylight without escort. The Battle was simply the machine that tested that theory to destruction — and the theory, not the men, was found wanting.
That is the paradox of the Fairey Battle. It is remembered as a failure — too slow, too lightly armed, sent to die in daylight. Yet it was a genuinely modern aeroplane overtaken by an era of impossibly fast change, and the courage of the men who flew it into hopeless odds in May 1940 is beyond question. The Merlin promise it embodied would, in other airframes, go on to win the war.
01The Fairey Battle’s design brief: what Specification P.27/32 actually asked for+
Air Ministry Specification P.27/32 was written in 1932 for a single-engine day bomber to replace the Hawker Hart and Hind biplanes. It demanded a 1,000 lb bomb load carried over roughly 1,000 miles at around 200 mph — a modest target by later standards, but a large step for its day.
Fairey answered with a low-wing all-metal monoplane of unusually clean lines, seating a crew of three in tandem beneath a long glazed canopy. The bombs were carried internally in cells inside the thick wing, a novel touch that kept the fuselage slim. When it flew in March 1936 the prototype comfortably exceeded the specification — which is precisely why so many were ordered.
The catch was hidden in the arithmetic. A single engine had to haul three men, fuel, and a useful bomb load, and there was simply not enough power left over for the speed and defensive armament that the fighters of 1939–40 would demand.
02Why the Fairey Battle mattered: the first of the Merlin generation+
The Battle was one of the very first aircraft designed around the Rolls-Royce Merlin, the V-12 that would later power the Spitfire, Hurricane, Lancaster and Mosquito. Early Battles helped mature the engine in squadron service, ironing out cooling and reliability problems before the fighters that would need it most went to war.
In that sense the Battle was a stepping-stone. The airframe was a dead end, but the powerplant, the stressed-skin construction and the monoplane bomber concept all pointed straight at the aircraft that would win the air war. Judged as a bridge between the biplane era and the Merlin era, the Battle did its job.
Design & Engineering
How the Fairey Battle was designed and built
The Battle looked like tomorrow’s bomber in 1936 — and much of it genuinely was. But a single engine set hard limits that no amount of clean design could overcome.
A clean monoplane airframe
All-metal stressed-skin construction, a retractable undercarriage and an enclosed cockpit made the Battle look a generation ahead of the biplanes it replaced — and it was, in 1936.
Bombs inside the wing
The 1,000 lb load was carried in cells built into the thick inner wing, keeping the fuselage slim. Four 250 lb bombs was the typical fit, with provision for external carriage.
One engine, three men, no margin
The single Merlin gave promising performance empty, but fully loaded the Battle was slow and could spare little for speed or guns — the fatal compromise of a single-engine bomber.
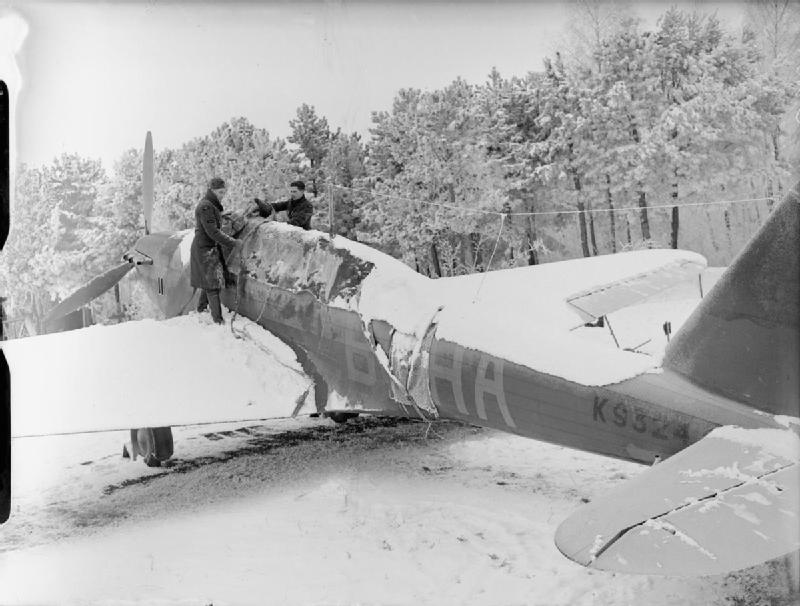
03How the Fairey Battle was built: structure, wing cells and the long glasshouse+
The Battle used a light-alloy monocoque fuselage and a two-spar metal wing, skinned in stressed alloy — thoroughly modern for a 1934–36 design. The long “glasshouse” canopy ran almost the full length of the crew compartment, seating pilot, observer/bomb-aimer and wireless-operator/gunner in tandem.
The distinctive thick inner wing housed the bomb cells, each holding a 250 lb bomb that was cranked down on a swinging arm before release. It was an elegant way to keep the airframe clean, though it limited the size of individual weapons the aircraft could carry.
The main wheels retracted rearwards into the wing, leaving part of the tyre exposed — a period feature that allowed a wheels-up landing with less damage.
04The Fairey Battle’s defensive weakness: one gun forward, one gun back+
Defensive armament was the Battle’s Achilles’ heel. It carried a single fixed .303 Browning firing forward from the starboard wing, and one hand-aimed .303 Vickers K (or Lewis) gun in the rear cockpit for the gunner. That was all.
Against Messerschmitt Bf 109s and Bf 110s, and against massed light flak defending the bridges of 1940, this was almost no protection. From December 1939 some 500 aircraft were fitted with an extra rearward-firing gun in a ventral position beneath the fuselage, but it was a palliative, not a cure.
The lesson — that an unescorted day bomber needed either speed, height, or heavy defensive firepower, and ideally all three — was written into RAF doctrine in the blood of the Battle squadrons.
Full Specifications
Fairey Battle Mk I — specifications
Figures are for a Merlin II–powered Battle Mk I in bomber configuration. Contested values are flagged; treat single numbers as representative.
Baseline: the Battle Mk I as it stood with the Advanced Air Striking Force in France in May 1940 — Rolls-Royce Merlin II, three-blade constant-speed propeller, four 250 lb bombs in the wing cells, and the armour plate that had been retrofitted behind the pilot that spring. Deltas for the Merlin I aircraft of 1937–38, for the sixteen Belgian machines, and for the dual-control trainer and target-tug conversions that consumed most of the production run are in grey. Four warnings before the figures. First, length is published as both 12.85 m (42 ft 1¾ in) and 12.90 m (42 ft 4 in); the gap is measuring convention, not two different aeroplanes. Second, the bomb load appears as both 1,000 lb and 1,500 lb and both are right: 1,000 lb was the internal load in the wing cells, 1,500 lb the maximum with external racks that were rarely fitted operationally. Third, the production total is quoted as 2,185, 2,201 and 2,203 depending on whether the prototype and the sixteen Belgian aircraft are counted, and Fairey and Austin figures are sometimes given for airframes ordered rather than delivered. Fourth, and most importantly, almost every speed figure in print is for a clean aeroplane at rated altitude; the Battle went to war low down with bombs and racks, where it was slower by a wide margin than any published table admits.
Dimensions & weights
- Crew
- 3 — pilot, observer/bomb-aimer, wireless operator/air gunner, under one long continuous canopy Specification P.27/32 asked for two. The third man was added during development, which made the aeroplane heavier without adding a single defensive gun; the whole crew of three was protected by one hand-held rifle-calibre weapon.
- Wingspan
- 16.46 m (54 ft 0 in) Enormous for a single-engine aeroplane: a Hawker Hurricane spanned 12.19 m (40 ft 0 in) and a Bristol Blenheim, on two engines, 17.17 m (56 ft 4 in). The Battle was a twin-sized airframe on one Merlin.
- Length
- 12.90 m (42 ft 4 in) 12.85 m (42 ft 1¾ in) is equally common in print and describes the same airframe measured differently.
- Height
- 4.72 m (15 ft 6 in) tail down
- Wing area
- 39.2 m² (422 sq ft) Sixty-four per cent more wing than a Hurricane, on the same engine. That is the whole aeroplane in one comparison.
- Empty weight
- 3,015 kg (6,647 lb)
- Normal loaded weight
- 4,895 kg (10,792 lb) with four 250 lb bombs and full fuel
- Bomb load
- 454 kg (1,000 lb) internally, in four cells in the wing centre section up to ~680 kg (~1,500 lb) with underwing racks; the racks cost speed the Battle could not spare and were seldom carried by AASF squadrons in 1940
- Wing loading
- 125 kg/m² (25.6 lb/sq ft) at normal loaded weight Low, which is why the Battle was docile, forgiving and popular with pilots. It is also why it was slow: all that wing had to be dragged through the air.
- Power loading
- 4.75 kg/hp (10.5 lb/hp) at normal loaded weight on 1,030 hp The single most damning number on this page. A Spitfire I on the same Merlin sat near 2.7 kg/hp (5.9 lb/hp) and a Bf 109E near 2.4. The Battle was asked to fight in daylight carrying nearly twice the weight per horsepower of the fighters sent to kill it.
- Fuselage
- all-metal light-alloy stressed-skin semi-monocoque, flush-riveted, with a long glasshouse canopy running from the leading edge to well aft of the trailing edge. Beautifully made, modern in every detail, and in 1936 genuinely advanced; the airframe was never the problem
- Wings
- cantilever low wing, all-metal two-spar with split flaps, carrying four bomb cells in the centre section outboard of the fuselage, the fuel, the single fixed Browning in the starboard side and the whole of the undercarriage
- Undercarriage
- hydraulically retracted main legs folding rearwards into the wing, the wheels remaining partly exposed in the retracted position, with a tailwheel a small drag penalty on an aeroplane with no drag to spare, and a deliberate one: a partly exposed wheel gave a better chance in a wheels-up landing.
Performance
- Maximum speed
- 414 km/h (257 mph) at 4,600 m (15,000 ft) 388–406 km/h (241–252 mph) is what service aircraft with racks and aerials actually gave. A Bf 109E-3 did 560 km/h (348 mph).
- Maximum speed, low level and combat-loaded
- ~340 km/h (~210 mph) at sea level with bombs This, not 257 mph, is the number that decided the May 1940 battles. German light flak crews on the Albert Canal were engaging a target moving barely faster than a 1918 fighter.
- Cruising speed
- 322 km/h (200 mph) at 4,600 m (15,000 ft)
- Rate of climb
- 4.7 m/s (925 ft/min) at sea level
- Time to 1,500 m
- 4 min 6 s to 1,500 m (5,000 ft) Adequate for a bomber and irrelevant to the Battle’s war, which was fought between fifty feet and six thousand.
- Service ceiling
- 7,600 m (25,000 ft) A paper figure. No Battle squadron ever had a use for it.
- Range
- 1,600 km (1,000 miles) carrying 1,000 lb of bombs The one specification requirement the Battle met handsomely. It carried a Hawker Hart’s bomb load roughly twice as far and twice as fast, which is exactly what the Air Ministry had asked for in 1932 and exactly the wrong thing to have in 1940.
- Combat radius
- ~400 km (~250 miles) with a war load and a reserve derived from the range figure, not an official number
- Endurance
- ~5 hours at economical cruise which is why the type was so useful later as a target tug and gunnery classroom: it could keep a drogue in the air over a range all morning
- Speed deficit against the opposition
- roughly 150 km/h (about 95 mph) slower than a Bf 109E A Battle could not run, could not climb away, and could not turn tightly enough for long enough with a full bomb load. The only tactic left was to accept the loss rate.
- Defensive cone
- one hand-held gun covering the upper rear quadrant only; nothing forward, nothing beam, nothing below German fighter pilots worked this out within days and attacked from below and astern, where no Battle gunner could reach them. Some AASF aircraft were hastily given a downward-firing gun through a floor hatch; it was a gesture.
Propulsion & systems
- Powerplant
- 1 × Rolls-Royce Merlin, 60° V-12, liquid-cooled, 1,030 hp (768 kW) Merlin I, II, III or V depending on batch and refit; the Merlin V was fitted to later Austin-built aircraft
- A Merlin first
- the Battle was the first production aeroplane designed around the Merlin and the only production type ever to enter service on the Merlin I, with its troublesome ramp cylinder head. The engine that made the Spitfire and the Lancaster went to war for the first time in the aircraft that could make least use of it
- Supercharger
- single-stage, single-speed no second speed and no second stage, so power fell away above about 4,600 m; not that it mattered for an aeroplane that bombed from low level
- Propeller
- two-blade fixed-pitch Fairey-Reed metal on early aircraft; three-blade de Havilland variable-pitch and then constant-speed as standard by 1940 the constant-speed conversion of spring 1940 was worth more to the Battle than to almost any other RAF type, and it was still not enough to matter
- Fuel
- ~1,030 litres (~226 imp gal) in wing tanks published capacities vary and no two references agree; the figure is consistent with the quoted range and cruise but should be read as an estimate
- Cooling
- ventral radiator in a fairing under the wing centre section the Belgian aircraft carried a noticeably longer radiator cowling, the one reliable external identifier of a Belgian-contract Battle
- Bomb gear
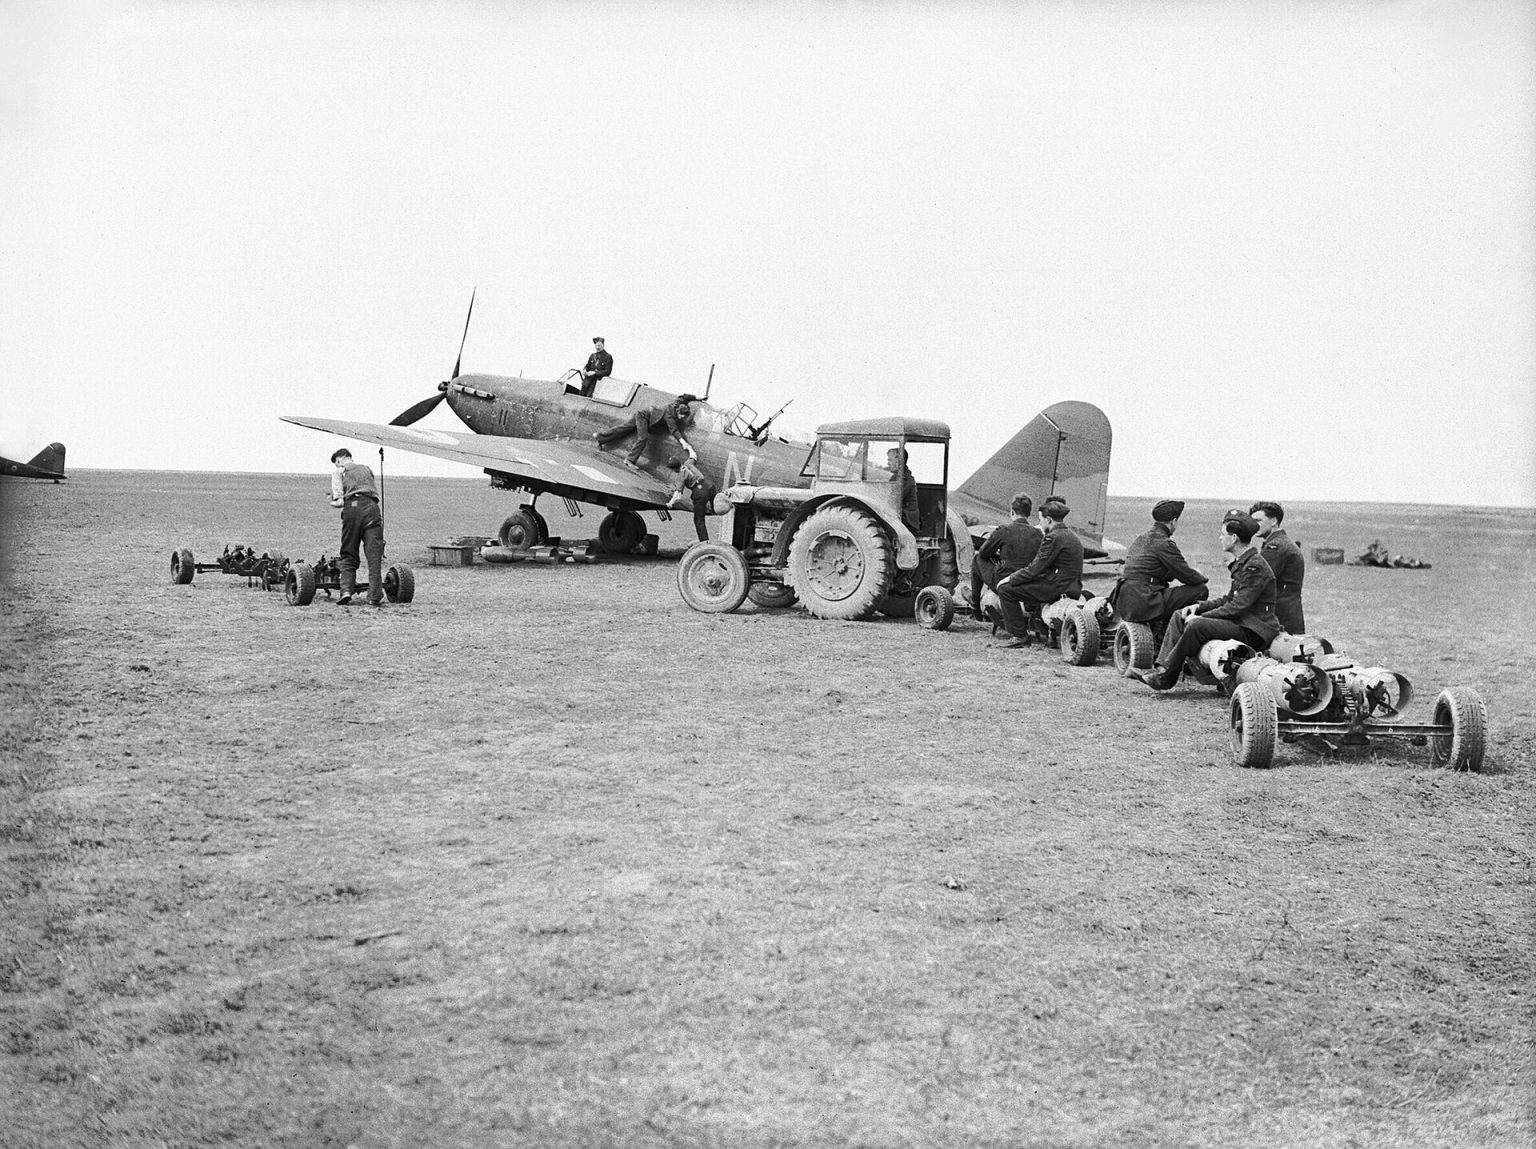
- four cells in the wing centre section with hinged doors and swinging carriers that swung each bomb clear of the airframe before release, so that bombs could be dropped in a dive without striking the aircraft — a genuinely good piece of engineering, fitted to an aeroplane that could not survive long enough to use it
- Protection
- none as designed. Armour plate behind the pilot’s seat and partial fuel tank protection were retrofitted to AASF aircraft in the spring of 1940 too late, too little, and adding weight to an airframe already short of power
- Radio
- TR9 R/T for the pilot and a separate wireless telegraphy set worked by the third crew member, who was also the only gunner — a division of labour that fell apart the moment the aircraft was attacked
- Engine test-bed installations
- the Battle’s size, docility and long nose made it the standard British engine test-bed of 1938–42: Rolls-Royce Exe (first flight 30 November 1938), Napier Dagger, Napier Sabre (K9270 and L5286), Fairey P.16 Prince H-16, and the 24-cylinder Fairey P.24 Monarch in K9370, which first flew on 30 June 1939 driving contra-rotating propellers and was shipped to Wright Field for United States evaluation as Project MX-229 in 1942. One RCAF aircraft, R7439, was re-engined with a Wright R-1820 Cyclone radial as the Battle IIT
- Target-towing equipment
- TT aircraft carried a wind-driven winch, drogue stowage and a separate raised rear cockpit for the winch operator; the bomb cells were plated over or given ballast this, not bombing, is what most Battles actually did for most of their lives
05The Fairey Battle’s performance figures: why the numbers are hedged+
Sources disagree on the Battle’s top speed. The RAF Museum quotes 257 mph (about 413 km/h); many references give a lower figure around 241 mph (388 km/h), reflecting different weights, altitudes and Merlin marks. Either way it was slow for a 1940 combat aircraft.
Weights and ranges vary between the Mk I, Mk II and Mk V, and between bomber and later trainer fits. Where a figure is contested we have given a representative value and flagged it.
06The Fairey Battle’s operating costs: what a WWII light bomber cost to run+
No reliable unit price or cost-per-flight-hour survives for the Battle. It was a wartime military type produced under expansion contracts, and such figures were neither published nor comparable to modern accounting.
Today the question is moot: there is no airworthy Fairey Battle anywhere in the world, so there is no operating cost to quote. The surviving aircraft are static museum exhibits. If you want to actually fly a piston or jet warbird, MiGFlug’s current fleet is the place to look — see migflug.com/flights-prices.
Armament & payload
The Battle carried a Hawker Hart’s bomb load twice as far and defended three men with one hand-held rifle-calibre gun
The offensive armament was competent for 1936 and the defensive armament was indefensible by 1939. Four 250 lb general-purpose bombs sat in cells in the wing centre section on swinging carriers that threw each bomb clear of the propeller disc in a dive, with underwing racks available to take the total to 1,500 lb. Against that, the whole aeroplane carried two rifle-calibre guns: one fixed Browning in the starboard wing that the pilot fired, and one hand-held Vickers K on a pillar mount in the rear cockpit. The Vickers covered the upper rear quadrant and nothing else, so the Luftwaffe attacked from below and behind and the gunner could not so much as see them. The 20 mm flak batteries dug in around the Albert Canal and the Meuse crossings did not need to be clever at all: they simply fired at a large aeroplane crossing at 210 mph in a shallow dive. Two days later, on 14 May, the Advanced Air Striking Force threw 63 Battles and eight Blenheims at the German bridgeheads at Sedan and lost 40 aircraft, 35 of them Battles — a 56 per cent loss rate in an afternoon, and the heaviest proportional loss the RAF has ever suffered on an operation of that size. Fits varied. Some AASF aircraft were locally modified in 1940 with a downward-firing gun through a floor hatch or a second Vickers K, and Belgian, Turkish, Greek and South African aircraft differed in radio and gun-mount detail from the RAF standard.
Gun
- One fixed 7.7 mm (.303 in) Browning machine gun in the starboard wing, outside the propeller disc, fired by the pilot and aimed with a simple ring-and-bead or reflector sight. No synchronisation gear was needed, and none was fitted
- One 7.7 mm (.303 in) Vickers K — the Vickers Gas Operated gun — on a pillar mount in the rear cockpit, fed by 96- or 100-round drums that the gunner changed by hand while standing in a slipstream
- That is the entire gun armament: two rifle-calibre weapons for a three-man aeroplane. A contemporary Heinkel He 111 carried three defensive guns and a Junkers Ju 88 four, in a comparable airframe
- Field modifications in 1940 added a downward and rearward firing gun through a hatch in the floor on some AASF aircraft, and a few carried twin Vickers K on the rear mount. Neither changed a loss rate
- The Battle was designed in 1933–36 against a threat picture of biplane fighters at 250 mph. The gun fit was not an oversight; it was an answer to the wrong question, frozen into two thousand airframes.
Air-to-air
- No guided air-to-air weapon existed anywhere in the Battle’s service life. Air-to-air combat meant the rear gunner’s Vickers K and, once, the pilot’s wing Browning
- The RAF’s first aerial victory of the Second World War was scored from a Battle: on 20 September 1939 Sergeant F. Letchford, gunner in a No. 88 Squadron aircraft on patrol near Aachen, shot down a Messerschmitt Bf 109. It is a real entry in the record and it was never going to be repeated at scale
- The reverse case came on 30 September 1939, when a reconnaissance formation of five Battles of No. 150 Squadron was intercepted near Saarbrücken and effectively wiped out. Daylight reconnaissance by Battles was suspended immediately afterwards, seven months before anyone drew the same conclusion about daylight bombing
- In a fighter fight the Battle had no answer: about 95 mph slower than a Bf 109E, no forward-firing battery worth the name, and a defensive cone that covered roughly a quarter of the sphere
- Claim totals for Battle gunners in 1939–40 are small and poorly corroborated; individual squadron records and post-war compilations do not agree, and this page does not offer a total.
Air-to-surface guided
- None, and none existed. The first operational guided air-to-surface weapons, the German Fritz X and Henschel Hs 293, entered service in 1943, three years after the Battle left front-line operations
- This card is worth keeping precisely because the Battle’s defining problem was one that guided weapons later solved: hitting a bridge without flying down its throat
- On 12 May 1940 the only way to put a 250 lb bomb on a specific span of the Veldwezelt bridge was to dive at it from 6,000 ft into concentrated 20 mm fire. Four of five aircraft did not come back
- Every bridge-busting technique that made such attacks survivable — the toss, the rocket, the stand-off glide bomb, the Tallboy against the pier rather than the deck — arrived after the type had gone
Bombs
- Standard load: four 250 lb general-purpose bombs, one in each of four cells in the wing centre section, on carriers that swung the bomb clear of the airframe before release so that dive attacks were possible
- Internal capacity 1,000 lb (454 kg); maximum 1,500 lb (~680 kg) with underwing racks for two further 250 lb bombs, a fit that cost speed and was rarely used operationally
- Low-level attacks in May 1940 used 11-second delay fuzing so that the aircraft could clear the blast; the delay also gave German engineers time to see where the bombs had lodged
- Training and gunnery aircraft carried light-series carriers for 8.5 lb and 11.5 lb practice bombs, and flash bombs for night bombing exercises — the load most Battles actually dropped, in Manitoba and South Australia rather than over Belgium
- The bomb load itself was never the criticism. Four 250-pounders delivered accurately would have dropped a pontoon bridge; the Battle simply could not survive long enough over the target to deliver them accurately more than once.
Rockets
- None. No Fairey Battle in any air force ever carried an air-to-surface rocket
- The British 3-inch RP-3 rocket projectile reached squadron service in 1942, by which time the Battle had been off operations for eighteen months and was towing drogues on the far side of the world
- The omission matters because the rocket was exactly the weapon the Battle needed: a way of striking a bridge or a column with useful effect from a shallow, fast, single pass rather than a slow dive
- The wing was stressed for bomb cells and a pair of light racks and was never plumbed or wired for rail-launched stores of any kind
Pods & other stores
- No drop tank was ever fitted. The Battle had ample internal fuel and its problem was never range
- Target-tug conversions carried a wind-driven winch on the rear fuselage, drogue stowage boxes, and roughly 6,000 ft of towing cable; the winch operator sat in a raised rear cockpit with a clear view of the target
- Gunnery trainers carried camera guns and, in the RCAF Battle IT, a hydraulically operated Bristol or Fraser-Nash rear turret in place of the open cockpit, so that trainee air gunners learned on a powered mounting
- Night-operating aircraft from September 1940 carried parachute flares for target illumination on anti-invasion raids against the Channel barge concentrations
- No gun pod, camera-reconnaissance installation or external fuel store was ever standardised. The Battle’s second career was defined by what it towed, not by what it carried.
Three typical loadouts
- Albert Canal bridge strike, No. 12 Squadron, 12 May 1940
- Four 250 lb GP bombs in the wing cells with 11-second delay fuzes, full internal fuel, one fixed Browning and one Vickers K with drums. Five aircraft, no fighter escort that reached the target, a dive from about 6,000 ft through massed 20 mm flak onto the Veldwezelt and Vroenhoven bridges. Four shot down, the fifth crash-landed on return. The crew of P2204, coded PH-K, were Flying Officer Donald Garland, Sergeant Thomas Gray and Leading Aircraftman Lawrence Reynolds; all three were killed. Garland, the pilot, and Gray, the observer who navigated the section to the target, were awarded posthumous Victoria Crosses gazetted on 11 June 1940, the first won by the RAF in the Second World War. Reynolds, the wireless operator/air gunner in the same aeroplane on the same sortie, received nothing at all, and the omission has never been satisfactorily explained. He is frequently miscalled Sergeant Reynolds; he was a Leading Aircraftman. The Veldwezelt bridge was hit and a span damaged, and German engineers had a pontoon crossing in place almost immediately.
- Night interdiction and anti-invasion raid, Nos. 12, 103, 142 and 301 Squadrons, September and October 1940
- Four 250 lb GP bombs plus parachute flares, no external racks, full fuel for a Channel-coast sortie against invasion barges at Boulogne, Calais and Ostend. Losses at night ran a small fraction of the daylight rate; the last Battle combat sortie of the war was flown on the night of 15/16 October 1940 by No. 301 (Polish) Squadron against Boulogne.
- Air gunnery and target-towing sortie, No. 2 Bombing and Gunnery School, Port Pirie, South Australia, 1943
- No bombs. A drogue on a long cable behind a Battle TT flying a racetrack over the gulf while trainee gunners in a second aircraft, or on the ground, fired coloured-tipped ammunition at it. This, repeated tens of thousands of times across Canada, Australia, Southern Rhodesia and South Africa, is the Battle’s real contribution to the war.
Sourcing caveat: bomb loads and gun fits are taken from Air Ministry pilot’s notes and standard reference works, but the Battle was modified locally in France in 1940 and again in every training command that received it. Ventral gun installations, twin rear guns, turret conversions and towing equipment were fitted in numbers nobody recorded centrally, so any single description of "the" Battle armament is an average of a fleet that varied considerably.
Variants
Two thousand two hundred Battles were built and the great majority never carried a bomb in anger
The Fairey Battle is usually filed as a failure, and as a combat aeroplane it was one. But the designation covers two almost entirely separate careers, and the second was much the larger. Roughly 2,200 airframes were built: 1,156 by Fairey at Heaton Chapel in Stockport and flight-tested at Ringway, 1,029 by the Austin Motor Company’s shadow factory at Cofton Hackett, Longbridge, and sixteen at Fairey for Belgium. Production ran until September 1940. Fewer than three hundred were ever committed to operations against the enemy, and the type’s entire front-line war lasted thirteen months. It was destroyed inside a week: 13 Battles lost on 10 May 1940, seven of eight on one sortie on 11 May, four of five at the Albert Canal on 12 May, 35 of 63 at Sedan on 14 May, and 99 aircraft gone between 10 and 16 May.
What happened to the rest is the more interesting story. From the summer of 1940 the Battle was pulled out of Bomber Command and shipped wholesale to the Empire Air Training Scheme, where its virtues finally became relevant: docile handling, long endurance, a big roomy fuselage, three crew stations, and a Merlin that instructors and ground crews across the Commonwealth already understood. Over 800 went to Canada and roughly 365 to Australia, where they taught bomb aiming, air gunnery and navigation and towed the drogues those gunners shot at. A Battle that killed nobody at Sedan trained the gunner who flew in a Lancaster in 1944, and there is a case that this was the most useful thing the programme ever did.
The third career is smaller and stranger. The Battle’s long nose, benign behaviour and abundant spare airframes made it the standard British flying test-bed of the late 1930s. Between 1938 and 1942 Battles flew with the Rolls-Royce Exe, the Napier Dagger, the Napier Sabre, the Fairey P.16 Prince and the 24-cylinder Fairey P.24 Monarch with contra-rotating propellers, and one Canadian airframe flew on a Wright Cyclone radial. The aeroplane that could not survive a Bf 109 spent the war carrying the engines that would eventually beat one.
- Fairey Day Bomber, prototype K4303 (1936, 1)
- Built to Specification P.27/32 under Marcel Lobelle, first flown at Hayes on 10 March 1936. All-metal, retractable undercarriage, Merlin power, twice the load and twice the speed of the Hawker Hart it replaced; the name Battle was applied afterwards.
- Battle Mk I, RAF (1937–40, ~2,185)
- The only bomber mark. Merlin I on the earliest aircraft, then Merlin II, III or V; first issued to No. 63 Squadron at RAF Upwood in June 1937, and the mount of the ten Battle squadrons of the Advanced Air Striking Force sent to France on 2 September 1939.
- Battle Mk I, Belgian contract (1938, 16)
- Serials T-58 to T-73, built by Fairey at Stockport and delivered in early 1938, identifiable by a longer radiator cowling. Nine flew the near-suicidal Albert Canal bridge attack of 11 May 1940 from Aalter with eight 50 kg bombs each, escorted by six Gloster Gladiators; seven of the nine were shot down and the Gladiator escort was destroyed. All sixteen were lost or wrecked in May 1940.
- Battle Mk I, Turkish contract (1939–40, ~30)
- Around thirty aircraft, one of them a target tug, for the Turkish Air Force, which reported itself pleased with the type’s handling and manoeuvrability. Turkey never fought with them, which is the only reason Turkish crews remembered the Battle fondly.
- Battle Mk I, other operators (1939–42, several hundred transferred)
- South Africa took a large batch of ex-RAF aircraft and flew them operationally in East Africa; the Royal Hellenic Air Force received about a dozen and used them from late 1940 until April 1941; the Irish Air Corps interned one ex-RAF target tug in 1942. Poland had ordered 100 before the war and received none — a shipment of 22 was turned back at Istanbul in September 1939.
- Battle Trainer, or Battle (T) (1940–41, several hundred, new-build and converted)
- Dual-control pilot trainer with the continuous canopy replaced by two separate cockpits and cut-down decking between them, giving the instructor a usable view. Built new by Austin and also converted from bombers; the split between the two is not consistently recorded.
- Battle IT (from 1941–42, RCAF conversions)
- Gunnery trainer with a powered turret in place of the open rear cockpit, so that trainee air gunners learned on the mounting they would meet in a Halifax or a Wellington rather than on a hand-held Vickers K.
- Battle IIT (1942, 1)
- A single RCAF airframe, R7439, re-engined with a Wright R-1820 Cyclone radial as a hedge against a Merlin spares shortage in North America. It flew, it was not repeated, and it is the only radial-engined Battle.
- Battle TT and Battle TT Mk I (1940, 100 conversions and 226 new-build)
- Target tugs with a wind-driven winch, drogue stowage and a raised rear cockpit for the winch operator. The TT Mk I, built by Austin, was the last production version of the Battle and the last one off the line in September 1940 — a bomber programme that ended by building tugs.
- Engine test-beds (1938–42, a handful of airframes)
- Rolls-Royce Exe, first flown 30 November 1938 and abandoned when Ernest Hives concentrated Rolls-Royce on the Merlin and Griffon; Napier Dagger; Napier Sabre in K9270 and L5286; Fairey P.16 Prince; and the 2,240 hp Fairey P.24 Monarch in K9370, first flown 30 June 1939 with contra-rotating propellers and shipped to Wright Field for United States evaluation as Project MX-229 in 1942, where it flew some 250 hours before the project lapsed.
Survivors, precisely. Four original Fairey Battle airframes survive and none is airworthy; no Battle has flown since the late 1940s. L5343 is displayed by the RAF Museum, recovered from Iceland in 1972 where it had force-landed in 1940 and restored as a composite using substantial parts of a second Icelandic wreck, L5340, which is why the aircraft is catalogued as L5343/L5340. R7384, a Battle IT built as a pilot trainer in 1940 and converted to a turret gunnery trainer in 1942, is on static display at the Canada Aviation and Space Museum in Ottawa and is the most complete original example. N2188, recovered from a tidal swamp near Port Pirie in South Australia, is under long-term restoration at the South Australian Aviation Museum. R3950, a Battle TT.I from the former Strathallan collection, is displayed at the Royal Museum of the Armed Forces and Military History in Brussels in Belgian markings as T-70 — the airframe is genuine but it is an ex-RAF target tug, not a Belgian aircraft, and no original Belgian Battle survives. There are no flying reproductions and no known reproduction airframes of any kind; the remaining relics are wreck fragments in Iceland and in Australian and Canadian store.
Reference Data
Fairey Battle: origins, production and service
The essential record — who built it, to what requirement, and how its service life unfolded.
| Type | Single-engine, three-seat light day bomber |
|---|---|
| Manufacturer | Fairey Aviation (Hayes; Heaton Chapel, Stockport) |
| Also built by | Austin Motors shadow factory, Longbridge |
| Design specification | Air Ministry P.27/32 (1932) |
| Designer | Marcel Lobelle |
| Prototype first flight | 10 March 1936 (K4303) |
| Service entry | 1937, No. 63 Squadron RAF |
| Engine marks | Rolls-Royce Merlin I, II, III and V |
| Number built | ~2,184 (commonly cited as ~2,200) |
| Main operators | RAF, RAAF, RCAF, SAAF, Belgium, Turkey |
| Primary theatre | Battle of France, May–June 1940 |
| Second career | Trainer, target tug, engine test-bed |
| Final retirement | 1949 |
Powerplant & Heritage
Engines, names and the Fairey Battle’s place in history
07The Rolls-Royce Merlin in the Fairey Battle: proving the war-winning engine+
The Battle was among the first production aircraft to fly with the Rolls-Royce Merlin, and early marks — the Merlin I, II and III — matured in Battle squadrons before the Spitfire and Hurricane fleets grew large. Cooling, boost and reliability issues were worked through on the type.
It is a genuine irony that the same engine that could not make the Battle fast enough as a bomber would, in lighter fighters and in the Lancaster and Mosquito, become the most important British aero-engine of the war.
Battles later served as flying test-beds for a remarkable range of engines, including the Napier Sabre, Bristol Taurus and Hercules, the Fairey P.24 Monarch and the Rolls-Royce Exe — the docile airframe made an ideal test mule.
08Where the name comes from: the Fairey Battle in a line of Fairey warplanes+
Fairey Aviation had a long line of military aircraft — the Fox, the Hendon, the Swordfish, the Firefly. The Battle continued a tradition of clean, competent designs, and its production contracts were central to Fairey’s expansion in the late 1930s.
The ‘shadow factory’ scheme, under which Austin Motors built Battles at Longbridge alongside Fairey’s own lines, was part of Britain’s pre-war rearmament — a template for the vast wartime production that followed.
09The Fairey Battle’s armament in detail: bombs, guns and the ventral position+
The standard offensive load was four 250 lb bombs carried in the wing cells, for 1,000 lb total, with light-series carriers under the wings for smaller bombs or flares. Bomb-aiming was done by the observer lying prone in the nose.
Defence rested on the fixed forward .303 and the gunner’s single rearward .303. The much-quoted December 1939 modification adding a downward-firing ventral gun to some 500 aircraft was an attempt to cover the blind spot below and behind — the very quarter from which fighters attacked.
Variants
Every major Fairey Battle version
One basic airframe served in many guises — front-line bomber, then trainer, target tug and flying laboratory.
| Variant | Role | Engine | Notes |
|---|---|---|---|
| Battle Mk I | Light bomber | Merlin I | Initial production; the France 1940 aircraft |
| Battle Mk II / III / V | Light bomber | Merlin II / III / V | Successive engine marks; bulk of production |
| Battle (T) | Dual-control trainer | Merlin | Conversion with second cockpit for pilot training |
| Battle Trainer | Bombing/gunnery trainer | Merlin | Large numbers under the Commonwealth Air Training Plan |
| Battle Target Tug (TT) | Target tug | Merlin | Winch and target gear for gunnery practice |
| Battle test-bed | Engine trials | Various | Sabre, Taurus, Hercules, P.24 Monarch, Exe test aircraft |
Notable Operations
The Fairey Battle in action — and afterwards
Advanced Air Striking Force, France (1939–40). Ten Battle squadrons formed the RAF’s forward striking arm, based on French airfields from September 1939. After a quiet winter they were flung into the German offensive of 10 May 1940.
The Albert Canal bridges, 12 May 1940. Five Battles of No. 12 Squadron attacked the Veldwezelt and Vroenhoven crossings near Maastricht. Only one returned; Flying Officer Donald Garland and Sergeant Thomas Gray won the RAF’s first air VCs of the war.
Sedan, 14 May 1940. A maximum-effort attack on the German pontoon bridges at Sedan cost the light-bomber force appallingly — the blackest single day for the Battle squadrons, with loss rates that no air force could sustain.
The East African Campaign (1940–41). South African Air Force Battles flew ground-attack and reconnaissance sorties against Italian forces in Abyssinia and Somaliland — a very different, and more survivable, war.
The Commonwealth Air Training Plan (1940–45). Away from combat, thousands of Battles taught bombing, gunnery and navigation over Canada and Australia, and towed targets for air gunners — the aircraft’s largest and longest role.
In Context
The Fairey Battle among its contemporaries
The Battle’s single engine put it at a permanent disadvantage against the twins that defined the next generation of bombers.
| Aircraft | First flight | Top speed | Bomb load | Notes |
|---|---|---|---|---|
| Fairey Battle (UK) | 1936 | ~413 km/h | 1,000 lb | Single-engine day bomber; heavy losses 1940 |
| Bristol Blenheim IV (UK) | 1935 | ~428 km/h | 1,000 lb | Twin-engine; also mauled in daylight 1940 |
| Junkers Ju 87 Stuka (Germany) | 1935 | ~390 km/h | ~1,100 lb | Dive-bomber; deadly with air superiority |
| Junkers Ju 88 A (Germany) | 1936 | ~470 km/h | ~2,400 lb | Fast, versatile twin; far more capable |
| Vickers Wellington (UK) | 1936 | ~378 km/h | ~4,500 lb | Twin-engine night bomber; the future of Bomber Command |
Figures are representative and vary by mark, load and source; use for broad comparison only.
Timeline
The Fairey Battle: a service history
Stories & Eyewitnesses
The Fairey Battle in the words of its war
The Albert Canal — the RAF’s first air VCs
Five Battles of No. 12 Squadron volunteered to attack the bridges near Maastricht. Only one came back.
Read the full story
The Veldwezelt and Vroenhoven bridges over the Albert Canal were vital to the German advance and ringed with flak. When volunteers were called for, every crew stepped forward; five aircraft went in.
Flying Officer Donald Garland led the attack on the Veldwezelt bridge and pressed it home through “exceptionally intense” fire. He and his observer, Sergeant Thomas Gray, were posthumously awarded the Victoria Cross — the RAF’s first air VCs of the war. The bridge was damaged but soon repaired.
Leading Aircraftman Lawrence Reynolds
Two men in Garland’s crew received the Victoria Cross. The third was never decorated.
Read the full story
Garland’s aircraft carried a third crewman, the wireless-operator/air-gunner Leading Aircraftman Lawrence Reynolds. He died with the others when the Battle was lost over the Albert Canal.
Only the pilot and the observer received the VC; Reynolds was not decorated at all. Many since have regarded this as an injustice — the whole crew shared the same courage and the same fate. It is worth remembering his name alongside Garland’s and Gray’s.
Sedan: the blackest day
The maximum-effort attack on the Sedan bridges is remembered as the costliest operation the Battle squadrons flew.
Read the full story
As German armour poured across the Meuse at Sedan, the RAF and Armee de l’Air threw everything at the pontoon bridges. Battles and Blenheims attacked in daylight, in relays, into a storm of flak and fighters.
Loss rates for the light bombers that day were among the highest ever recorded for an operation of that size. Across 10–14 May, Battles flew 118 sorties and lost about 60 aircraft — roughly 51 per cent.
First blood over France
The Battle’s vulnerability was clear from the opening weeks of the war.
Read the full story
On 20 September 1939 a Battle gunner shot down a Bf 109 — an early RAF air-combat success. But the reckoning came ten days later.
On 30 September, a formation of No. 150 Squadron Battles on reconnaissance was bounced by Messerschmitts and all but wiped out. The message — that an unescorted Battle could not survive against modern fighters — was already written.
Why crews volunteered for hopeless odds
Time and again in May 1940, Battle crews flew into attacks they knew they might not survive.
Read the full story
By mid-May the aircrew understood exactly what they faced. Bridges had to be dropped to slow the German advance, and the Battle was what the AASF had. Volunteers came forward anyway.
That combination — obsolete aircraft, vital targets, and men willing to press home regardless — is what gives the Battle’s story its particular, painful weight in RAF history.
One gun against the sky
The man in the rear cockpit had a single hand-held machine gun to defend the whole aircraft.
Read the full story
The wireless-operator/air-gunner sat facing aft with one .303 Vickers K gun on a mounting. Against cannon-armed fighters attacking from below and behind, it was almost symbolic.
The December 1939 ventral gun modification — a second gun firing downward, fitted to around 500 aircraft — tried to cover that deadly blind spot, but it could not change the fundamental arithmetic of a slow, lightly armed day bomber.
Modern in 1936, outclassed by 1939
The Battle is the classic example of how fast military aviation moved in the late 1930s.
Read the full story
When it first flew, the Battle outclassed the biplanes around it. Three years later the fighters it would face were 100 mph faster and heavily armed.
Nothing about the airframe was badly made; it was simply overtaken. The single engine that limited it was the same Merlin that, in a lighter fighter, was winning the Battle of Britain that same summer.
The Belgian Fairey Battles
Belgium bought and assembled Battles of its own — and lost them in the same May days.
Read the full story
Under a licence arrangement, Avions Fairey at Gosselies built and assembled Battles for the Belgian air arm. They flew alongside the RAF’s against the German advance in May 1940.
Like their RAF counterparts, the Belgian Battles were thrown against bridges and columns at low level, and suffered heavily. The type’s weaknesses were nationality-blind.
The SAAF’s Battles at war
In Africa, far from the fighters of France, the Battle had a longer and more useful combat life.
Read the full story
South African Air Force Battles flew ground-attack and reconnaissance sorties against Italian forces during the East African Campaign of 1940–41, over Abyssinia and Somaliland.
With little modern fighter opposition, the Battle could actually do the job it was designed for — carrying bombs to a target and coming home — a reminder that the aircraft’s failure in France was as much about circumstance as design.
A second life over the prairies
More Battles served as trainers in Canada than were ever lost in combat.
Read the full story
Under the British Commonwealth Air Training Plan, hundreds of Battles were shipped to Canada to train the bomb-aimers and air gunners of the coming bomber offensive.
Flying from prairie airfields, dedicated bombing and gunnery schools ran Battles hard for years. It was unglamorous, vital work — and it defined the aircraft’s real numerical legacy.
The Fairey Battle as flying laboratory
The docile airframe made an ideal test-bed for experimental engines.
Read the full story
Individual Battles were fitted with a startling variety of powerplants for trials: the Napier Sabre, the Bristol Taurus and Hercules, the Fairey P.24 Monarch and the Rolls-Royce Exe among them.
A steady, forgiving aeroplane that could carry a big engine and instrumentation was exactly what engine-development programmes needed. Some of the war’s most important engines first flew behind a Battle.
The Battle that came home from Iceland
The RAF Museum’s Fairey Battle spent decades in an Icelandic bog before restoration.
Read the full story
L5343, an Austin-built Battle, force-landed in Iceland and lay in the wilderness for years. It was recovered in 1972 and slowly restored, the work completed by 1990.
It is now the centrepiece Fairey Battle at the RAF Museum in London — one of very few substantially complete originals anywhere, and the reason the type can still be seen at all.
The first bomber over Germany
A Fairey Battle flew one of the RAF’s earliest offensive sorties of the war.
Read the full story
In the opening days of the war, Battles of the AASF flew armed reconnaissance and the first tentative strikes along the frontier, among the RAF’s earliest offensive operations of the conflict.
It was a strange, quiet prelude — leaflet drops and cautious patrols — before the sudden, shattering violence of May 1940. For a few months the Battle was, briefly, the RAF’s sword in France.
The engine that outlived the airframe
The Battle helped prove the Merlin — which then went on to win the war in other aircraft.
Read the full story
Early Merlins matured in Battle squadrons, their cooling and reliability problems worked through in daily service before the fighter fleets grew large.
It is one of aviation’s neat ironies: the powerplant that could not make the Battle fast enough became, in the Spitfire and Lancaster, the most celebrated British aero-engine of all. The Battle was its schoolroom.
The export Battles
Not every Fairey Battle wore RAF roundels — some were sold abroad before the war.
Read the full story
Turkey bought around 29 Battles as light bombers in the late 1930s, and small numbers reached Greece and other operators. The type was never a major export success.
By the time buyers might have wanted more, the Battle was already obsolescent, and the war swallowed British production for the RAF’s own needs. The export story is a minor footnote — but a real one.
Ten thousand hours over Canada
The Battle’s real numerical legacy was written in the training skies of the Commonwealth.
Read the full story
At bombing and gunnery schools across Canada, Battles flew relentlessly, teaching bomb-aimers and gunners the trade they would practise over Germany. Accidents were not rare; training was dangerous work.
More Battles were worn out or lost in these schools than were ever destroyed in combat — a quiet statistic that says everything about where the aircraft actually spent its life.
How the crews remembered it
To the men who flew and fought it, the Battle was neither a joke nor a legend.
Read the full story
Aircrew respected its flying qualities and cursed its vulnerability. Those who survived France carried the memory of friends lost in hopeless attacks; those who instructed on it in Canada remembered a steady, honest aeroplane.
The Battle earns its place in history not for what it achieved as a bomber, but for the courage it demanded and the foundation it laid — in engines, in aircrew, and in hard-won doctrine.
The Fairey Battle in Depth
The Fairey Battle: the questions people actually ask
Six deeper dives into the aircraft, its catastrophe over France, and the long career that followed.
10The Battle of France, day by day: how the Fairey Battle squadrons were destroyed+
When the German offensive opened on 10 May 1940, the Advanced Air Striking Force sent its Battles against advancing columns at low level. Losses began at once: of the aircraft dispatched on the first day, a large proportion failed to return.
On 11 May, eight Battles of No. 218 Squadron attacked columns near Luxembourg; seven were lost. On 12 May came the Albert Canal raid and the first VCs. On 14 May, the Sedan attacks brought the heaviest losses of all.
By the time the surviving squadrons were pulled back to Britain in June, the AASF’s Battle force had been effectively annihilated as an offensive weapon in a matter of weeks. The 51 per cent loss rate over 10–14 May tells the story in a single figure.
11The first air Victoria Crosses of WWII: Garland, Gray — and Reynolds+
On 12 May 1940, No. 12 Squadron was ordered to break the Albert Canal bridges near Maastricht. Volunteers flew five Battles into the defences; only one returned.
Flying Officer Donald Edward Garland, the pilot who led the attack on the Veldwezelt bridge, and his observer Sergeant Thomas Gray, received posthumous Victoria Crosses — the first awarded to the RAF for aerial operations in the Second World War.
Their third crew member, Leading Aircraftman Lawrence Reynolds, the wireless-operator/air-gunner, was killed with them but received no decoration. The omission has troubled historians ever since; the courage was shared by all three.
12Why the Fairey Battle failed as a bomber — and why that isn’t the whole story+
The Battle failed as a day bomber for structural reasons that no crew could overcome: too slow to evade fighters, too lightly armed to fight them off, and sent unescorted against defended targets in clear daylight. In that role, against a first-class enemy, it was a death-trap.
But the failure was as much doctrinal as technical. The RAF of 1940 had not yet learned the lessons — escort, height, mass, night — that would later make Bomber Command effective. The Battle paid the tuition.
And judged over its whole career, the aircraft was far from useless: it matured the Merlin, trained a generation of Commonwealth aircrew, and tested the engines of the future. History remembers the disaster; the ledger is more balanced.
13The Fairey Battle’s huge second career: trainer, target tug and test-bed+
After France, the Battle found its real vocation. As a trainer it was ideal: stable, roomy, and powered by the Merlin that crews would meet again in operational aircraft. Thousands went to the Commonwealth Air Training Plan schools.
As a target tug it let air gunners practise against a real moving target streamed on a cable. As an engine test-bed it flew some of the most important powerplants of the war. None of this made headlines, but it kept hundreds of airframes usefully employed for years.
It is a genuine possibility that more Fairey Battles were lost in training accidents over Canada and Australia than were ever shot down over Europe — a striking measure of where the type actually spent its life.
14How many Fairey Battles were built? Reading the production figures+
The most commonly cited total is around 2,184 aircraft, built by Fairey Aviation and by Austin Motors under the shadow-factory scheme. Some references round this to ‘about 2,200’.
Small variations reflect different ways of counting prototypes, export machines and cancelled contracts. The precise figure is less important than the scale: this was a mass-produced aircraft central to Britain’s pre-war expansion, which is exactly why so many were available to be squandered in 1940 and then repurposed as trainers.
15The Fairey Battle’s export and Allied operators+
Beyond the RAF, Battles served with the air forces of the Commonwealth — Australia, Canada, South Africa and New Zealand — largely in training roles. Belgium operated and assembled its own, and lost them in May 1940.
Export sales before the war included around 29 to Turkey, and small numbers reached Greece and other operators. A couple that force-landed in neutral Ireland were impressed into the Irish Air Corps.
It was never a great export success — the type was obsolescent almost as soon as it entered service — but its operators spanned three continents by the time its career ended.
16The Advanced Air Striking Force: what the AASF was and why it was in France+
The Advanced Air Striking Force was the RAF’s forward bomber component sent to France at the outbreak of war in September 1939. Built around ten squadrons of Fairey Battles, plus some Blenheims, it was intended to strike into Germany from bases close to the front.
In practice the ‘Phoney War’ kept it largely idle through the winter of 1939–40, flying reconnaissance and leaflet sorties while everyone waited. Its aircraft, tactics and crews were untested against a serious enemy.
When the storm broke on 10 May 1940, the AASF was thrown straight into the crisis of the campaign — and its Battles, designed for a different kind of war, were consumed in a matter of days trying to stem an armoured breakthrough they had never been equipped to stop.
17Sedan, 14 May 1940: the RAF’s costliest day+
By 13–14 May 1940 German armour had forced the Meuse at Sedan and was pouring pontoon bridges across. If those bridges could be broken, the breakthrough might be contained — so the Allied air forces were ordered to destroy them at all costs.
The result was a massacre of the attacking bombers. Wave after wave of Battles and Blenheims went in at low level against concentrated flak and standing patrols of fighters. The loss rate among the light bombers that afternoon was the highest the RAF suffered in any comparable operation of the war.
The bridges stayed up. The sacrifice bought little, and it confirmed in the harshest possible way that the unescorted daylight light bomber had no future against a first-class air defence.
18The light-bomber crisis of 1940: Battle, Blenheim and a doctrine that failed+
The Battle’s destruction was part of a wider collapse of the pre-war light-bomber concept. The RAF had believed that fast, modern bombers could operate by day, defend themselves, and hit precision targets without escort. May 1940 demolished that belief.
The Blenheim squadrons suffered alongside the Battles, and for the same reasons. Neither aircraft was fundamentally badly designed; both were asked to do something that no aircraft of their class could do against modern fighters and radar-directed flak.
Out of that failure came the ideas that shaped the rest of the air war: attack by night, concentrate in bomber streams, and — when attacking by day — provide long-range fighter escort. The Battle crews paid the tuition fee for lessons the whole force would need.
19From first flight to front line: the Fairey Battle’s rapid rise and fall+
Few combat aircraft have risen and fallen so quickly. The Battle first flew in March 1936 as one of the most advanced bombers in the world, entered service in 1937, and equipped a large part of the RAF’s expanding bomber force by 1939.
Yet by the time it went to war it was already obsolescent, and within weeks of real combat in May 1940 it had been withdrawn from front-line operations. Its entire career as a first-line bomber lasted barely three years, and its combat career effectively a few weeks.
That compression is the whole story of late-1930s aviation in miniature: a design cycle so fast that an aeroplane could be state-of-the-art and outdated inside a single production run.
More on the Fairey Battle
The Fairey Battle: legacy, survivors and myth
20The Fairey Battle vs the Bristol Blenheim: two ways to fail in daylight+
The Battle and the twin-engine Bristol Blenheim were the RAF’s two principal light bombers in 1940, and both suffered terribly in daylight against fighters and flak. The Blenheim was a little faster and had two engines; the Battle carried a similar load on one.
Neither was survivable in the unescorted daylight role, and both were eventually pushed to night operations, other theatres, or training. Comparing them is less about which was ‘better’ than about a shared doctrinal mistake that the RAF corrected at heavy cost.
21The Fairey Battle and the birth of RAF night and escorted bombing+
The destruction of the Battle and Blenheim squadrons in daylight in 1940 was one of the hard lessons that pushed Bomber Command towards night operations, and later towards long-range fighter escort by day.
In that sense the Battle’s sacrifice was not wholly wasted: the tactics that would eventually devastate German industry were shaped in part by understanding, in blood, why the daylight light-bomber concept had failed.
22Fairey Battle survivors: how many, and where they came from+
Complete Fairey Battles are rare. Most surviving airframes were recovered decades later from bogs, lakes and wilderness — places where a forced landing had preserved them — and painstakingly restored for museums.
The RAF Museum’s L5343 came out of Iceland; a Canadian example was recovered from a lake; others in Belgium and Australia are composites or restorations. There is no airworthy Battle, and given the type’s rarity there is unlikely ever to be one flying.
23What it was like to fly the Fairey Battle+
By the accounts of those who flew it, the Battle was pleasant and forgiving to handle — stable, with no vicious habits, which is exactly why it made such a good trainer. It was the combat performance, not the flying qualities, that let its crews down.
In the training role over Canada, that docility was a virtue: it let inexperienced pupils concentrate on bombing and gunnery rather than fighting the aeroplane. The tragedy of 1940 was asking a gentle machine to do a killer’s job.
24The Fairey Battle in memory: monuments, museums and the VC story+
The Battle is remembered above all through the Albert Canal VCs. Garland and Gray are commemorated in RAF history and in the collections of the RAF Museum, and the raid remains one of the defining acts of courage in the RAF’s story.
The surviving aircraft — especially the RAF Museum’s L5343 — let visitors stand in front of the real thing and grasp both how modern it looked in 1936 and how cruelly the war outpaced it.
25The Fairey Battle and the Commonwealth Air Training Plan+
The British Commonwealth Air Training Plan — known in Australia as the Empire Air Training Scheme — was one of the great industrial and educational efforts of the war, training tens of thousands of aircrew far from the fighting. The Fairey Battle was one of its workhorses.
Roughly 739 Battles went to Canada and more than 600 to Australia, with others in South Africa and New Zealand. They served at bombing and gunnery schools, teaching the men who would later crew the heavy bombers of the offensive against Germany.
For the Battle it was redemption of a kind. The very qualities that made it a poor combat aircraft — steadiness, docility, a roomy cockpit and a familiar Merlin — made it an excellent teacher. Its greatest contribution to victory came in the classroom of the sky, not over the bridges of France.
26Belgium’s Fairey Battles and Avions Fairey+
Fairey had a Belgian subsidiary, Avions Fairey, at Gosselies, and Belgium acquired Battles both directly and through local assembly. When Germany invaded on 10 May 1940, the Belgian air arm committed its Battles to the desperate defence.
Like the RAF’s, the Belgian Battles were sent against bridges and columns at low level, and like the RAF’s they were cut down. The aircraft’s weaknesses were the same regardless of the roundel it wore.
The Belgian connection is one reason a Fairey Battle survives in a Belgian museum today — a tangible link to that brief, costly national defence.
27The Fairey Battle in the East African Campaign+
Far from the fighters of Western Europe, the Fairey Battle had a longer and more useful war in Africa. South African Air Force Battles operated during the East African Campaign of 1940–41 against Italian forces in Abyssinia and Italian Somaliland.
There, with little modern fighter opposition and against dispersed ground targets, the Battle could do exactly what it had been designed for: carry a useful bomb load to a target and return. Its combat record in Africa is far happier than its record over France.
It is a useful corrective to the ‘death-trap’ caricature. The Battle was not incapable; it was simply mismatched to the intensity of the fighting in May 1940. Change the theatre, and the same aircraft became a serviceable light bomber.
28A fair verdict on the Fairey Battle+
A balanced assessment has to hold two things at once. The Battle was a failure in its intended role: obsolescent on arrival, catastrophically vulnerable in daylight, and responsible for some of the RAF’s worst loss rates. That cannot be softened.
But it was also a genuinely modern design overtaken by an unrepeatable era of change, a proving ground for the Merlin, and the trainer of a generation of Commonwealth aircrew. Its crews’ courage in 1940 produced the RAF’s first air VCs of the war.
The fairest verdict is neither ‘triumph’ nor ‘disaster’ but ‘the right aeroplane a few years too late’ — and a reminder of how quickly technological advantage can evaporate.
Equipment & Operations
The Fairey Battle: crew, kit and how it was flown
29The Fairey Battle’s crew stations: pilot, observer, gunner+
The three-man crew sat in tandem under the long canopy. The pilot flew from the front; behind him the observer doubled as navigator and bomb-aimer, moving forward to lie prone in the nose over the target; at the rear the wireless-operator/air-gunner worked the radio and manned the defensive gun.
It was a logical layout for a day bomber, but it concentrated three lives in one thin fuselage with a single engine ahead of them — and, in 1940, almost no way to defend themselves once the fighters arrived.
30Bombing and navigation gear in the Fairey Battle+
The observer used a course-setting bomb sight from the prone position in the nose, releasing the four 250 lb bombs from the wing cells. Navigation was by map, compass and dead reckoning, with the wireless set for communication and homing.
For its training career the Battle carried practice bombs and camera guns, and the target-tug versions added a winch and drogue gear — the same airframe re-roled from delivering bombs to teaching others how to aim them.
31How the Fairey Battle was maintained and operated in the field+
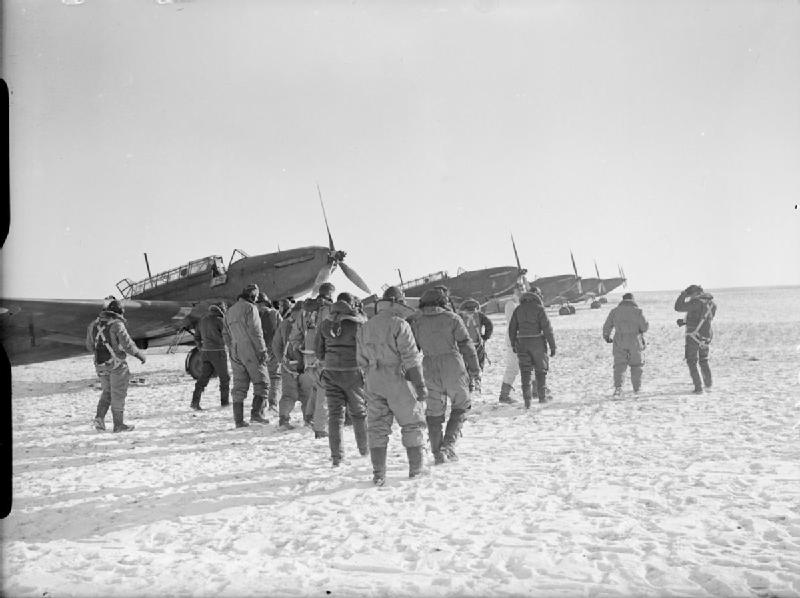
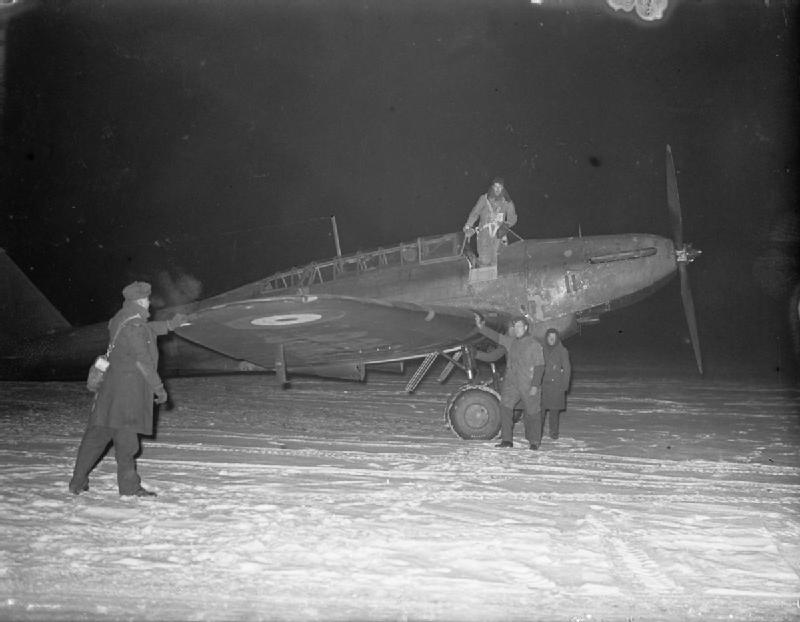
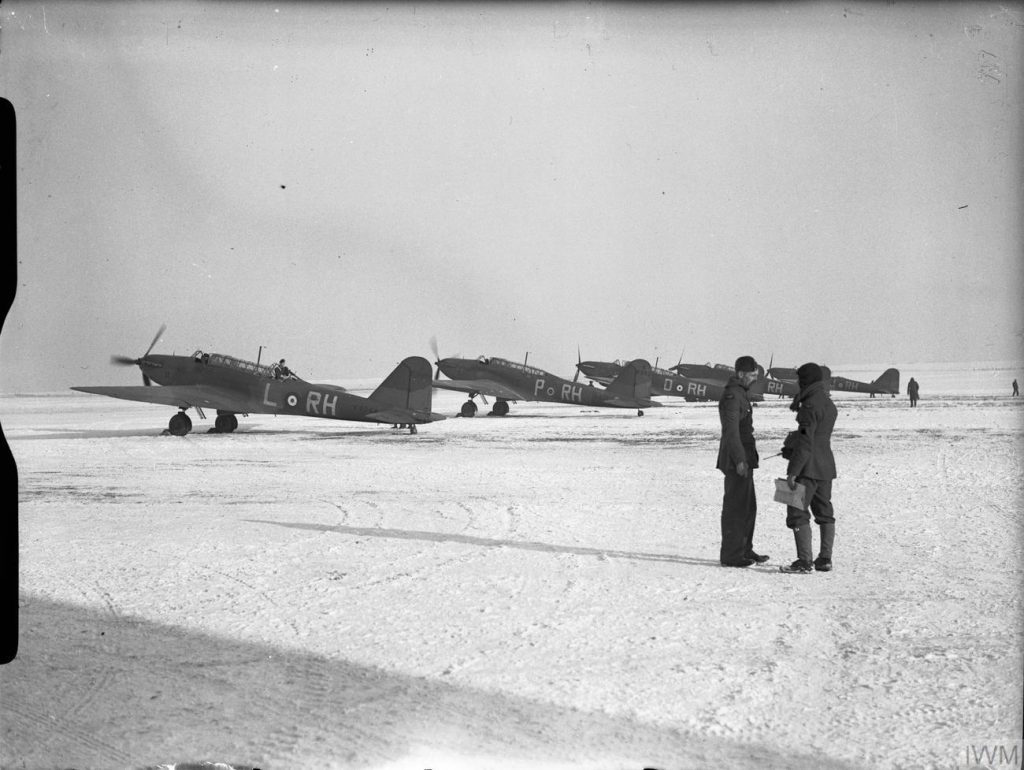
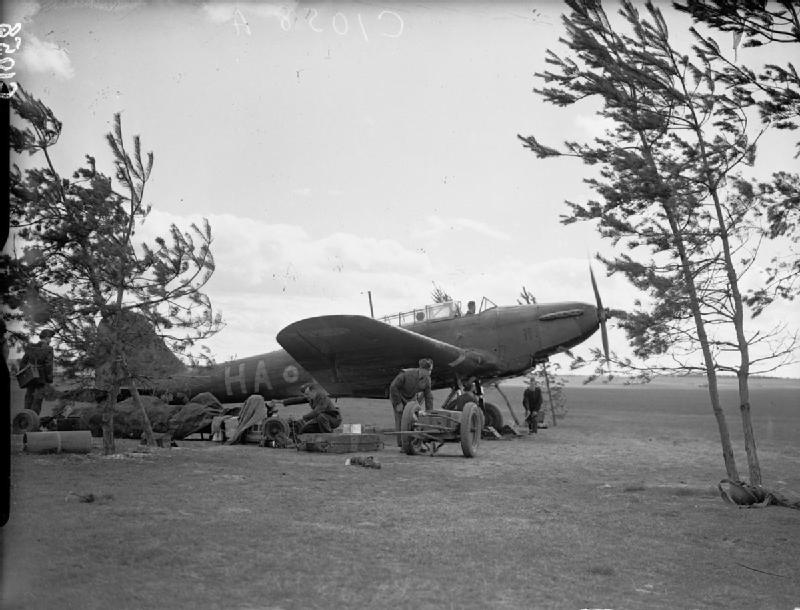
In France the AASF operated its Battles from dispersed grass airfields, with the usual challenges of servicing liquid-cooled engines in the open through the hard winter of 1939–40. Ground crews worked to keep serviceability up as operations began.
In the training schools of Canada and Australia the Battle flew intensively, day after day, and the maintenance organisation built around it — spares, engine overhaul, repair — was part of the vast industrial effort that the Commonwealth Air Training Plan represented.
32The Fairey Battle’s markings and camouflage+
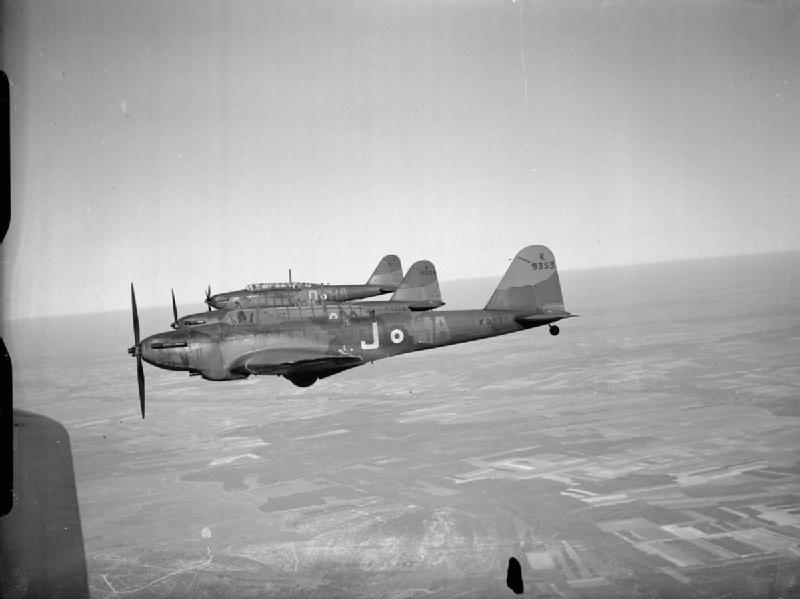
Front-line Battles wore the standard RAF day-bomber scheme of the period — dark green and dark earth upper surfaces over black or light undersides, with squadron codes and roundels. The France aircraft carried the markings of the AASF squadrons.
Trainer and target-tug Battles later appeared in training-yellow and high-visibility target-tug stripes, a visual signal of just how far the type had travelled from its brief front-line career.
33Inside the Fairey Battle’s cockpit and controls+
The pilot sat high under the forward canopy with a good view over the long nose, on conventional controls for the period: a spade grip or wheel, throttle and pitch levers to his left, and the flight instruments and engine gauges on the panel ahead.
Behind and below, the observer had a chart table and bomb-aiming position, sliding forward to lie prone in the glazed nose to sight the target. The wireless-operator/gunner at the rear worked the radio and swung the defensive gun on its mounting.
It was a comfortable, well-laid-out office by 1937 standards — part of why the aircraft made such a good trainer once its combat days were over.
34Servicing the Merlin in the field, 1939–40+
Keeping liquid-cooled Merlins running from muddy French airfields through the hard winter of 1939–40 was demanding work. Ground crews contended with cold-starting, coolant and oil systems, and the constant need for inspection that early Merlins required.
The AASF’s serviceability depended on these fitters and riggers as much as on the aircrew. When operations exploded into life in May 1940, the maintenance organisation had to turn round battle-damaged aircraft under impossible pressure.
The experience fed directly into the far larger engine-support effort that the Merlin would demand as it went into Spitfires, Hurricanes and Lancasters by the tens of thousands.
35The Fairey Battle as a target tug+
One of the Battle’s most numerous second-career roles was target towing. Fitted with a winch and drogue gear, it streamed a fabric target on a long cable so that trainee air gunners — and anti-aircraft crews — could practise against a realistic moving mark.
It was unglamorous but essential: every competent gunner in a Commonwealth bomber crew had, in effect, been taught to shoot with the help of aircraft like the Battle. Target-tug Battles often wore bright stripes to reduce the risk of being fired on directly.
The role kept airframes useful long after they had any combat value, and it is a large part of why so many Battles survived into the mid- and late 1940s.
36Radios, cameras and training equipment+
In its training guise the Battle carried the gear of the schoolroom: practice bomb carriers, camera guns to score gunnery without live ammunition, and radios for communication and homing exercises.
Bombing schools used it to teach the whole sequence of an attack — navigation to the target, the run-in, the sight picture and the release — in a forgiving aircraft where a pupil’s mistake was rarely fatal.
This equipment fit, humble as it was, is what actually defined the majority of Battles in service: not bomb-carriers of war but patient teaching machines.
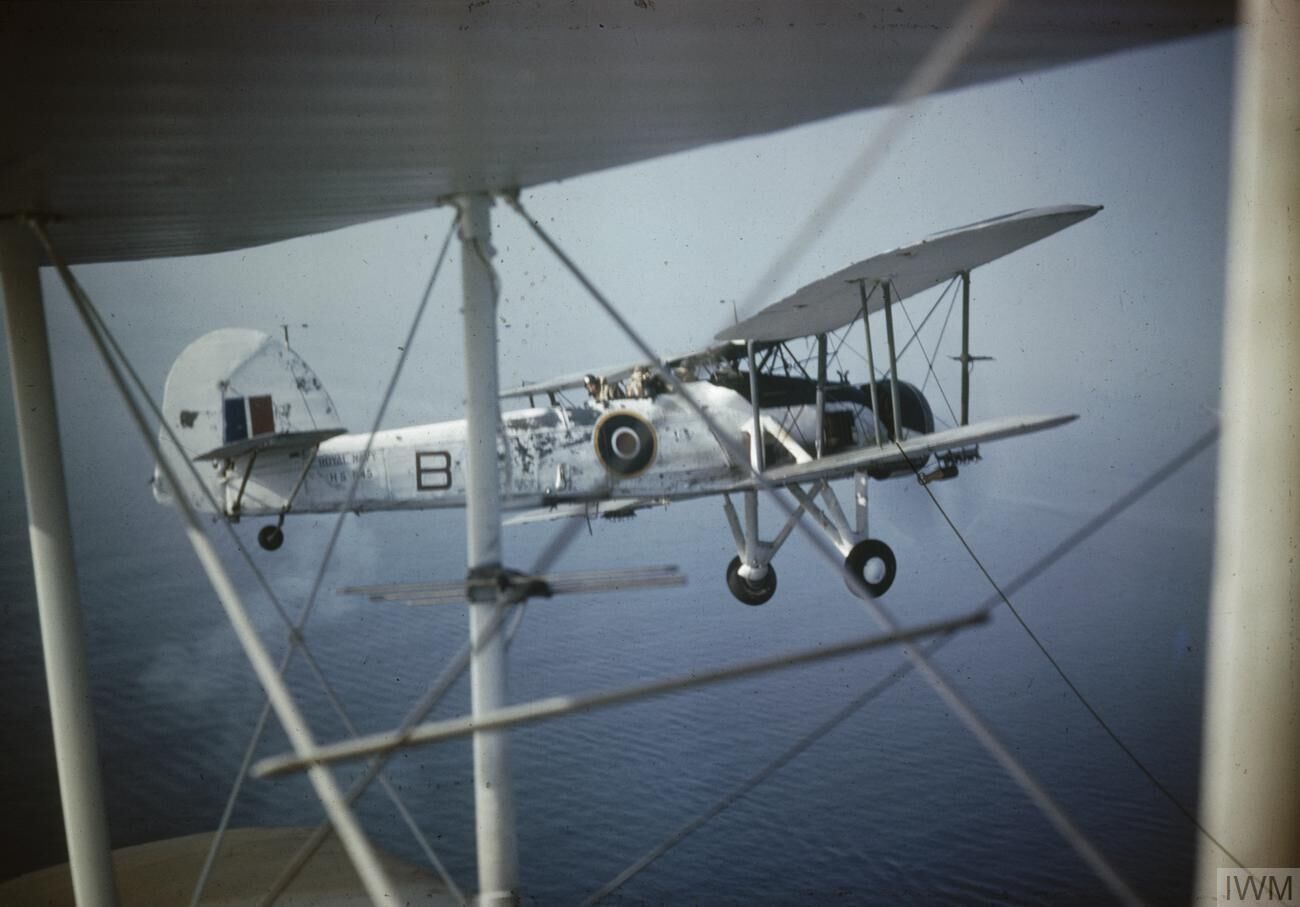
Photo Gallery
The Fairey Battle in photographs
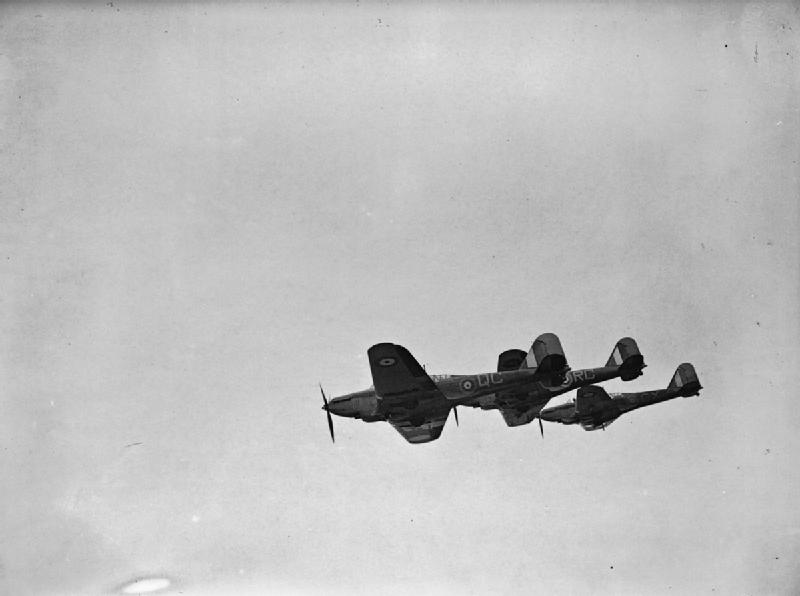
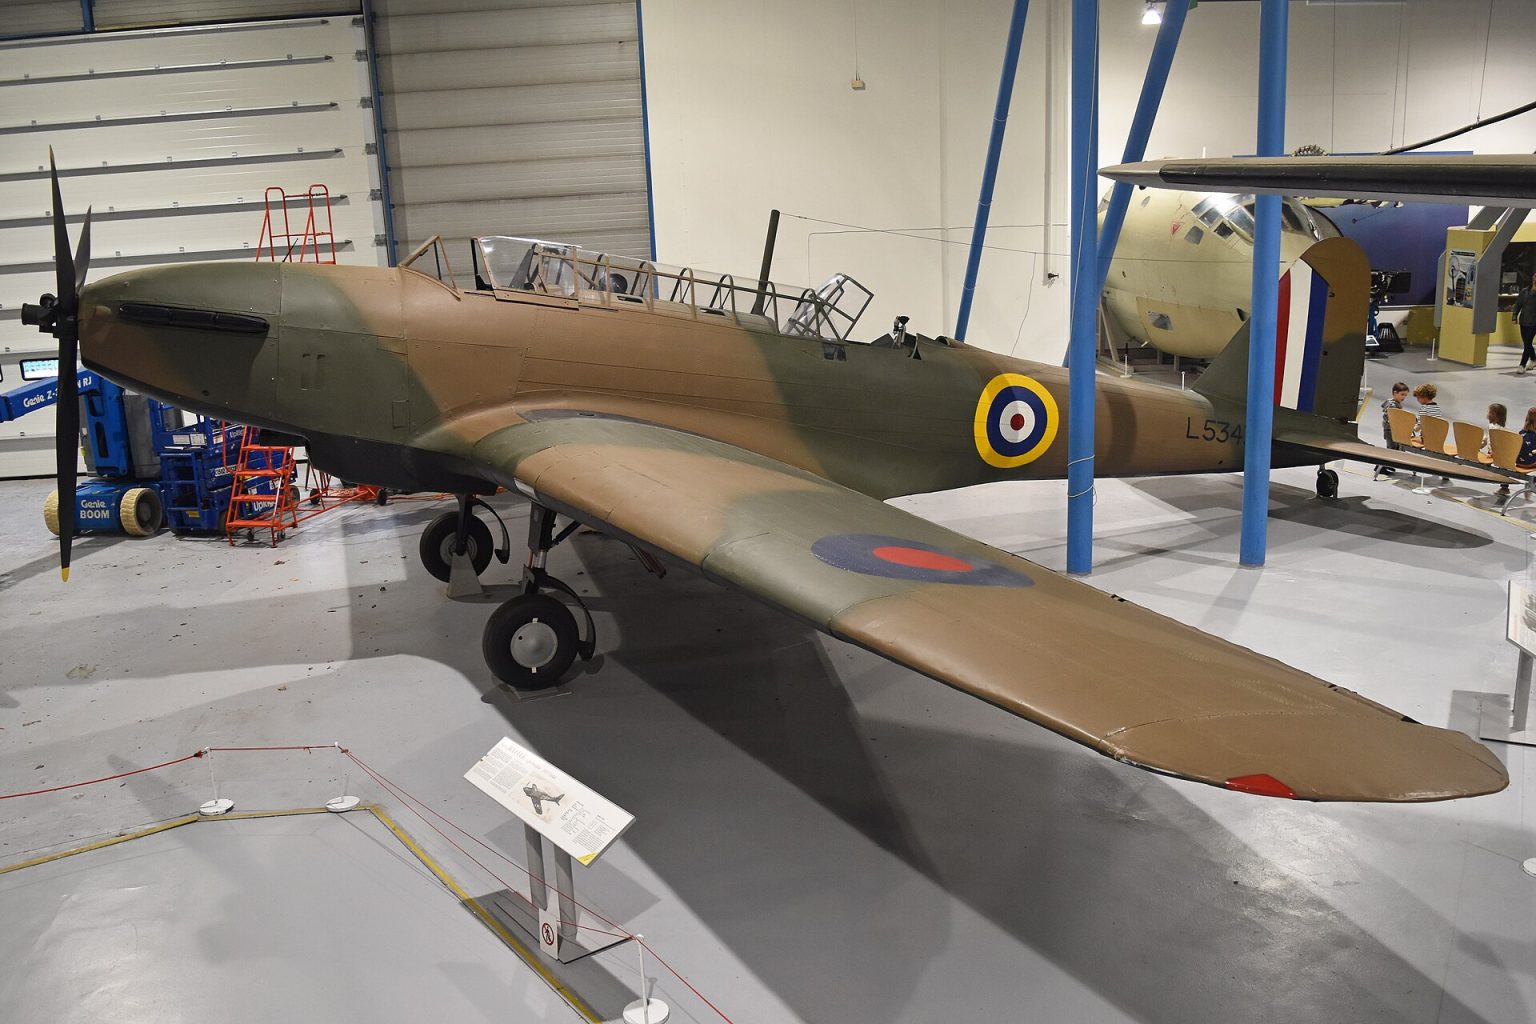
All images public domain or Creative Commons; credits as noted. Wikimedia Commons is the image source.
On Film
The Fairey Battle on film
A well-researched history of the Battle from Rex’s Hangar, one of the most respected aircraft-history channels on YouTube.
“The Fairey Battle — Light Bomber, Heavy Losses” by Rex’s Hangar (~160,000 views). An authoritative, source-based account of the aircraft’s design, its catastrophe over France, and its later career.
Operations Map
Where the Fairey Battle operated
Britain designed and built it; the RAF and the Commonwealth flew it in war and in training; a handful survive in museums. Toggle the categories to explore.
Combat Record
The Fairey Battle’s war in numbers
The Battle’s combat record is inseparable from its losses. Flown unescorted in daylight against modern flak and fighters, the AASF squadrons suffered some of the worst loss rates in RAF history — and, on the same days, produced some of its greatest courage.
Where to See One
Surviving Fairey Battles
Complete survivors are rare; several were recovered from bogs and lakes decades after the war and restored for museums. None is airworthy.
RAF Museum, London
L5343. Austin-built, recovered from Iceland in 1972 and restored by 1990. One of very few substantially complete originals, and the definitive Battle to see in Britain.
Canada
Recovered example. A Fairey Battle pulled from a Canadian lake and restored is displayed in Canada — a reminder of the type’s vast training role under the Commonwealth Air Training Plan.
Belgium & Australia
Museum airframes. Restored and composite Battles are held in Belgian and Australian collections, reflecting the aircraft’s Belgian service and its RAAF training career. There is no airworthy example anywhere.
Museum holdings and restoration status change over time; check with the museum before travelling.
In the End
The Fairey Battle: how history should remember it
The Fairey Battle is easy to caricature as a failure — too slow, too lightly armed, sent to die in daylight. But that judgement flattens a more interesting truth.
It was a genuinely modern aeroplane, one of the first to carry the Merlin, overtaken by the fastest three years of change in aviation history. Its crews flew it into hopeless odds over the bridges of Belgium and France with a courage that produced the RAF’s first air VCs of the war — and its long, unglamorous second life trained the aircrew and tested the engines that helped win it.
Remember the disaster, by all means. But remember Garland, Gray and Reynolds too, and the thousands who learned their trade behind a Battle’s Merlin over the Canadian prairies. The aircraft deserves both halves of its story.
Questions & Answers
Fairey Battle: your questions answered
Can I fly in a Fairey Battle?
No. There is no airworthy Fairey Battle anywhere in the world. The type was retired in 1949, and the few survivors are static museum exhibits — most recovered from bogs or lakes and restored for display. MiGFlug does not offer Fairey Battle flights, because no flyable example exists.
However, you can fly in genuine military aircraft today — from jet fighters to warbirds — with MiGFlug. See the current fleet and prices at migflug.com/flights-prices.
Why did the Fairey Battle suffer such heavy losses in 1940?
It was flown in daylight, at low level, without fighter escort, against defended bridges and columns — the worst possible use of a slow, lightly armed single-engine bomber. With one fixed forward gun and one hand-held rear gun, it could neither outrun nor fight off modern Messerschmitts, and it was easy prey for concentrated flak. Over 10–14 May 1940, about 51 per cent of the Battles sent out were destroyed.
What were the RAF’s first air Victoria Crosses of the Second World War?
They were won by a Fairey Battle crew. On 12 May 1940, No. 12 Squadron attacked the Albert Canal bridges near Maastricht; only one of five aircraft returned. Flying Officer Donald Garland (pilot) and Sergeant Thomas Gray (observer) received posthumous Victoria Crosses — the RAF’s first air VCs of the war. Their third crew member, Leading Aircraftman Lawrence Reynolds, was killed but not decorated, which many regard as an injustice.
How many Fairey Battles were built?
Around 2,184 — commonly rounded to about 2,200 — built by Fairey Aviation and by Austin Motors under the shadow-factory scheme. Figures vary slightly between sources depending on how prototypes and export machines are counted.
What happened to the Fairey Battle after the Battle of France?
It was withdrawn from front-line bombing in late 1940 and began a huge second career as a trainer, target tug and engine test-bed. Thousands served in Canada and Australia under the British Commonwealth Air Training Plan, teaching bombing, gunnery and navigation. Quite possibly more Battles were lost in training accidents than in combat.
What engine did the Fairey Battle use?
The Rolls-Royce Merlin — the same V-12 that powered the Spitfire, Hurricane, Lancaster and Mosquito. The Battle was one of the first aircraft built around it, and helped mature the engine in squadron service. Battle marks used the Merlin I, II, III and V.
Where can I see a Fairey Battle today?
The best-known complete example is L5343 at the RAF Museum in London, recovered from Iceland in 1972 and restored. Other restored or composite airframes are held in Belgium, Canada and Australia. None is airworthy.
Was the Fairey Battle a bad aircraft?
Not exactly — it was a good design used in the wrong way at the wrong moment. When it flew in 1936 it was among the most advanced bombers in the world. But aviation moved so fast that by 1940 it was too slow and too lightly armed to survive unescorted daylight attacks against modern fighters and flak. In other theatres and roles — East Africa, and above all training — the same aircraft performed perfectly well.
How fast was the Fairey Battle and how far could it fly?
Top speed is usually given as around 413 km/h (257 mph) at altitude, though many sources quote a lower figure near 388 km/h (241 mph); it varied with weight, altitude and Merlin mark. Range was roughly 1,450 km (900 miles) and the service ceiling about 7,600 m (25,000 ft). Those were respectable numbers in 1936 but well short of what a 1940 combat aircraft needed.
You can’t fly the Bristol Blenheim. These, you can.
The Blenheim is a museum piece and a memorial — but the thrill of flying a real military aircraft is not out of reach. MiGFlug puts you in the cockpit of genuine jets, from trainers to supersonic fighters.
Fighter Jet Flights
Take the controls of a real ex-military jet with an experienced fighter pilot.
See flights & pricesL-39 Albatros
The classic jet trainer — aerobatics and low-level fun, in several countries.
See flights & pricesRelated Aircraft
More from the Aircraft Museum
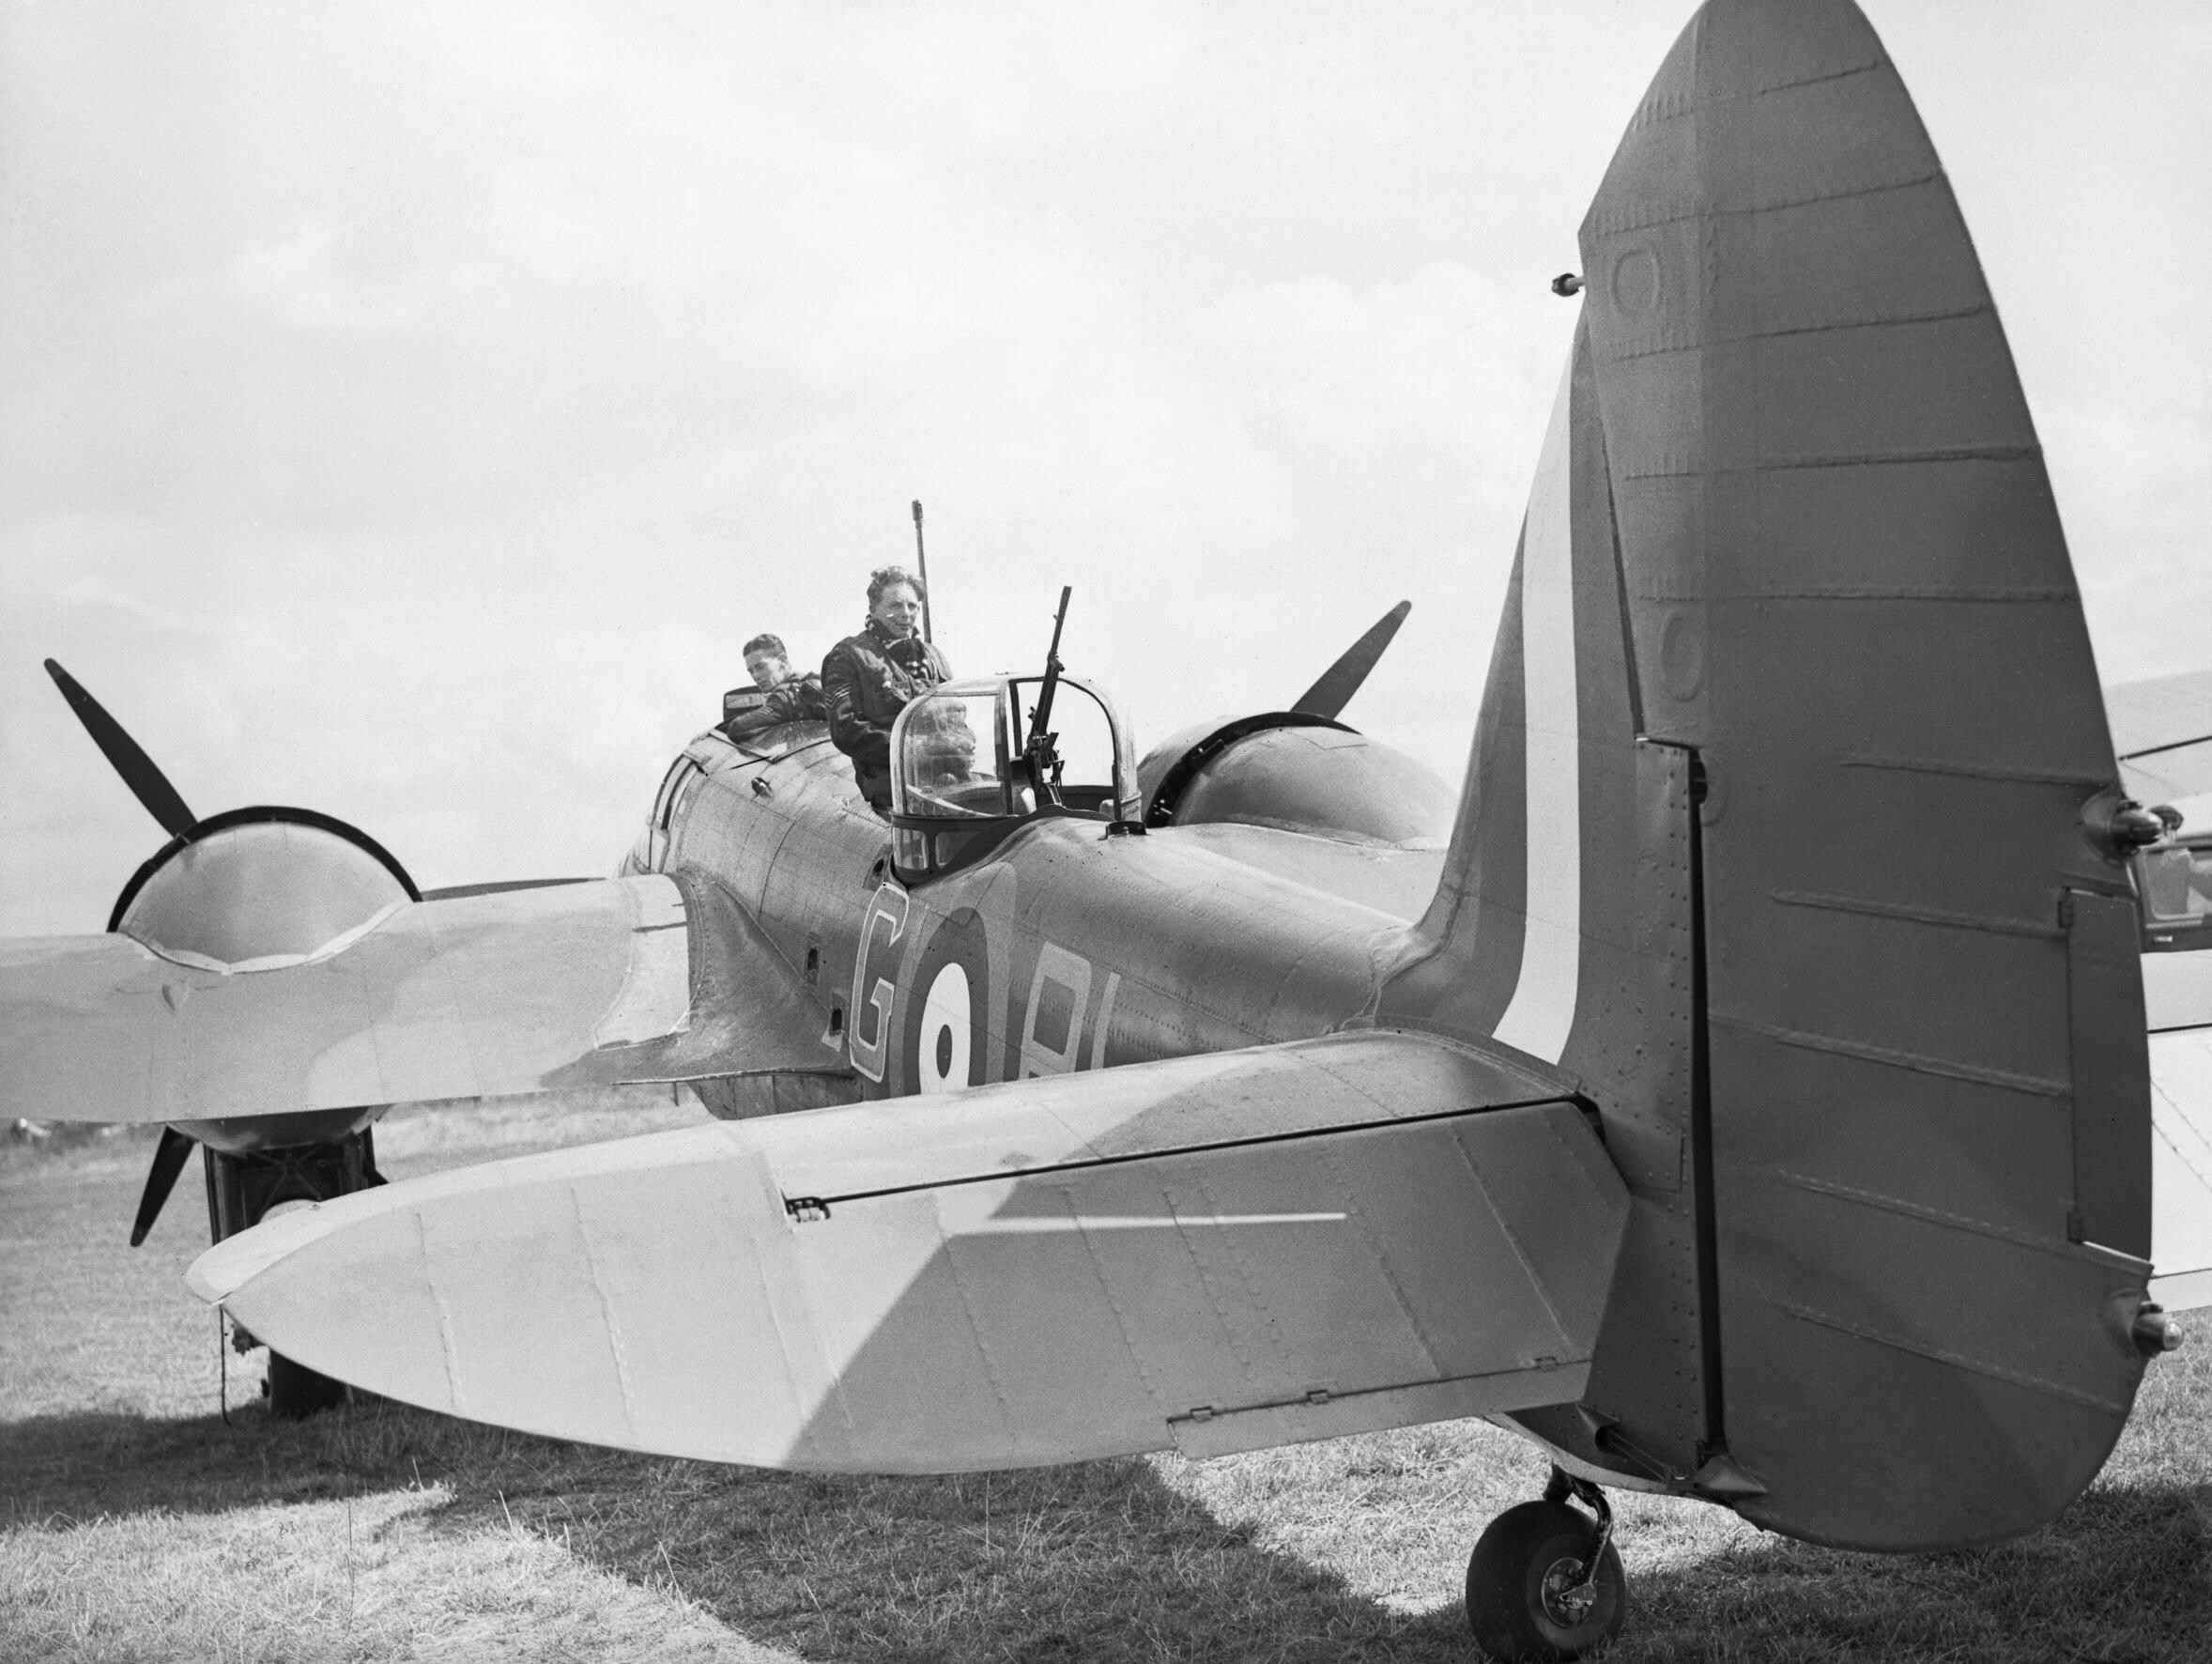
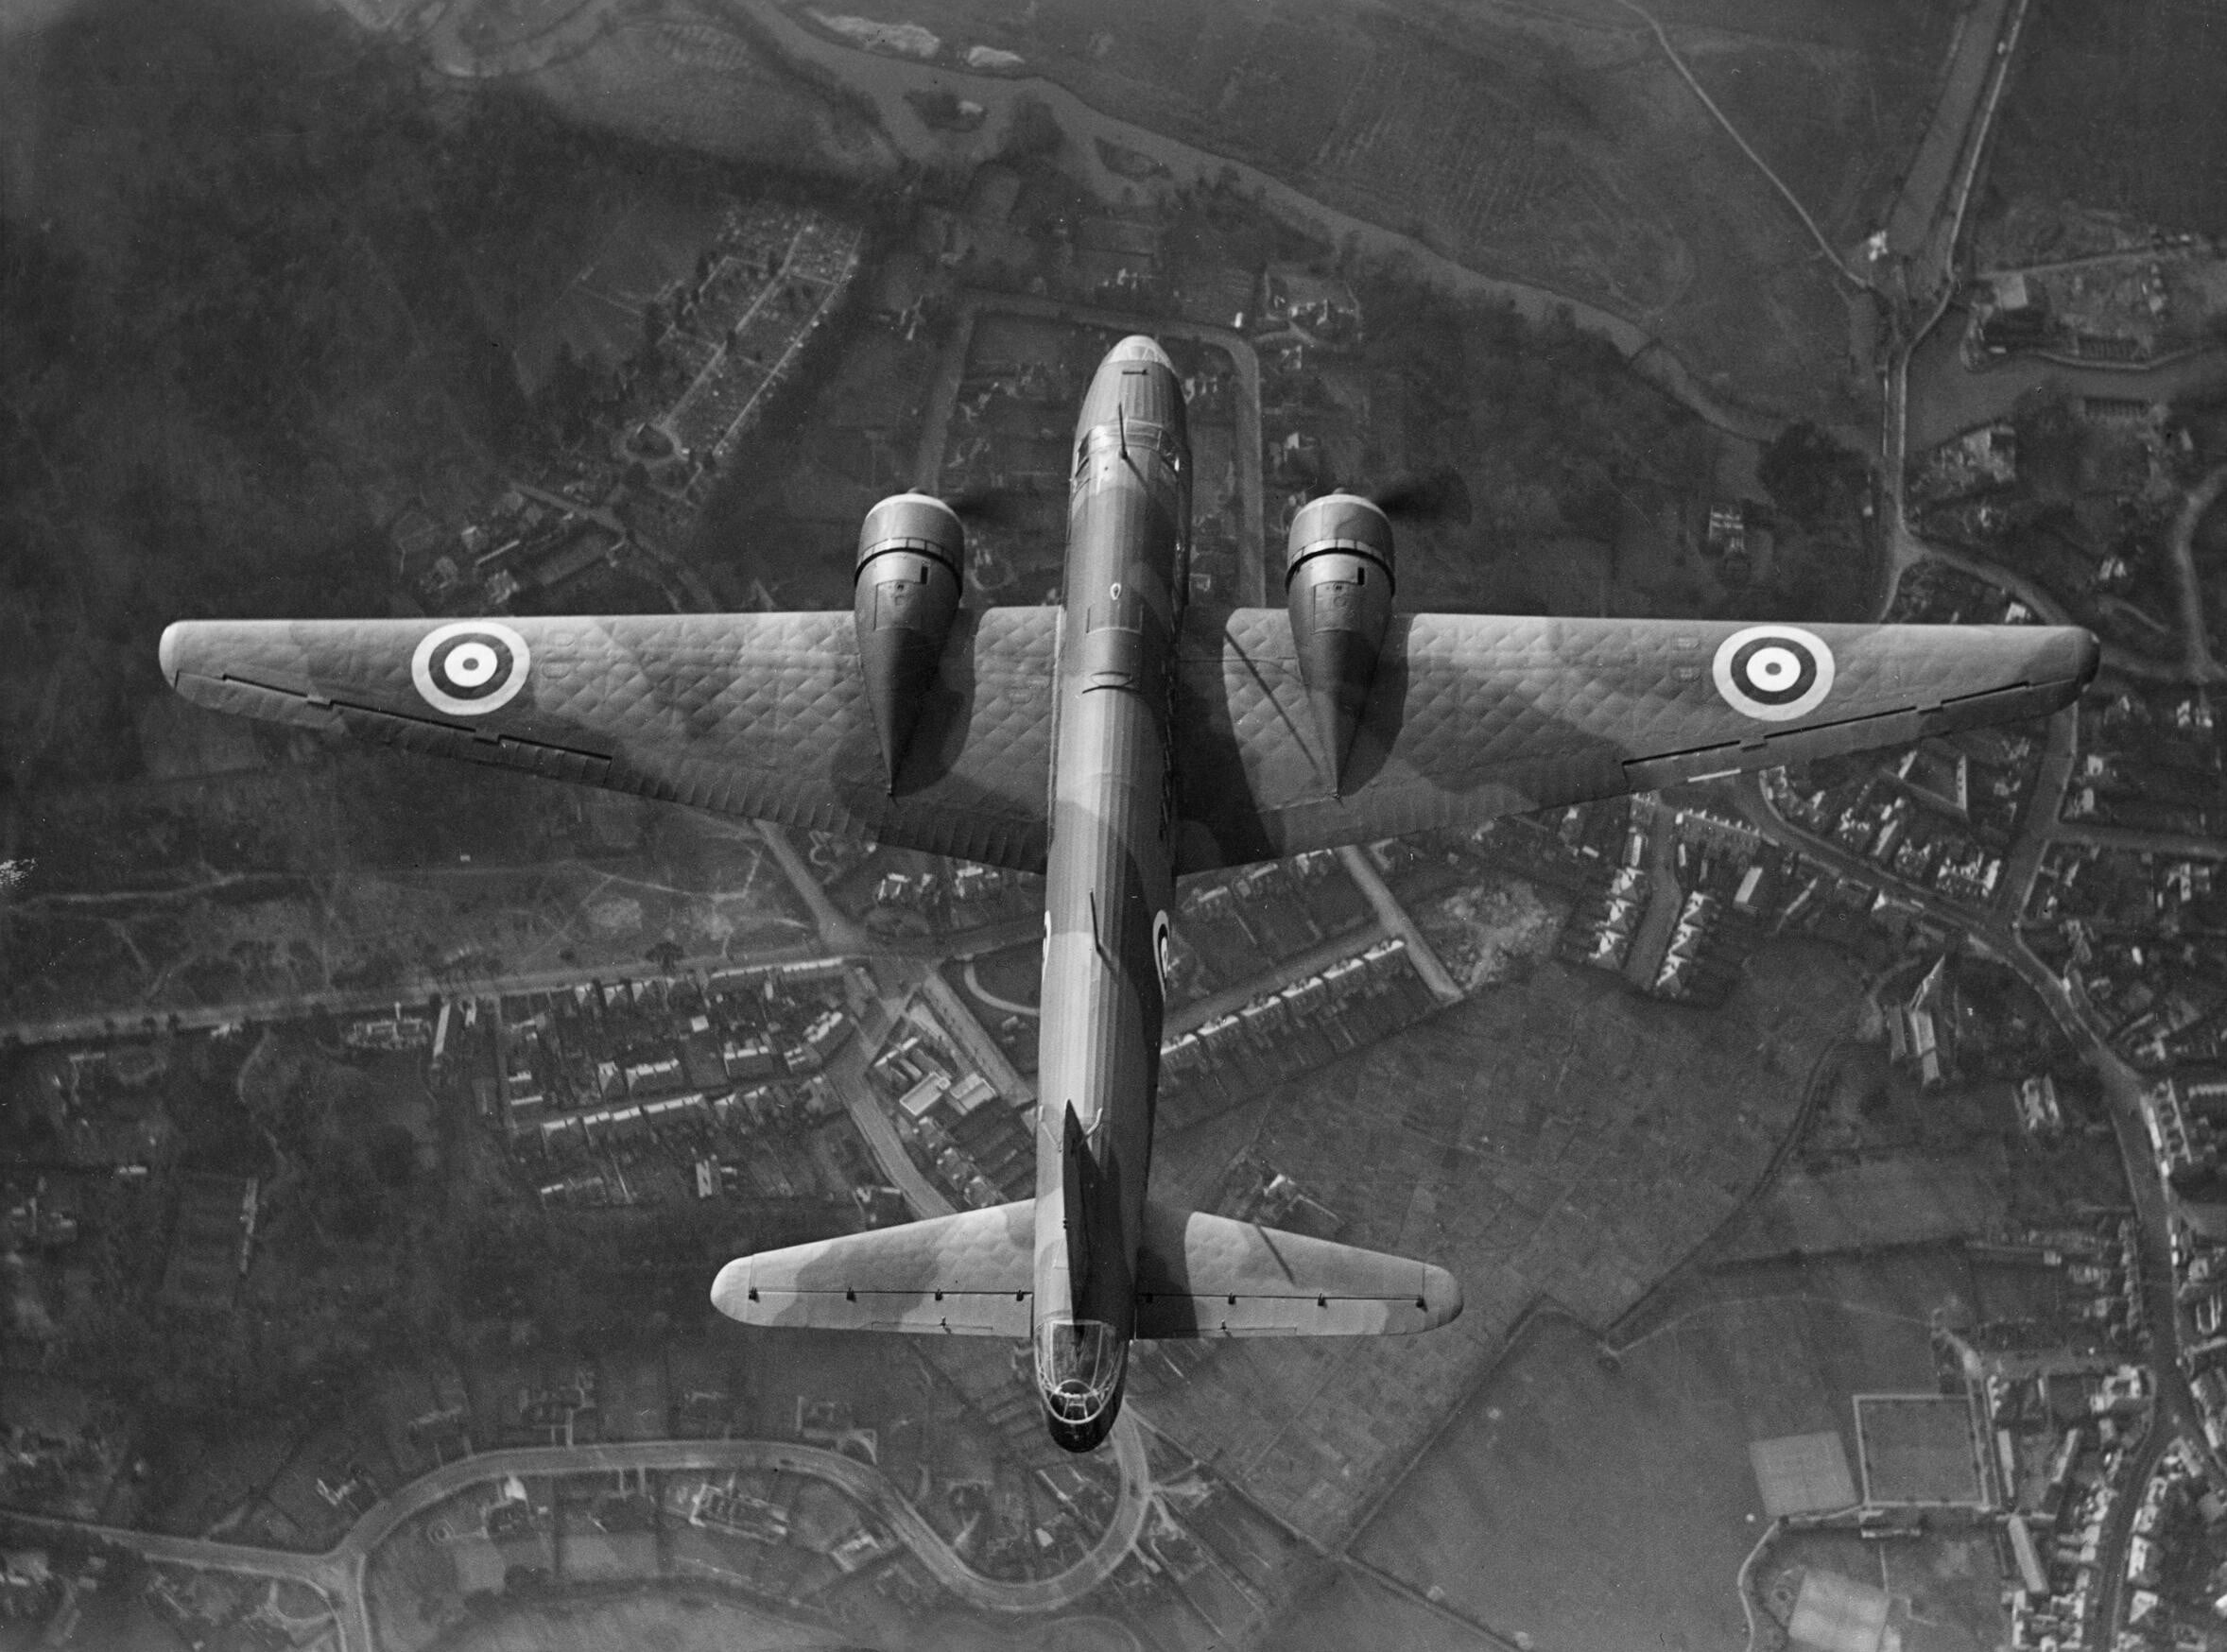
Sources & Further Reading