
Mitsubishi G4M
“Betty”
The Imperial Japanese Navy’s long-range land-based bomber — fast and far-reaching, but so lightly built that Allied crews called it the “one-shot lighter.”
Range bought with fire
In 1937 the Imperial Japanese Navy issued a specification for a land-based bomber that could reach far out across the Pacific and strike ships and bases at extreme range. Mitsubishi’s answer, led by engineer Kiro Honjo, was the G4M — a clean, cigar-shaped twin the Navy insisted be built around just two engines. To hit the demanded range on two engines, Honjo’s team made a hard bargain: they left out armour plate and self-sealing fuel tanks, and turned the wings themselves into large unprotected fuel cells.
First flown on 23 October 1939 and in service by 1941, the result was genuinely fast and astonishingly long-legged — able to range farther than almost any Allied medium bomber of the early war. It announced itself spectacularly on 10 December 1941, when G4M and older G3M torpedo and level bombers of the IJN caught and sank the British capital ships HMS Prince of Wales and HMS Repulse off Malaya — the first capital ships sunk by air power alone while under way at sea.
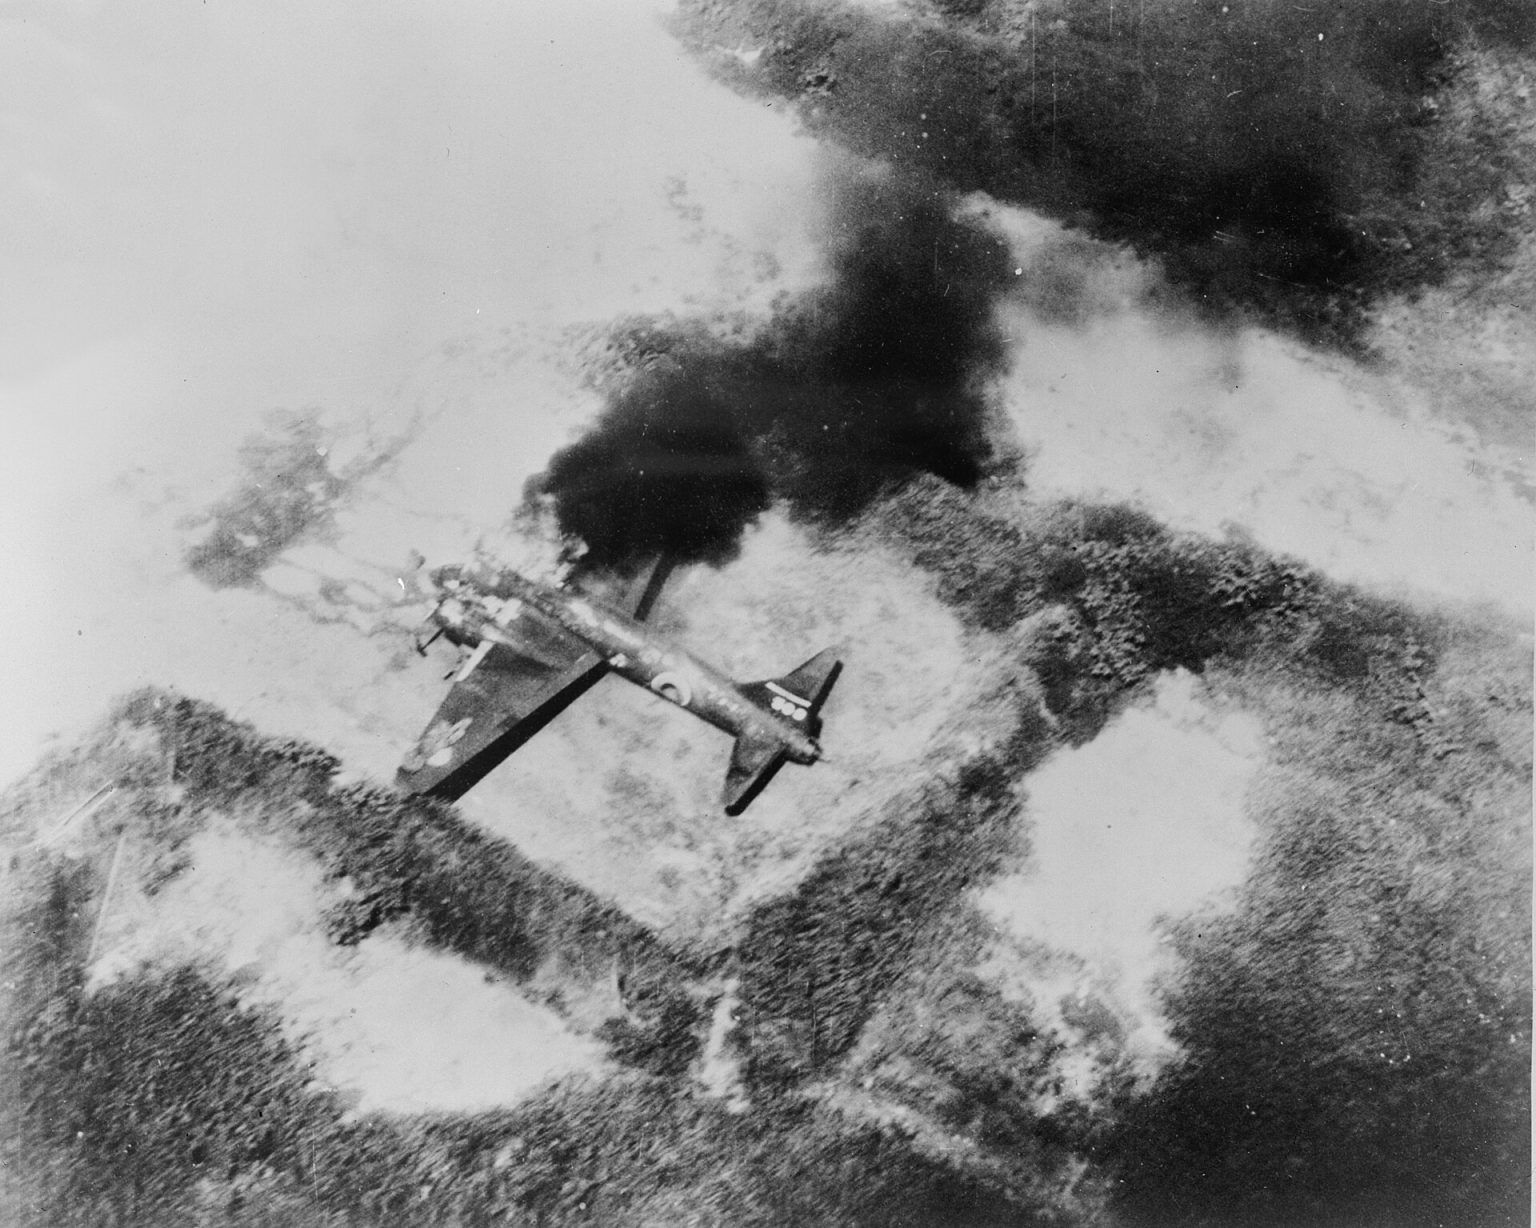
But the bargain had a price. With no protection and fuel packed through the wings, a single burst of tracer could turn the Betty into a torch. Allied fighter pilots came to call it the “one-shot lighter” or “flying Zippo”; Japanese crews knew its cigar shape as the Hamaki, and — by some accounts — wryly as the “Type 1 lighter.” Over well-defended targets whole formations were shot down in flames. The same airframe carried Admiral Isoroku Yamamoto to his death in 1943, later slung the Ohka suicide rocket beneath its belly, and finally, in August 1945, flew Japan’s surrender delegates painted white with green crosses. Around 2,435 were built; not one complete example survives airworthy today.
01The Mitsubishi G4M Betty’s fatal bargain: how range was paid for with fire
The Navy’s 1937 requirement asked for a land-based bomber with the range of a flying boat but the speed of a modern aircraft — and it capped the design at two engines. Kiro Honjo, who had studied advanced structures in Germany, knew what that combination demanded. Every kilogram spent on armour plate or rubber-lined self-sealing tanks was a kilogram of fuel not carried, so those items were deleted. The wing was built as an integral “wet” structure, its interior sealed and filled with fuel.
The trade delivered the range the Navy wanted, and in 1941–42 that reach let the Betty strike where no one expected it. Yet the very tanks that gave it range had no way to seal a puncture or smother a fire. From 1943 the Navy tried to claw back some protection — adding covers over the tanks on later G4M1s, and finally a properly armoured G4M3 in 1944 — but by then Allied fighters and radar-directed guns were everywhere, and only about sixty G4M3s were completed before the war ended.
What makes it special
Range delivered by deleting protection
To meet the Navy’s long-range demand on two engines, Mitsubishi left out armour and self-sealing fuel tanks and turned the wings into integral fuel cells. The Betty could out-range almost any Allied medium bomber — roughly 6,000 km at the extreme — but a single incendiary strike could set the unprotected tanks ablaze, earning it the “one-shot lighter” name.
A naval striker: torpedoes and level bombing
The G4M was first of all a torpedo bomber, able to carry one aerial torpedo of roughly 800 kg or a comparable load of bombs, flown by a crew of seven. Defensive fire came from several 7.7 mm machine guns and a 20 mm cannon in the tail — adequate in 1941, but never enough to cover an airframe with no armour behind it.
The Ohka carrier — and a white-and-green footnote
Late in the war the G4M2e was adapted to carry the Yokosuka MXY-7 Ohka, a piloted rocket bomb, slung under the fuselage; laden and slow, the mother ships suffered catastrophic losses. In a very different role, two G4Ms painted white with green crosses carried Japan’s surrender delegation in August 1945.
02The Mitsubishi G4M Betty’s engines and defence: Kasei radials and a tail cannon
Power came from two Mitsubishi Kasei (“Mars”) fourteen-cylinder radials of roughly 1,530 hp each, giving a top speed around 428 km/h. Defensively the early Betty relied on a scatter of 7.7 mm machine guns and a single 20 mm cannon in the tail. Allied pilots quickly learned that the guns could be endured and the fuel could not — the surest kill was a burst into the wing roots. Later marks added heavier tail armament and, eventually, tank protection, but the fundamental vulnerability was baked into the original bargain.
03The Mitsubishi G4M Betty and the Ohka: mother ship to the piloted rocket bomb
From 1944 the G4M2e was modified to carry the Ohka — a small, rocket- or jet-boosted piloted bomb designed to be released near an Allied ship and flown into it by its pilot. The Betty had to lug the heavy, draggy weapon most of the way to the target, becoming slower and even more vulnerable in the process. On the first mass sortie, on 21 March 1945, the entire formation of mother ships was intercepted and destroyed before any Ohka could be launched. It was a grim illustration of how far the Betty’s lack of protection had caught up with it by the war’s end.
Full specifications
Baseline note: the figures below describe the Mitsubishi G4M1 Model 11 (Navy Type 1 Land-based Attack Aircraft Model 11, Allied reporting name “Betty”), the mark that helped sink Force Z, carried Admiral Yamamoto to his death and was destroyed in hundreds over the Solomons. Deltas for the G4M2 of 1943, the G4M2a and the belatedly protected G4M3 of late 1944 are given in grey. Note that the most widely reproduced online specification panel for the G4M1 omits a service ceiling entirely and quotes a 5,040 km ferry range, where Francillon’s tables give 8,500 m and a maximum range of 6,033 km; both readings are reproduced below rather than quietly reconciled.
Dimensions & weights
- Crew
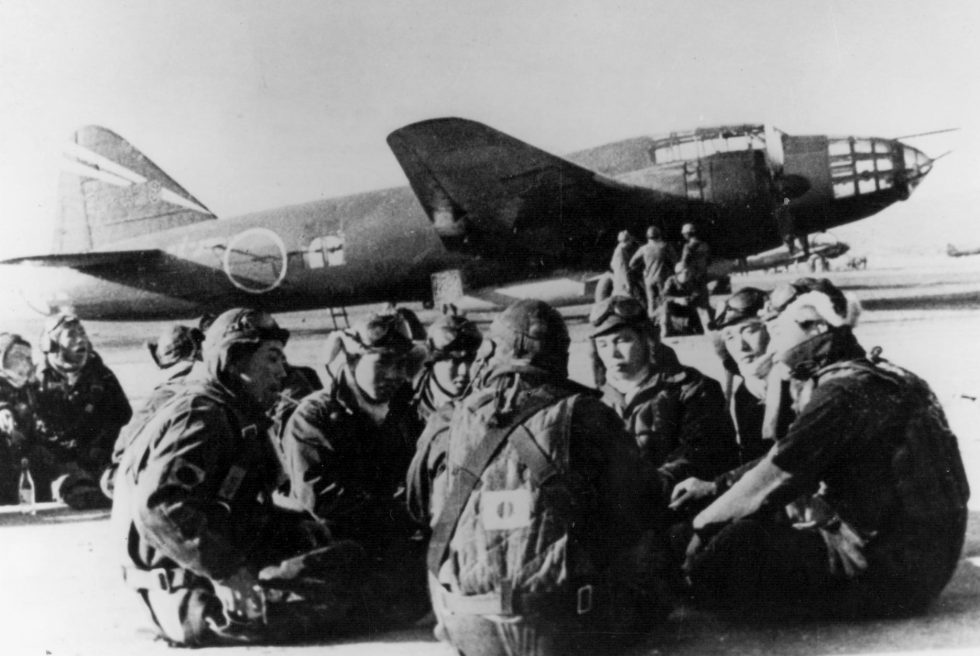
- 7 — pilot, co-pilot, navigator/bomb-aimer who also worked the nose gun, aircraft captain in the dorsal position, radio operator, flight mechanic and tail gunner; the two waist blisters were manned by whoever was free. Ohka-carrying G4M2e crews often flew with eight or nine aboard
- Length
- 19.97 m (65 ft 6 in); G4M2 19.63 m (64 ft 5 in), G4M3 19.50 m (64 ft 0 in) — the later marks are marginally shorter because the nose was reprofiled, not because anything was cut out
- Wingspan
- 24.89 m (81 ft 8 in) — unchanged from the 1939 prototype to the last G4M3, although the aerofoil section beneath the skin changed twice
- Height
- 4.90 m (16 ft 1 in) in rigging position; about 6.00 m (19 ft 8 in) overall standing on its tailwheel, which is the figure most reference books print
- Wing area
- 78.125 m² (840.9 sq ft) — identical on every mark
- Wing
- Cantilever mid-set monoplane, all-metal stressed skin. On the G4M1 and G4M2 the wing box was the fuel tank — an integral wet structure with no separate cells and nothing between the petrol and the outside air. The G4M2 substituted an LB-type laminar-flow section; only the G4M3 rebuilt the wing around separate self-sealing tanks
- Fuselage
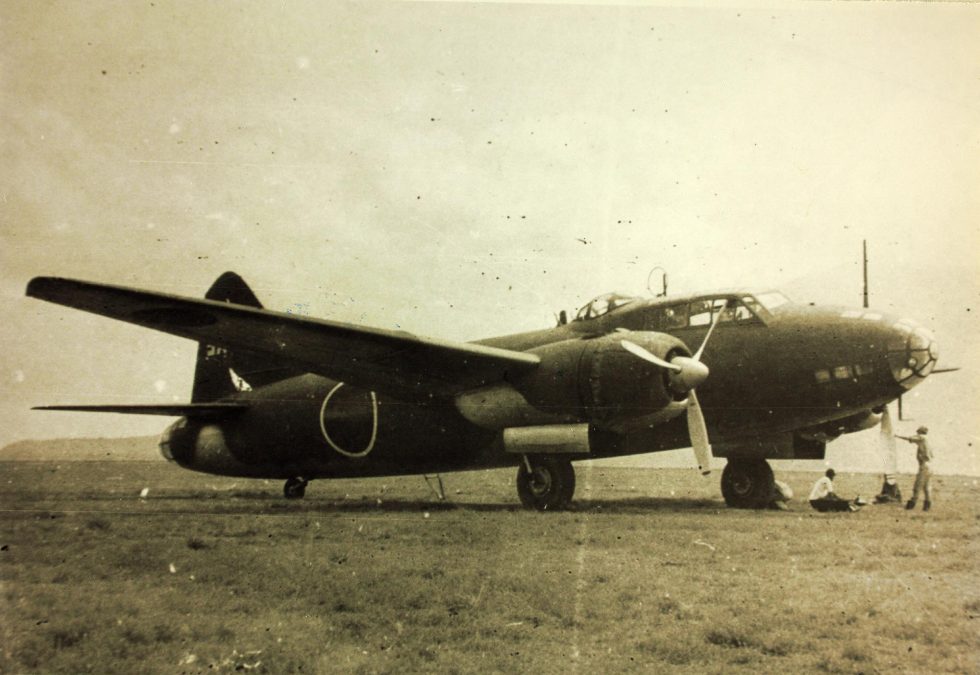
- Circular-section all-metal semi-monocoque of unusually large diameter, which is why Japanese crews called it hamaki, the cigar. Unlike the G3M it had a proper internal bomb bay; on the G4M1 that bay had no doors and the torpedo hung half out of it
- Empty weight
- 6,741 kg (14,861 lb); G4M2 about 8,160 kg (17,990 lb), G4M3 about 8,391 kg (18,499 lb) — the 1,650 kg gained between first mark and last bought heavier engines, a powered turret and, at the very end, protection
- Gross weight
- 9,500 kg (20,944 lb) normal loaded; G4M2 about 12,500 kg (27,558 lb) at normal load
- Maximum take-off weight
- 12,860 kg (28,351 lb); Japanese sources give 15,451 kg (34,064 lb) for an overloaded G4M2 and 14,772 kg (32,566 lb) for the G4M3, figures that describe ferry and long-range search conditions rather than anything a squadron flew routinely
- Wing loading
- 121.6 kg/m² (24.9 lb/sq ft) at normal loaded weight, rising to 164.6 kg/m² (33.7 lb/sq ft) at maximum — still modest, and the reason a fully fuelled Betty could get off Rabaul’s strips in the tropics
- Power loading
- 3.10 kg/hp (6.84 lb/hp) at normal loaded weight on two 1,530 hp Kasei 11s
- Internal fuel
- ~4,900 l (~1,078 imp gal, ~1,294 US gal) in the G4M1’s integral wing tanks; German-language sources quote 5,674 l (1,248 imp gal) for the 3,750 km range condition, and the G4M2 carried more again. All of it unprotected until 1943, and none of it separated from the crew by anything but aluminium
- Undercarriage
- Retractable tailwheel type, main units folding rearwards into the engine nacelles; the tailwheel retracted on later marks
- Protection
- None whatever on the G4M1 as designed: no armour, no self-sealing, no inert gas. Rubber ply sheeting was applied to the tanks from the 663rd airframe in March 1943 and armour was added behind the tail gunner, both palliatives. Genuine self-sealing tanks and crew armour arrived only with the G4M3 in October 1944, by which time 91 aircraft were all that would be built
Performance
- Maximum speed
- 428 km/h (266 mph, 231 kt) at 4,200 m (13,780 ft)
- Maximum speed, G4M2 Model 22
- 438 km/h (272 mph, 236 kt) at 4,600 m (15,090 ft) — the 1,800 hp Kasei 21 and a laminar-flow wing bought 10 km/h, which tells you how much drag the extra turret and fuel put back
- Maximum speed, G4M3 Model 34
- 470 km/h (292 mph, 254 kt) at 5,200 m (17,060 ft) — the fastest and the only survivable Betty, and it reached squadrons in the last winter of the war
- Cruising speed
- 315 km/h (196 mph, 170 kt) at 3,000 m (9,840 ft); G4M2 about 324 km/h (201 mph, 175 kt) at 4,000 m (13,125 ft)
- Stalling speed
- 120 km/h (75 mph, 65 kt) — docile, which mattered on the six-hour night torpedo sorties the type ended up flying
- Rate of climb
- 9.17 m/s (1,805 ft/min) at low level; the G4M2 needed roughly 30 minutes to reach 8,000 m (26,250 ft), which is a fair measure of what the heavier marks had left at altitude
- Service ceiling
- 8,500 m (27,890 ft); G4M2 8,950 m (29,360 ft), G4M3 about 9,200 m (30,180 ft). The most widely reproduced online specification panel gives no ceiling for the G4M1 at all
- Range, normal
- 2,852 km (1,772 miles, 1,540 naut miles) with a war load — the operationally useful number, and still greater than any Allied medium bomber of 1941
- Range, maximum
- 6,033 km (3,749 miles, 3,258 naut miles) per Francillon; several online references print 5,040 km (3,130 miles) as a ferry figure. The G4M2 is credited with about 6,000 km (3,730 miles) one-way when overloaded
- Combat radius, torpedo strike
- ~1,000 km (~620 miles) with one Type 91 and a search allowance. That radius put Force Z inside reach of airfields in southern French Indochina, and it made Rabaul a viable base for striking Guadalcanal — a round trip of roughly 2,000 km flown as routine, and one of the longest sustained bomber commutes of the war
- Endurance
- Commonly eight to twelve hours on maritime search; the type’s whole reason for existing was to stay airborne over empty ocean longer than anything else in the theatre
- For comparison: Mitsubishi G3M2 Model 22
- 374 km/h (232 mph) and 4,380 km (2,722 miles) with 800 kg — the predecessor, which carried its torpedo externally and had even less defensive armament. The G4M was faster, better armed and carried more, and was exactly as flammable
- For comparison: North American B-25D Mitchell
- 457 km/h (284 mph) and about 2,170 km (1,350 miles) with 1,361 kg (3,000 lb) — the American equivalent: slower-legged by half, and fitted from the outset with self-sealing tanks and armour. The difference in crew survival was not marginal
- For comparison: Vickers Wellington Ic
- 378 km/h (235 mph) and 2,905 km (1,805 miles) with 1,814 kg (4,000 lb) — slower and much shorter-ranged, but a geodetic airframe that came home with pieces missing
Propulsion & systems
- Engines
- 2 × Mitsubishi MK4A Kasei 11 fourteen-cylinder twin-row air-cooled radials, 1,530 hp (1,140 kW) each for take-off, 1,410 hp (1,050 kW) at 2,000 m and 1,340 hp (1,000 kW) at 4,000 m. Choosing the big new Kasei rather than the Kinsei of the G3M is what made the whole specification arguable in the first place
- Engines, later G4M1
- MK4E Kasei 15 from March 1942, with a revised supercharger rating; individual exhaust stacks arrived in September 1943 and gave a small thrust recovery
- Engines, G4M2
- 2 × Mitsubishi MK4P Kasei 21, 1,800 hp (1,340 kW) for take-off, with methanol-water injection and VDM-pattern electric four-blade propellers that could be feathered — the first Betty that could hold height properly on one engine
- Engines, G4M3
- 2 × Mitsubishi MK4T Kasei 25, 1,800 hp (1,340 kW). Experimental Models 25, 26 and 27 tested the Kasei 25 Otsu, a turbocharged Kasei 25b Ru and the Kasei 27 respectively; four aircraft in total, none in service
- Propellers
- Three-blade Sumitomo-built Hamilton Standard constant-speed units on the G4M1; four-blade electrically controlled units with feathering from the G4M2
- Fuel system
- Integral wet wing on the G4M1 and G4M2 — no self-sealing liners, no inert-gas purging, no fire suppression in the wing. Rubber ply protection was retro-fitted from the 663rd G4M1 in March 1943 and carbon-dioxide extinguishers were fitted to the bomb bay, but only the G4M3’s redesigned wing with separate protected cells addressed the actual defect
- Ordnance carriage
- Internal bomb bay — a genuine advance on the G3M’s external crutch. On the G4M1 the bay had no doors and the Type 91 torpedo hung partly proud of the fuselage; the G4M2a Model 24 introduced bulged doors to take a larger bomb load, and the G4M2e had the doors removed altogether and Ohka shackles fitted
- Defensive arrangement
- G4M1: hand-held 7.7 mm guns in the nose, a small dorsal blister and both waist blisters, with a 20 mm Type 99 in the tail cone. G4M2: an electrically powered dorsal turret with a 20 mm cannon, a redesigned and better-glazed tail position, and 20 mm cannon replacing the waist guns on the Ko and Otsu sub-types. G4M3: an entirely new tail position modelled on late-war B-26 practice, giving the gunner a field of fire the earlier marks never had
- Bombsight and torpedo direction
- Type 90 optical bombsight, adequate for area bombing and irrelevant to the type’s main trade. Torpedo attack was flown by eye at 10 to 20 m (30 to 65 ft) above the sea, and the training that made it work — over-water dead reckoning plus low-level release practice — was the Navy’s real weapon, not the aeroplane
- Radar
- Type 3 Ku Mark 6 (H-6) air-to-surface search radar with Yagi aerials on the nose and flanks, standard on the Model 22 Ko and Model 24 Ko onwards; the Model 24 Hei moved the aerial above the nose cone and added a 13.2 mm Type 2 gun in the nose tip
- Designer and lineage
- Kiro Honjo’s team at Mitsubishi Nagoya, answering a 12-Shi requirement issued in 1937 barely two months after the G3M had entered combat over China. First prototype rolled out in September 1939 and first flown on 23 October 1939 by Katsuzo Shima; it exceeded the specification at 445 km/h and 5,550 km. Mitsubishi is generally said to have proposed a four-engined layout that would have allowed protection within the same performance, and to have been overruled by a Naval Staff that wanted a twin and wanted the same airframe usable as an escort fighter; the documentary basis for this is Japanese post-war testimony rather than a surviving staff paper.
- Production
- 2,435 in total, all by Mitsubishi — unlike the G3M there was never a second source. 1,172 G4M1 (production from April 1941, ended January 1944), 429 G4M2 Model 22 and sub-types, 713 G4M2a Model 24 and sub-types, 91 G4M3 Model 34 and sub-types, 30 G6M1, plus a handful of experimental conversions
- Unit cost
- Not reliably published. Imperial Japanese Navy per-airframe procurement costs survive only patchily and no trustworthy figure for the G4M appears in the standard references; quoted numbers on enthusiast sites trace back to no primary source
04The Mitsubishi G4M Betty’s cost: why no reliable price exists
The G4M was a wartime Japanese state product, built by Mitsubishi for the Imperial Japanese Navy and never sold on an open market. No dependable flyaway unit price or cost-per-flight-hour figure survives in the public record, and wartime Japanese accounting was disrupted by the collapse of 1945. What is well documented is the scale of production — roughly 2,435 airframes across all variants — which made the Betty the Navy’s most numerous land-based bomber. Any precise dollar figure attached to a G4M today should be read as an estimate, not a sourced fact.
Armament & payload
The G4M carried one torpedo further than any other aircraft in the world could, and it did so by leaving out everything that would have kept its crew alive
The Imperial Japanese Navy’s land-based attack aircraft — the rikko — existed to do a job no other navy asked an aeroplane to do: find an enemy battle fleet hundreds of miles out in open ocean and torpedo it, from an airfield, without a carrier. The G3M had proved the idea worked. In 1937, two months after the G3M entered combat over China, the Navy asked Mitsubishi for its successor, and the 12-Shi requirement was brutal: 398 km/h, a cruising altitude of 3,000 m, 3,700 km carrying an 800 kg torpedo or bomb load and 4,722 km empty. Kiro Honjo’s team met all of it. They met it by treating the wing as one enormous integral fuel tank and by declining to line it, armour it or purge it.
This was not an oversight and it was not ignorance. It was an explicit exchange, made with the arithmetic in front of everyone: self-sealing liners and armour would have cost several hundred kilograms, and several hundred kilograms would have cost the range that the entire doctrine rested on. The Navy took the range. What it bought with it, in the first six months, was extraordinary — a bomber that could strike from Formosa to the Philippines, from Indochina to the Gulf of Siam, from Rabaul to Guadalcanal, and hit ships at the end of the flight. What it bought after that was the systematic destruction of the Navy’s trained aircrew. Allied pilots called it the one-shot lighter, the flying Zippo and the flying cigar, and the names were not exaggeration: a single burst of .50 calibre into the wing root routinely produced a fire that could not be put out.
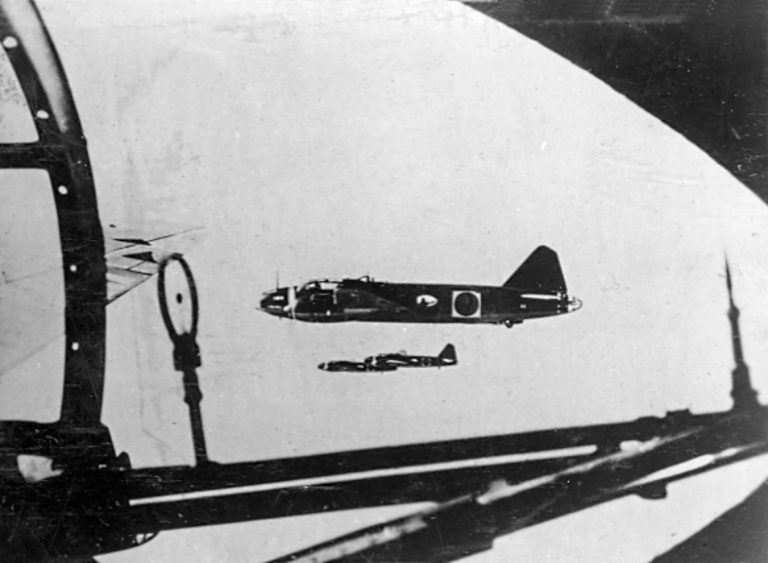
On 10 December 1941 the bargain paid in full. The 22nd Air Flotilla put 85 strike aircraft and three scouts against Force Z off Malaya, and most of them were G3M Nells — but the twenty-six torpedo aircraft of the Kanoya Kokutai, flying from Thu Dau Mot in southern French Indochina, were G4M1s, and they did the killing. A single Genzan Nell had already crippled Prince of Wales with one torpedo aft. At about 12:20 the Kanoya Bettys arrived, split, and attacked both ships at once: three torpedoes into Prince of Wales’s starboard side — at the bow, opposite B turret and abaft Y turret — and a hammer-and-anvil run on Repulse from both bows simultaneously, which no amount of helm could answer. Repulse had already dodged nineteen torpedoes; she took at least four in a few minutes and sank at 12:33. Prince of Wales followed at 13:18. The Kanoya Kokutai lost two aircraft shot down and a third written off on landing. Two capital ships, at sea, under way, destroyed by shore-based aircraft, for the first time in history.
Eight months later the same aeroplane met an enemy with radar, proximity-fused anti-aircraft ammunition and carrier fighters overhead. On 8 August 1942, the second day of the Guadalcanal landings, twenty-three torpedo-armed G4M1s attacked the American transports off Lunga Point. Eighteen were shot down and every one of those eighteen crews — roughly 120 men — was lost. One burning Betty crashed into the transport George F. Elliott, which had to be scuttled, and a torpedo crippled the destroyer Jarvis, sunk the next day with all hands. That was a good day by later standards. Between August and October 1942 more than a hundred G4M1s were lost over the Solomons, and Japan had no reserve of trained rikko crews to replace them. At Rennell Island on 29 and 30 January 1943 the type sank the cruiser Chicago in a night torpedo attack and lost ten of forty-three aircraft doing it, about seventy aircrew including Lieutenant Commander Higai. Japanese and American loss accounts for the Solomons night attacks rarely agree within twenty per cent; the figures here are the Allied ones.
The vulnerability then killed the man who had planned the war. On 18 April 1943 two G4M1s of the 705th Kokutai left Rabaul at 06:00 with six A6Ms of the 204th Kokutai as escort, carrying Admiral Isoroku Yamamoto in aircraft T1-323 and Vice Admiral Matome Ugaki in the second. Sixteen P-38G Lightnings of the 339th Fighter Squadron, sent on the strength of decrypted signals traffic, met them over Bougainville at 09:34 — one minute early. Rex Barber is credited by most modern historians with the burst that set the leading Betty’s wing alight; it went into the jungle north of Buin, and Yamamoto’s body was found the next day, thrown clear, still upright, one gloved hand on his sword. Ugaki’s aircraft was shot into the sea off Moila Point and he survived it. One P-38, Lieutenant Raymond Hine’s, did not come back. The whole engagement lasted a few minutes, and it worked because a Betty that has been hit in the wing does not need to be hit twice.
By 1945 the aeroplane had one last job, and it was the worst one. Stripped of bomb-bay doors and fitted with shackles, the G4M2e carried the Yokosuka MXY7 Ohka — a 2,140 kg rocket-boosted piloted bomb with a 1,200 kg warhead and a release range of about 37 km. Hanging that under a Betty made a slow aircraft slower and a fragile aircraft helpless, and it required the mothership to fly straight and level deep inside a fighter screen. On 21 March 1945 Lieutenant Commander Goro Nonaka led eighteen G4M2e of the 721st Kokutai — the Jinrai Butai, the Divine Thunder Corps — from Kanoya against Task Force 58. Fifteen carried Ohka. Of the fifty-odd Zeros promised as escort only about thirty arrived. Hellcats intercepted them well short of the fleet; every one of the eighteen Bettys was shot down and about 160 men died, the Ohka pilots among them, without a single weapon reaching a ship. Nonaka, who had called the operation Minatogawa after the battle Kusunoki Masashige rode into knowing he would die, was killed with the rest. Ohka would eventually sink exactly one ship, the destroyer Mannert L. Abele, on 12 April 1945.
Gun
- G4M1 Model 11: 1 × 20 mm Type 99 Model 1 cannon in the tail cone plus 4 × 7.7 mm Type 92 machine guns — nose, a small dorsal blister and the two waist blisters. Five guns, four of them rifle-calibre and hand-held
- The Type 99 was a licensed Oerlikon FF derivative with a 60-round drum, low muzzle velocity and a poor trajectory; the Type 92 was a Lewis descendant on a 97-round pan. Neither out-ranged a Wildcat’s six .50 calibre Brownings
- G4M2 Model 22: an electrically powered dorsal turret with a 20 mm Type 99 replaced the hand-held dorsal gun — the single most useful defensive change made to the type. The Model 22 Otsu fitted the longer-barrelled Type 99 Model 2
- G4M2 Model 22 Ko and G4M2a Model 24 Ko: 20 mm Type 99 cannon in the waist positions in place of the 7.7 mm guns. The Model 24 Hei added a 13.2 mm Type 2 heavy machine gun in the nose cone tip
- G4M3 Model 34: two 20 mm cannon (dorsal turret and an entirely new tail position patterned on late-model B-26 practice) and two 7.7 mm guns, with the waist guns upgraded to 20 mm on the Model 34 Ko. The best-armed Betty, and the rarest
Air-to-air
- No guided air-to-air weapon existed; the defensive guns were the whole of it, and the doctrine was mutual support in tight formation at altitude
- That doctrine assumed the enemy would have to press home an attack to score. Against the wet wing it was wrong: a fighter needed only to put a short burst anywhere into the outer panel from any angle
- The G6M1 of 1940 was an attempt to solve the escort problem with the airframe itself — a ventral gondola with twin 20 mm cannon, extra guns and no bombs. It came out heavier than the bombers it was meant to protect and could not stay with them once they had dropped; all 30 were rebuilt as trainers and transports
- The problem was finally solved by the A6M Zero, whose extraordinary endurance was specified precisely so that rikko formations would not have to defend themselves. When the Zeros were absent or outnumbered, as at Lunga Point and on 21 March 1945, the results were annihilation
- The type’s one great defensive success was 10 December 1941, and it succeeded because there were no British fighters within reach
Air-to-surface guided
- 1 × Yokosuka MXY7 Ohka Model 11 from the G4M2e Model 24 Tei — a guided anti-ship weapon whose guidance system was a man. 2,140 kg gross, 1,200 kg (2,600 lb) warhead, 6.07 m long, 5.12 m span
- Three Type 4 Mark 1 Model 20 solid-fuel rockets in the tail; roughly 650 km/h in level flight and 930 to 1,000 km/h in the terminal dive, which no gun director of 1945 could track reliably
- Release range about 37 km (23 miles). That is the number that killed the carriers: a G4M2e had to be inside a defended fleet’s fighter screen, straight and level, before it could let go
- Carriage cost the bomb-bay doors, cut cruising speed sharply and made evasive manoeuvre impossible. The G4M2e did receive additional armour for the pilots and the fuselage tanks — too little, and applied to the wrong aircraft, since the wing was still the problem
- Of about 300 Ohka built for Okinawa, 74 were launched and 56 destroyed; seven American ships were sunk or damaged in total. No other guided or standoff weapon reached a G4M unit
Bombs
- Normal maximum 800 kg (1,764 lb) internally: 1 × 800 kg, or 4 × 250 kg (551 lb), or 12 × 60 kg (132 lb)
- The G4M2a Model 24 introduced bulged bomb-bay doors to take a larger load, commonly quoted at up to about 1,000 kg (2,205 lb); aviastar credits the G4M2 with 2,200 kg, which is an overload condition rather than an operational fit
- Against warships the bombs were an afterthought — a Betty’s value was the torpedo, and level bombing of manoeuvring ships from medium altitude produced almost nothing throughout the war
- Against airfields, ports and towns the load was adequate and was used extensively: Clark Field and Iba on 8 December 1941, Darwin in February 1942, Port Moresby, Henderson Field, and Chinese cities before that
- The internal bay was itself a real advance on the G3M’s external crutch, and the G4M1’s doorless bay gave much of that advantage straight back in drag
Rockets
- None carried by the aircraft itself. No air-to-ground or air-to-air rocket was ever a G4M store, and the wing had no hard points because the wing was a fuel tank
- The only rockets a Betty ever took into the air were the three solid motors in the tail of an Ohka slung under the fuselage, fired by a different pilot after separation
- Rocket-assisted take-off gear was used by some heavily loaded Japanese Navy types late in the war but was not standard on the G4M
- The card is kept because the absence marks the generation: by 1945 Allied medium bombers were routinely firing rockets at shipping, while the Navy’s answer to the same problem was to put a man in the warhead
Pods & other stores
- 1 × Type 91 Kai-3 aerial torpedo, 858 kg (1,892 lb), 450 mm (17.7 in) diameter, carried semi-recessed in the bay — the type’s primary weapon and the one it was designed around
- The Type 91’s wooden kyoban tail stabilisers sheared off on water entry and stopped the weapon porpoising or diving deep, which is what made reliable drops from 10 to 20 m (30 to 65 ft) possible. Without that modification neither Prince of Wales nor Repulse would have been hit
- Type 3 Ku Mark 6 (H-6) ASV radar with Yagi aerials, standard from the Model 22 Ko; the equipment that kept the type useful as a night and all-weather ocean searcher long after it was hopeless as a day bomber
- Transport fits: the G6M1-L2 carried up to twenty passengers, and G4Ms served throughout the war as VIP and staff transports — the role Yamamoto was flying when he was killed
- No drop tanks were carried. The range was in the wing, and that was the entire argument
Three typical loadouts
- Anti-shipping torpedo strike, Malaya, 10 December 1941
- Crew of seven, one Type 91 torpedo semi-recessed in the doorless bay, full internal fuel, one 20 mm tail gun and four 7.7 mm hand-held guns, no escort of any kind. Launched from Thu Dau Mot at a radius of roughly 1,000 km, search outbound, attack on arrival. Twenty-six Kanoya Kokutai aircraft, three torpedoes into Prince of Wales and at least four into Repulse, two aircraft lost. The mission the aeroplane was built for, flown perfectly, once.
- Night torpedo attack against a defended anchorage, Solomons, 1943
- G4M2 with H-6 radar, crew of seven, one Type 91, rubber-ply tank protection and a powered 20 mm dorsal turret. Approach at wave height in darkness, using radar to find the screen and flares or float lights dropped by a lead aircraft to silhouette the targets. Effective — the cruiser Chicago was sunk this way — and expensive: ten of forty-three lost at Rennell Island in two nights, entirely to anti-aircraft fire.
- Ohka carriage, Kyushu, 21 March 1945
- G4M2e with bomb-bay doors removed, one MXY7 Ohka Model 11 on belly shackles, added armour for the pilots and fuselage tanks, reduced defensive ammunition to offset the weight. Cruise at low speed to within 37 km of the target, straight and level, and release. Eighteen aircraft set out with about thirty escorts; eighteen were shot down, about 160 men were killed and not one Ohka was launched at a ship. The most completely futile loadout carried by any aircraft in this encyclopedia.
Sourcing caveat: dimensions, weights and performance follow Francillon’s tables in Japanese Aircraft of the Pacific War as reproduced by the standard references; gun fits varied between production blocks and field modification was constant, so photographs frequently disagree with the official schedules. Torpedo figures are for the Type 91 Kai-3 as issued in 1943. Loss figures for Japanese units are Allied assessments where Japanese records do not survive.
Variants
Mitsubishi built 2,435 G4Ms and spent five years trying to give the aeroplane back what the first specification had taken out of it
The G4M’s development history is the history of one mistake being slowly and incompletely corrected. Span never changed; wing area never changed; the internal bay never grew. What changed was engines, guns and, at the very end, the wing structure itself. Every improvement added weight, every addition of weight ate range, and the one improvement that actually mattered — protected fuel — was left until the G4M3 of October 1944, of which 91 were built out of 2,435.
It is worth being precise about why. Rubber ply sheeting was applied to G4M1 tanks from March 1943 and carbon-dioxide extinguishers were fitted, but the wet-wing structure meant there was no cell to line properly; the sheeting slowed a leak, not a fire. The G4M2 of 1943 added a powered turret, a laminar-flow wing and 270 more horsepower a side, and the article that describes it in the reference literature says flatly that the redesign failed to rectify the type’s vulnerability. Only the G4M3, with a new wing built around separate self-sealing cells, crew armour and a redesigned tail position, was a survivable aeroplane, and by October 1944 there was neither the fuel, the aircrew nor the strategic situation to make use of it.
Alongside the bombers ran a second, stranger line. The G6M1 of 1940 was an attempt to make the airframe escort itself: a ventral gondola with two 20 mm cannon, more guns elsewhere, no bomb load. It was heavier than a loaded G4M and could not keep formation with unloaded G3Ms, which is a complete refutation of the concept in one sentence. All thirty were converted to crew trainers and then to twenty-seat transports, and it was almost certainly a machine of that family — a Type 1 land-based transport — that led the surrender delegation to Ie Shima in August 1945.
- G4M1 Model 11 (1941–January 1944 / 1,172 including prototypes)
- Kasei 11 of 1,530 hp, later Kasei 15 from March 1942; one 20 mm tail gun and four 7.7 mm hand-held guns; doorless bomb bay; no protection as built. Propeller spinners from summer 1942, rubber ply tank sheeting from the 663rd airframe in March 1943, tail-gunner armour and a redesigned tail cone from August 1943, individual exhaust stacks from September 1943. The mark that fought and lost the Solomons.
- G6M1 (1940 / 30)
- Long-range escort fighter conversion with a ventral gondola mounting two 20 mm Type 99 cannon and no bomb load. Too heavy to escort anything; never used in the role. The Navy’s insistence on this idea is part of why the bomber went into production without protection.
- G6M1-K and G6M1-L2 (1941–42 / conversions of the 30 G6M1)
- The escorts rebuilt first as aircrew trainers and then as Type 1 land-based transports carrying up to twenty passengers — the version that spent the rest of the war moving staff officers, and that appears in the surrender flights of August 1945.
- G4M2 Model 22, 22 Ko, 22 Otsu (prototype December 1942, service mid-1943 / 429)
- Kasei 21 of 1,800 hp with four-blade feathering propellers, LB laminar-flow wing, wider tailplane, more fuel, and an electrically powered dorsal turret with a 20 mm Type 99. Ko added H-6 radar and 20 mm waist guns; Otsu fitted the longer Type 99 Model 2. Faster, better armed, better at altitude — and still a wet wing.
- G4M2a Model 24, 24 Ko, 24 Otsu, 24 Hei (1944 / 713)
- Kasei 25 of 1,800 hp, recognisable by the carburettor intake on top of the cowling, with bulged bomb-bay doors for a larger load. Hei added a 13.2 mm Type 2 gun in the nose tip and moved the radar aerial above the nose cone. Numerically the most-built Betty after the G4M1.
- G4M2b Model 25, G4M2c Model 26, G4M2d Model 27 (1944 / one, two and one aircraft)
- Engine testbeds: the Kasei 25 Otsu, the turbocharged Kasei 25b Ru and the Kasei 27 respectively. Four aircraft in total, none in service; the turbocharged Model 26 in particular came far too late to give the type the high-altitude performance it needed against B-29 escorts.
- G4M2e Model 24 Tei (late 1944–1945 / conversions of Model 24 Otsu and Hei)
- Ohka carrier: bomb-bay doors removed, belly shackles for a 2,140 kg MXY7, added armour for the pilots and the fuselage tanks. Flown by the 721st Kokutai. On its first operation, 21 March 1945, all eighteen aircraft committed were shot down.
- G4M3 Model 34, 34 Ko, 34 Otsu, 34 Hei (October 1944–1945 / 91)
- The aeroplane the G4M should have been in 1941: redesigned wing with separate self-sealing tanks, proper crew armour, dihedral on the tailplane, and a new tail gunner’s compartment modelled on late B-26 practice. Kasei 25 engines, 470 km/h, and 91 built. Three and a half per cent of total production, arriving in the last ten months of the war.
- G4M3 Model 36 (1945 / two prototypes)
- Turbocharged Kasei 25b Ru engines in the G4M3 airframe. Two aircraft, no production, no operational use.
- No licence production, no export (1941–45)
- Every G4M was built by Mitsubishi for the Imperial Japanese Navy, which operated the type in 37 kokutai. There were no exports and no second source. The only other operators were captors: the USAAF and the RAF flew evaluation aircraft, and the Republic of China Air Force took over at least one G4M2 seized at Tainan.
Closing caveat on survivors: of 2,435 built, exactly one substantially complete G4M exists. G4M1 Model 11 serial 1280, built on 16 April 1942 and recovered from Babo airfield in Indonesia in 1991, is displayed unrestored in a diorama at the Planes of Fame Air Museum, Chino, California; it is the only complete airframe anywhere and it has never been restored. Everything else is fragments. The Smithsonian holds the forward fuselage of a G4M3 Model 34; the Kawaguchiko Motor Museum in Yamanashi displays a restored G4M2 fuselage; two G4M1s, serials 1800 (701st Kokutai) and 2806, were recovered from Ballale in the Solomon Islands in August 2018 as wrecks. Admiral Yamamoto’s aircraft, G4M1 serial 2656 with tail code 323, still lies in the jungle near Panguna on Bougainville where it fell on 18 April 1943, and remains the most visited piece of Japanese aircraft wreckage in the Pacific. No G4M flies, and none ever will. Note also that accounts of the August 1945 surrender flights differ: Japanese sources describe two aircraft leaving Kisarazu on 19 August — a Type 1 land-based transport as Bataan 1 and a Type 1 land attack aircraft as Bataan 2, both painted overall white with green crosses — while at least one English-language source states that four white G4M1s reached Ie Shima. Two is the better-attested figure. On the return leg one aircraft collapsed its undercarriage taxiing at Ie Shima and the other ran out of fuel and force-landed on the beach at Sameshima near the mouth of the Tenryu river on the night of 20 August; the delegates waded ashore with the surrender documents intact and reached Tokyo the following day.
From long-range striker to surrender transport
The requirement
The Imperial Japanese Navy issues a specification for a long-range, land-based attack bomber; Mitsubishi assigns Kiro Honjo to the design.
First flight
The prototype flies on 23 October, showing the range the Navy wanted — and the lightly built, unprotected structure that made it possible.
Enters service
The G4M joins front-line units and goes to war across China and the Pacific as a torpedo and level bomber.
Prince of Wales and Repulse
On 10 December, IJN torpedo and level bombers sink the British capital ships off Malaya — the first sunk by air power alone while under way.
The flammability bill
Over Guadalcanal and the Solomons, unprotected Bettys are shot down in flames in large numbers, confirming the “one-shot lighter” reputation.
Operation Vengeance
US P-38 Lightnings intercept and shoot down the G4M carrying Admiral Isoroku Yamamoto over Bougainville on 18 April.
The Ohka carrier
The G4M2e carries the piloted Ohka rocket bomb; on the first mass mission (21 March 1945) the mother ships are wiped out before launching.
White wings, green crosses
Two G4Ms painted white with green crosses fly Japan’s surrender delegation to Ie Shima. Production ends at roughly 2,435 aircraft.
From the war: twelve Betty stories
The bomber built to reach the horizon
The Navy wanted a land bomber with the range of a flying boat — on two engines.
Read the full story
Wet wings and no armour
To buy range, Honjo left out armour plate and self-sealing tanks and filled the wings with fuel.
Read the full story
The day the battleships fell
G4M and G3M bombers sank HMS Prince of Wales and HMS Repulse off Malaya.
Read the full story
The one-shot lighter
Allied pilots learned that one burst into the wing could light the whole aircraft.
Read the full story
Hamaki, the cigar
Japanese crews knew the Betty by its shape — and, some say, by darker jokes.
Read the full story
The formations that burned
Over the Solomons in 1942, unescorted Betty raids were savaged by defending fighters.
Read the full story
The death of Yamamoto
A G4M carrying the architect of Pearl Harbor was shot down in a targeted ambush.
Read the full story
Mother ship to the Baka bomb
The G4M2e hauled the piloted Ohka rocket toward Allied ships — at terrible cost.
Read the full story
The armoured Betty, too late
Only around sixty properly protected G4M3s were finished before the war ended.
Read the full story
Range, and its price
The men who flew the Betty knew its reputation better than anyone.
Read the full story
White wings, green crosses
Disarmed, white-painted Bettys flew the surrender delegates to meet the Allies.
Read the full story
The Betty that no longer flies
Of some 2,435 built, not one complete example survives airworthy.
Read the full story
The Betty in pictures
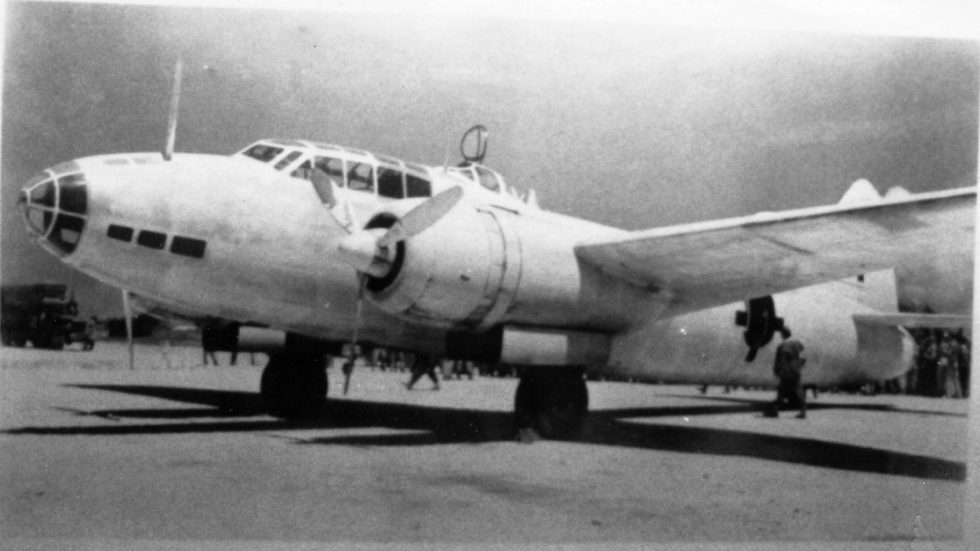
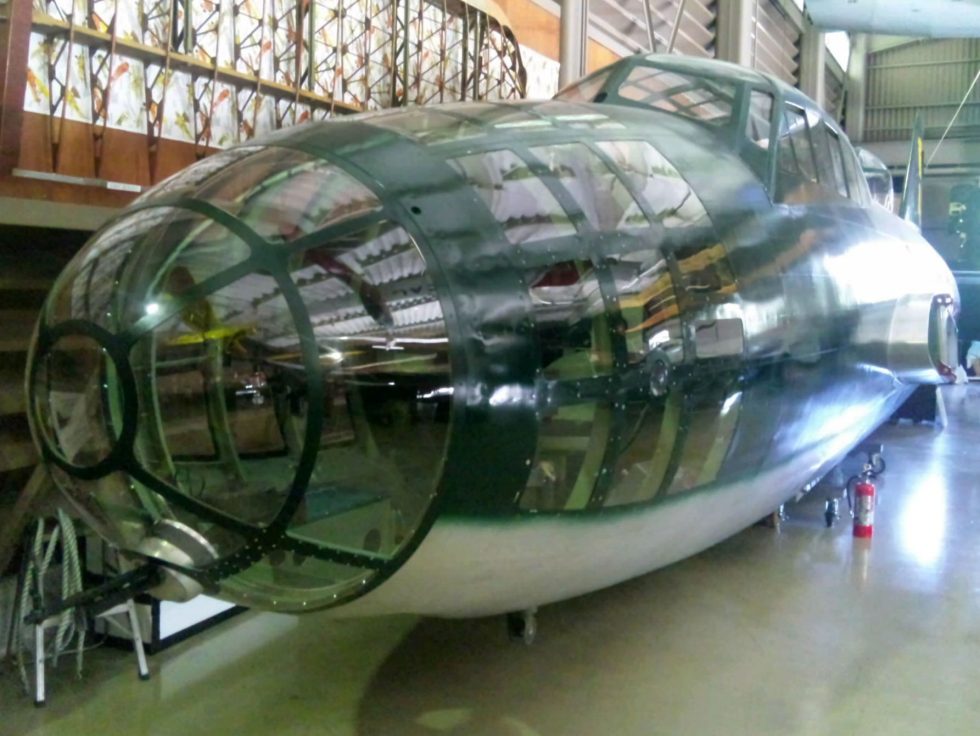
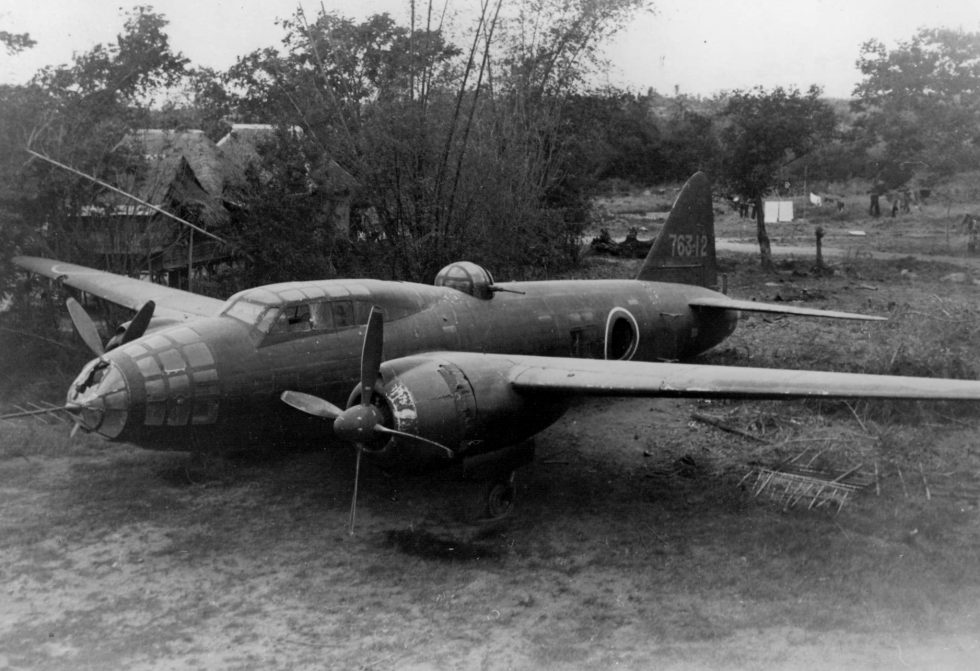
The Betty in motion
Video coming soon — we are sourcing a high-authority archival film of the G4M “Betty” for this exhibit.
Where the Betty flew
The score that defines it
The Betty’s combat record is a story of spectacular early success and a mounting bill for its lack of protection. Its greatest day came in the war’s first week; thereafter the same design that gave it reach made it fatally easy to burn. It served only with the Imperial Japanese Navy, from the opening of the Pacific war to the surrender.
Compare the combat record of every military aircraft. Figures as of July 2026.
Everything people ask about the G4M Betty
Can I fly in a G4M Betty?
Why was the G4M called the “one-shot lighter”?
Did the G4M really sink HMS Prince of Wales and HMS Repulse?
What happened to Admiral Yamamoto’s G4M?
What was the Ohka, and how did the Betty carry it?
How many G4Ms were built, and do any survive?
Did any country other than Japan use the G4M?
You can’t fly the Betty.
These, you can.
Some legends only live in museums — others are fuelled and waiting. MiGFlug has put civilians in real military jet cockpits since 2004.
 Fly the L-39 AlbatrosThe world’s most-flown jet trainer — aerobatics included
 Fly the F-104 Starfighter“The missile with a man in it”
 Fly the MiG-21The Cold War’s most-produced jet
 Fly the T-33 Shooting StarAmerica’s first jet trainer
 Fly the DH VampireA piece of early jet history
 Fly the S.211Agile Italian jet trainer
 Fly the MB-326The classic Aermacchi jet
 Fly the MiG-15The Soviet legend of the Korean War
Continue the tour
Every fact, checked
- HistoryNet — Mitsubishi G4M: Why Betty BombedDesign bargain, Kiro Honjo, the flammability problem and crew nicknames.
- Smithsonian National Air and Space MuseumReference for the surviving G4M3 forward-fuselage section and variant data.
- The National WWII MuseumOperation Vengeance and the April 1943 shoot-down of Yamamoto’s G4M.
- Air & Space Forces MagazineThe P-38 interception that killed Admiral Yamamoto.
- Royal Air Force MuseumThe Yokosuka MXY-7 Ohka piloted rocket bomb carried by the G4M2e.
- Pacific WrecksThe white, green-crossed surrender-delegation Bettys (“Bataan”), 1945.
- History of WarSpecifications, range figures and variant history for the G4M.
- Naval History and Heritage CommandThe 10 December 1941 loss of HMS Prince of Wales and HMS Repulse.